Satnogs - All Metal "Box Mountable" Rotator

Hi Rene,
I’m really happy to see your progression !
On my side I’m still waiting for the new jaws to test the new bracket.

Do you mean to power the Arduino ? In my case ther Raspberry only power the Arduino and my Rtl-Sdr

Fortunately I’ve done the work for you :wink: I mean, if we agree on the meaning of end-plugs, what do you mean by that ?

The orange one was the first version, and the white one are the seconde version that i did with some arrangement.

One more time, I’m here for you man, few people like you are already interested for a group order of machined part, if you confirm that you’re interested, I can add your name to the list :wink: If it works, I will send it to you with all the screw needed and some assembly instructions (even if the build is really really simple)

And finally for the DC motor, it was just that it’s better to explore all the possibilities to make sure you don’t miss something, but for the moment my version with the stepper motor suits me very well.

I didn’t done very extensives test but when I left it “On” for several days, at the end I couldn’t even notice a de-synchornization on the two axis due to the steps loss.

I didn’t have any torque problems either, I think it’s my bracket that will bend before the motors are limited, 80Nm is already quite a lot, 0.9kg cantilevered on 10m.

Fell free to post anything that can help the project to move forward !

Yohan

2 Likes

@Yohan_Hadji

Good to hear that you still plan to have the mechanical parts made. Big thumbs up!
Please put me on your list.

I’m sorry I wasn’t clear. I meant the add-on CNC board on the Arduino UNO from the V3 project. The control of the stepper motors.
According to the spec sheets, this PCB board is not suitable for NEMA 23 motors but only for NEMA 17. This is due to the maximum current of 1.5-2A (cooled) that the FETs can supply. These could break under load. NEMA 23 steppers can draw current up to 4.5 Amps.

End plugs = End stops :wink: Hall sensor, mechanical switch …

80Nm is indeed a lot. It may well be that it is also sufficient for my application, but I have no comparison. Also no idea what the torque of the SPX02 rotator
is.

Unfortunately, there is little I can do in the coming period. First wait for all parts to arrive. Can not wait :slight_smile:

Stepper Nema23 with a TB6600 and Arduino.

SPX-02. Bend bracket :sweat_smile:

Nice and easy bracket solution.

2 Likes

Today I tested another idea for the bracket that work as well and re-use my old parts.

5 Likes

Clever idea Yohan! :+1:

I’ve been working today on the connector idea, this is even better than i thought !
It connect the endstops and the stepper using the same connector.

4 Likes

Today is a good day for Super-Antennaz,
Durable mount on the roof !
The project started in my mind exactly 1 year ago, today the dream became true :slight_smile:


7 Likes

Congratz Yohan! You did a great job. :+1:
I’m still waiting for all the stuff to come from China. Delay due to the Covid19 virus.

Question…
Do you experience RF interference / noise while receiving signals and rotating your antenna at the same time?
Stepper motors are known to cause quite a bit of RF interference.
Have you already supplied the motor cables with ferrite beads?

1 Like

Thanks Rene !
I had RF noise with the first version, (the one with the antenna directly next to the steppers) this is why I’ve moved the antenna on the horizontal mast, my motor cables are grounded and shielded
As you can see the firsts result are pretty good, I now need to do some gain adjustment
https://network.satnogs.org/observations/2181147/
https://network.satnogs.org/observations/2181156/
https://network.satnogs.org/observations/2182836/
https://network.satnogs.org/observations/2181163/

My next problem is getting a bit higher to pass above my room and avoid being masked in the north below 30°.

Ok so after 1 weeks, with a lot of rain, everything is still ok, I had few electronics bugs, and issues due to bad internet connection, and another problem due to my power supply which give a to low voltage.

I think that I’m ready to share a design that work, but before everything else, I would like to remind everyone who would like to build this rotator that I am only a 16 year old teenager, I didn’t study mechanics, all my skills come only from trial and error, and there might be some things to correct !

I will first present you the perfect solution, the one that will cost you the most to build, and then the solutions a little bit different, which use system D but whose operation is not guaranteed.

First solution;

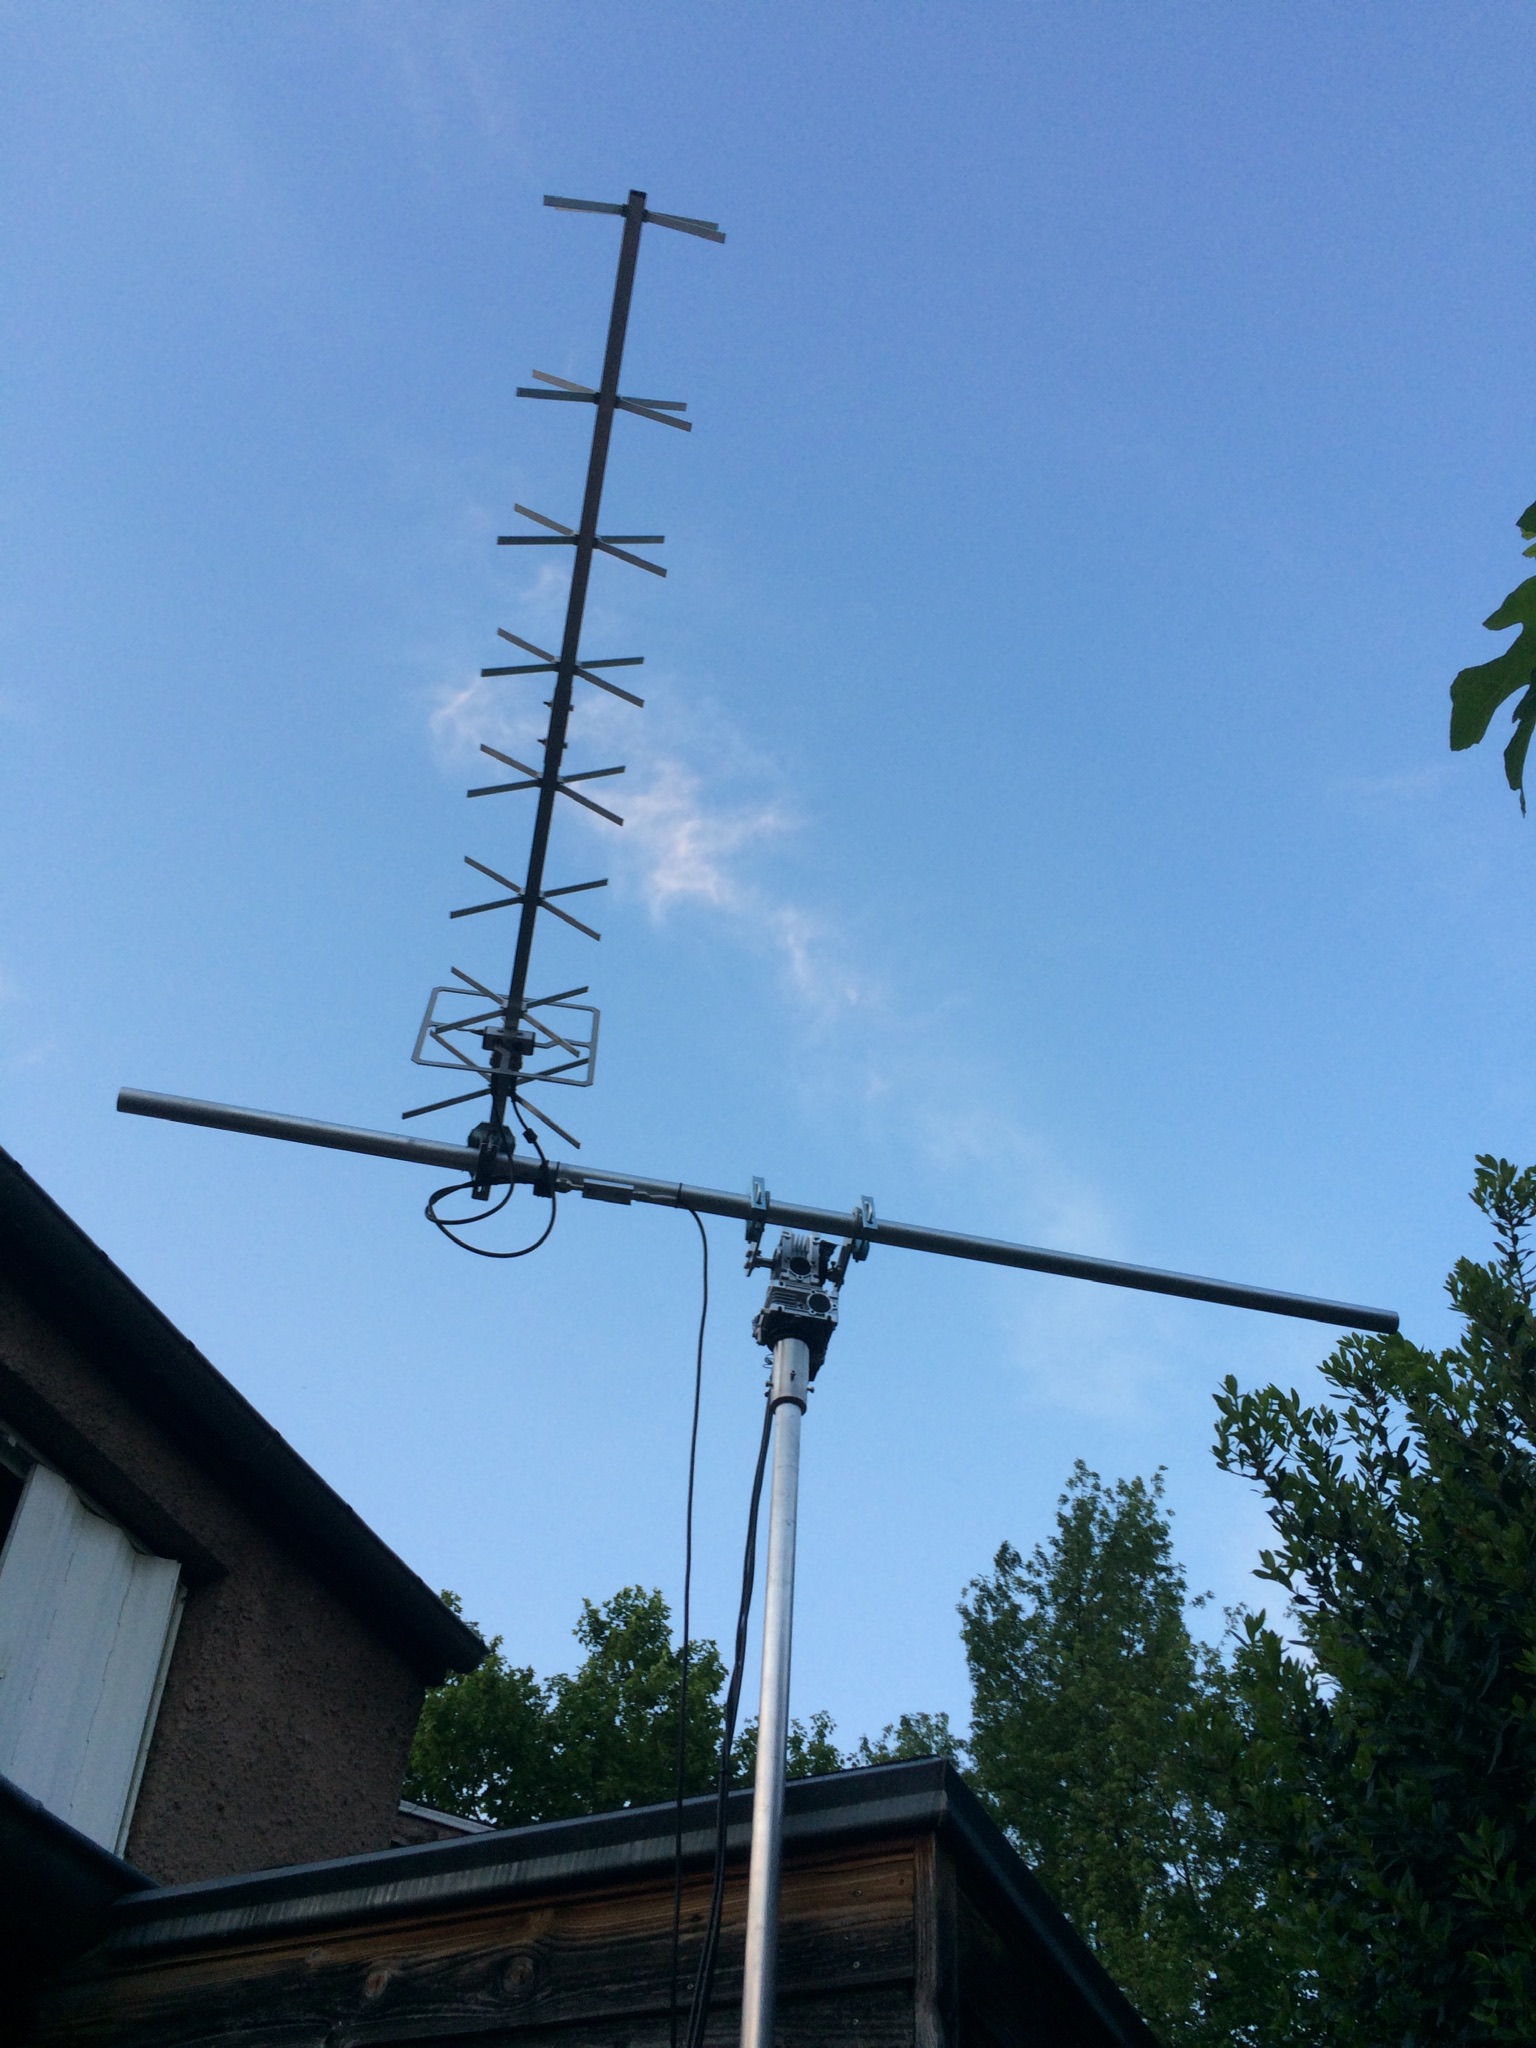
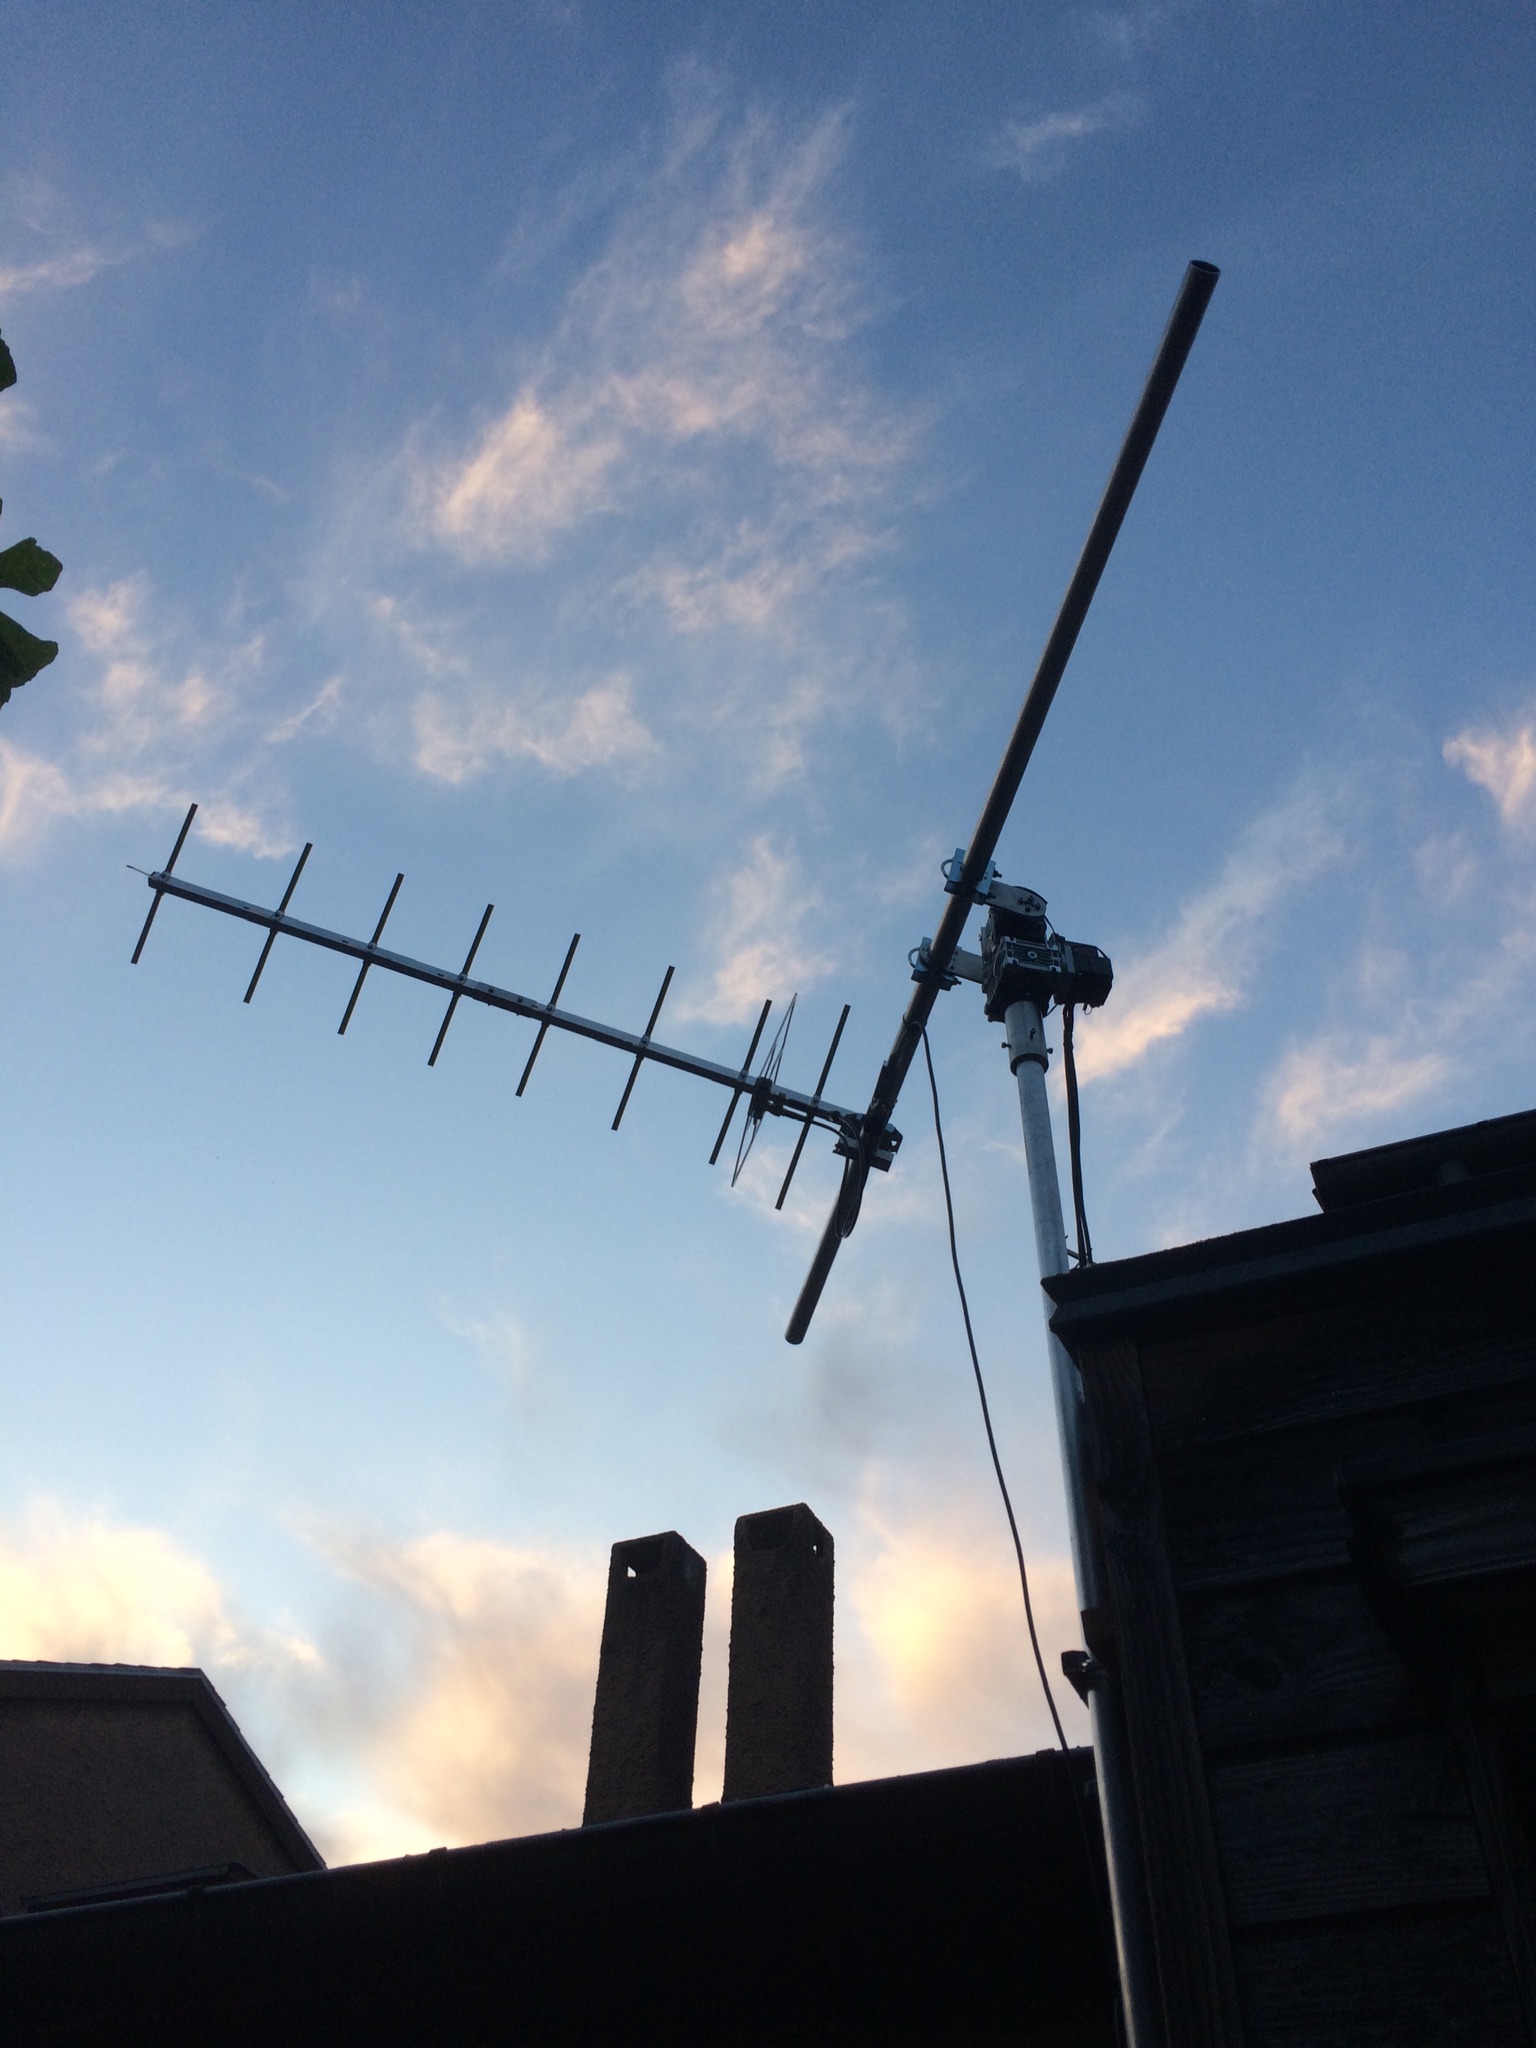
You can see the design here : https://a360.co/2zDnfvi

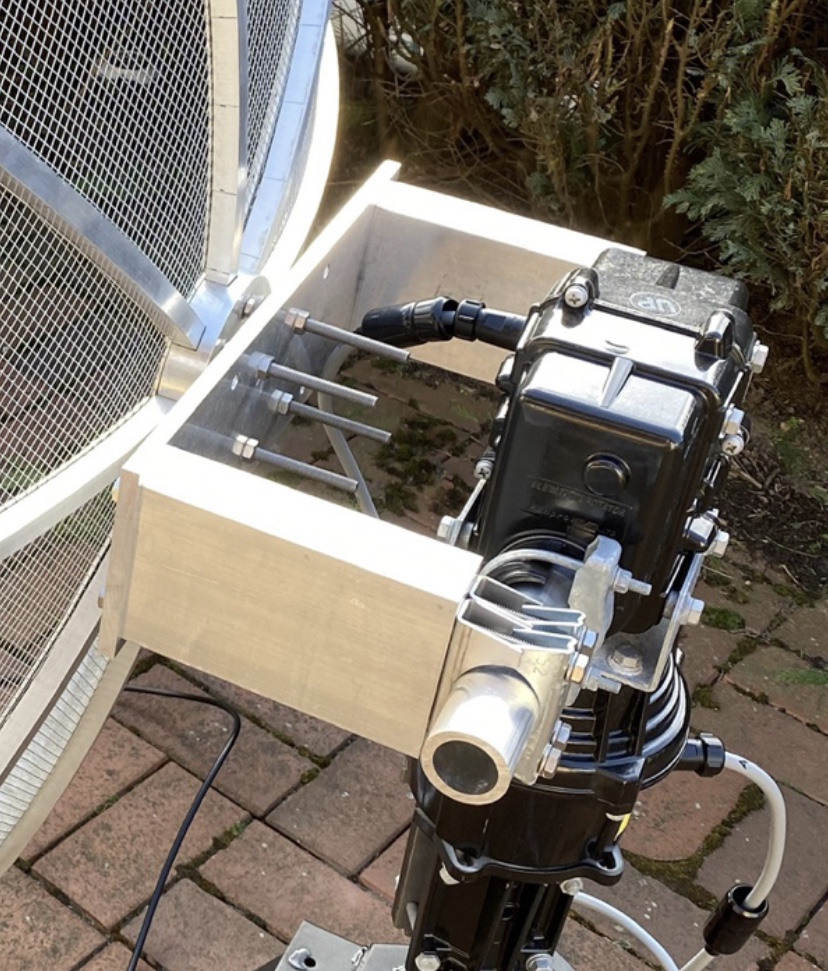
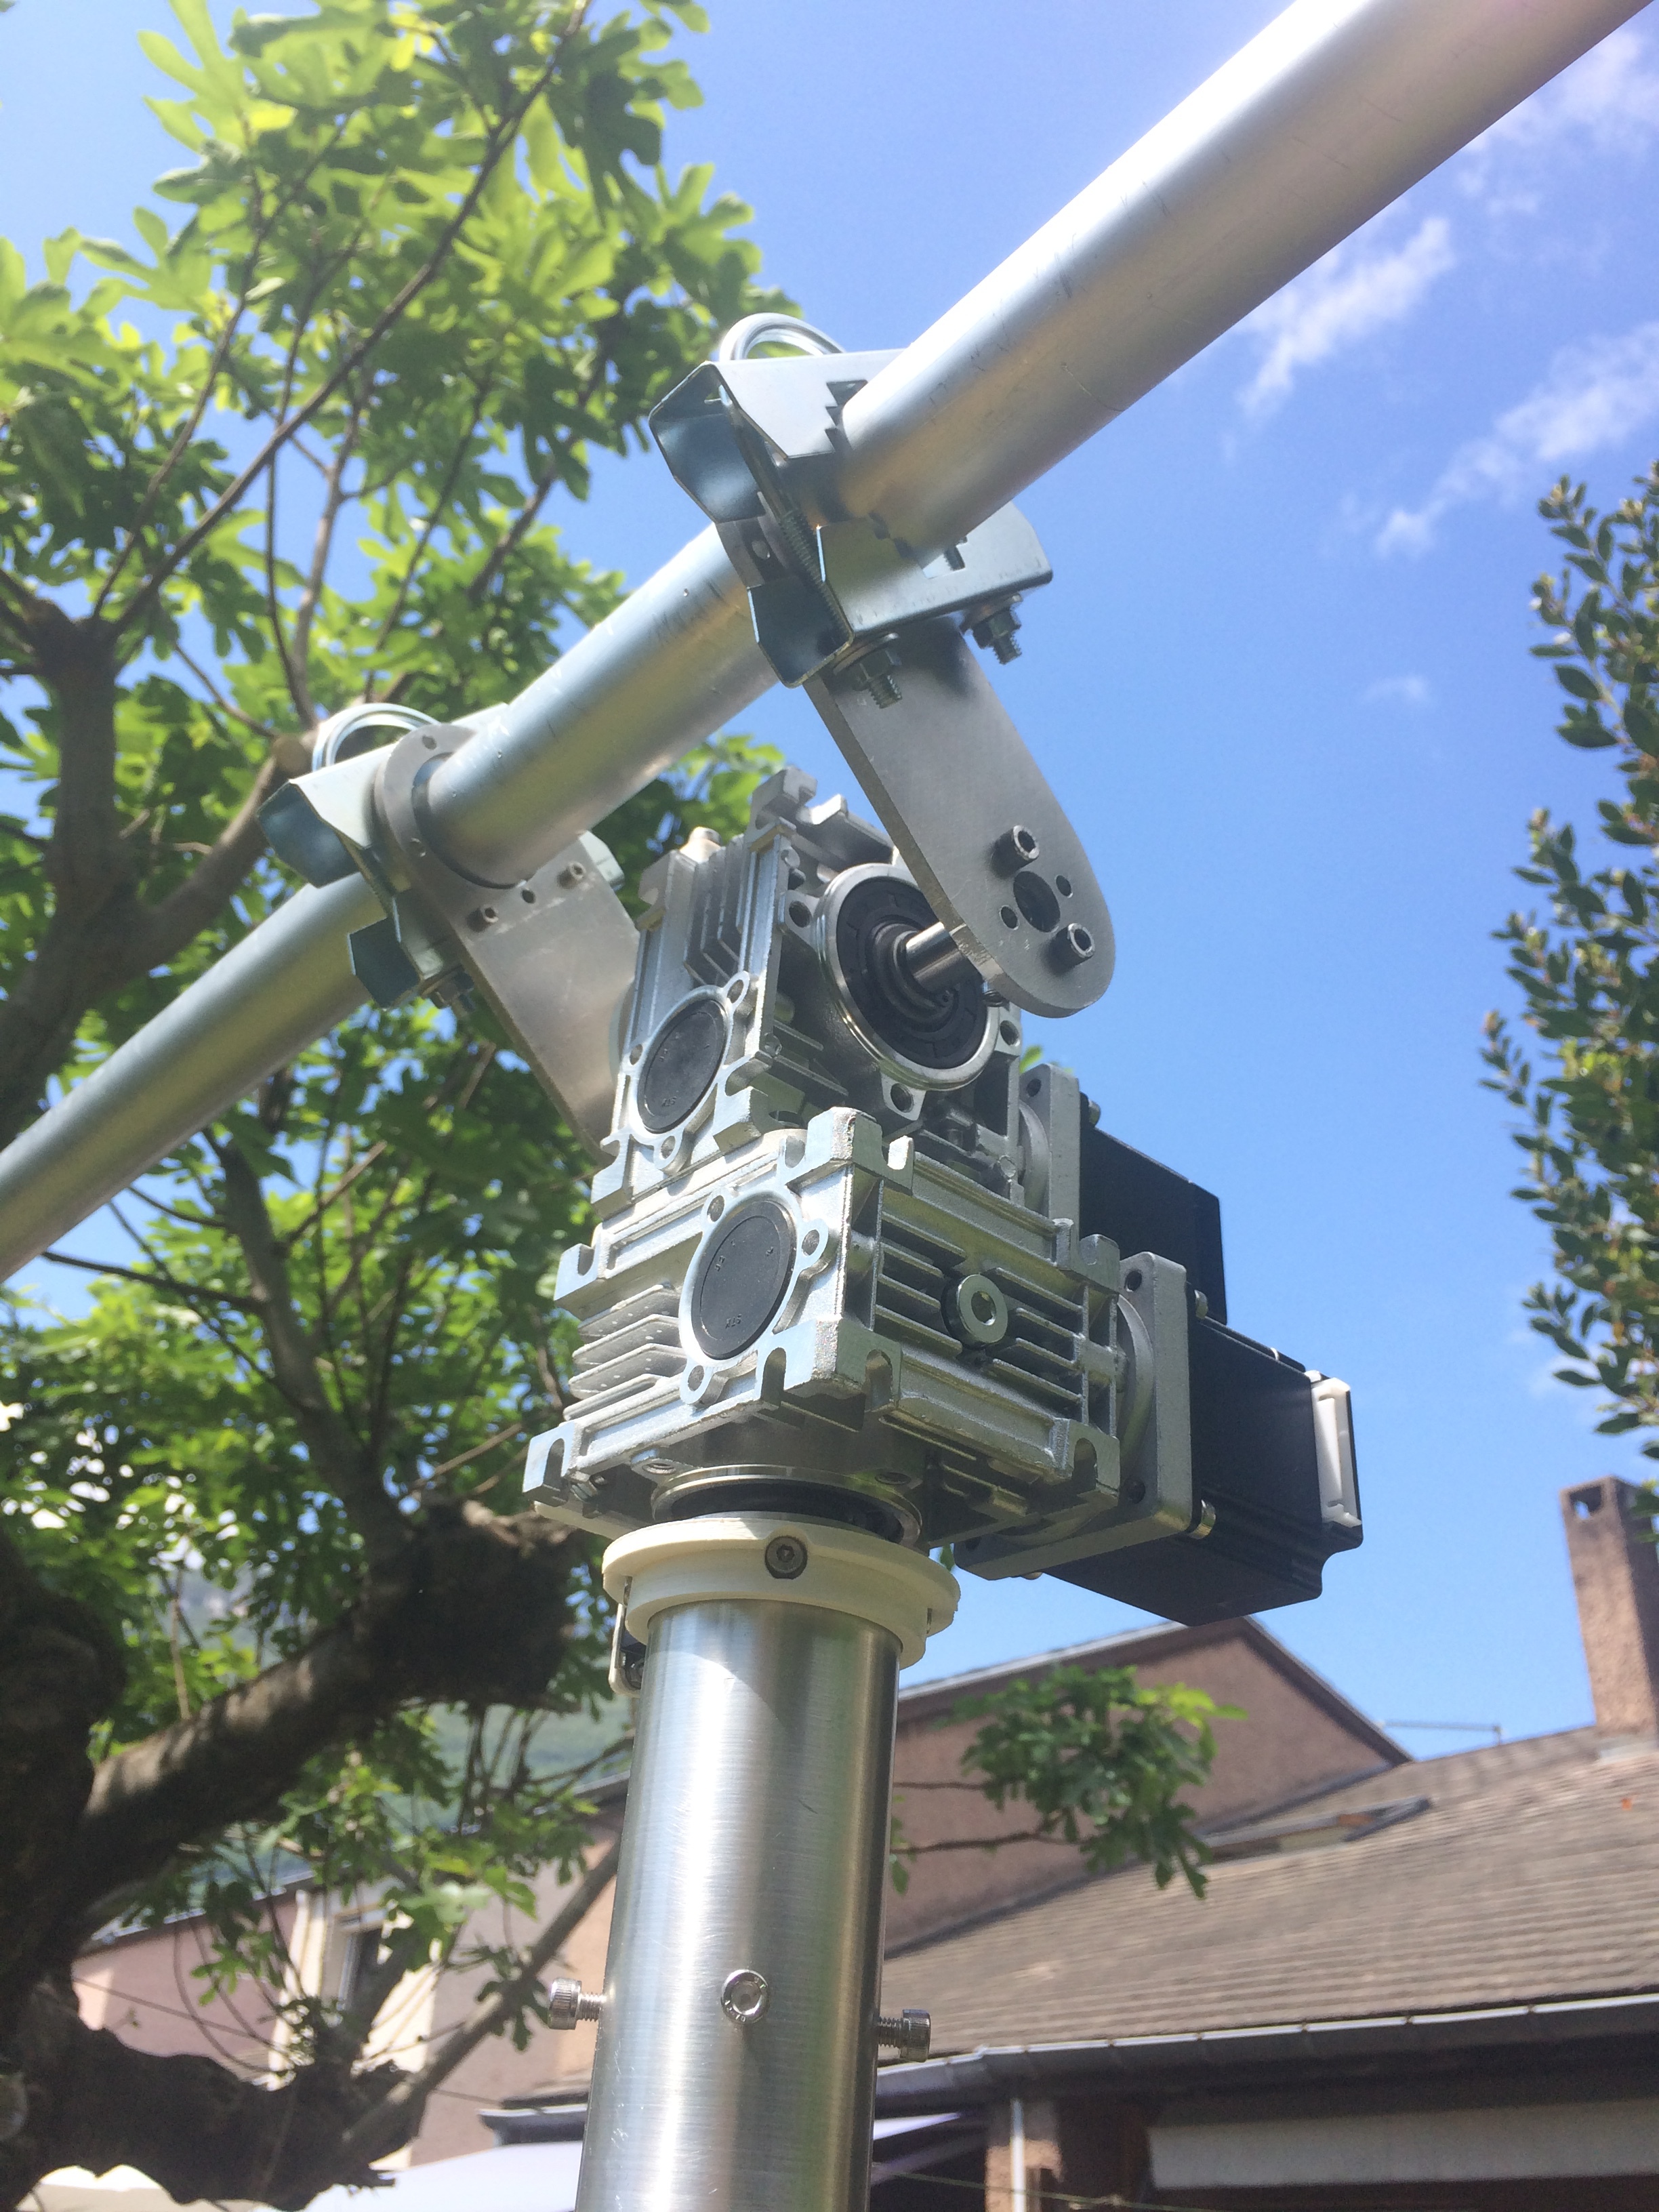
The rotator is build around 2 Nema 23, and 2 RV030 80:1 reducer, if you want a lot of power you can use bigger Nema 23, if you want less weight you can use smaller Nema 23

It’s 10-30$ / Stepper and 18-30$ / Reducer

Then we need 14mm mechanical shaft, a simple shaft for azimuth, and a double shaft for elevation

5-10$ for a shaft

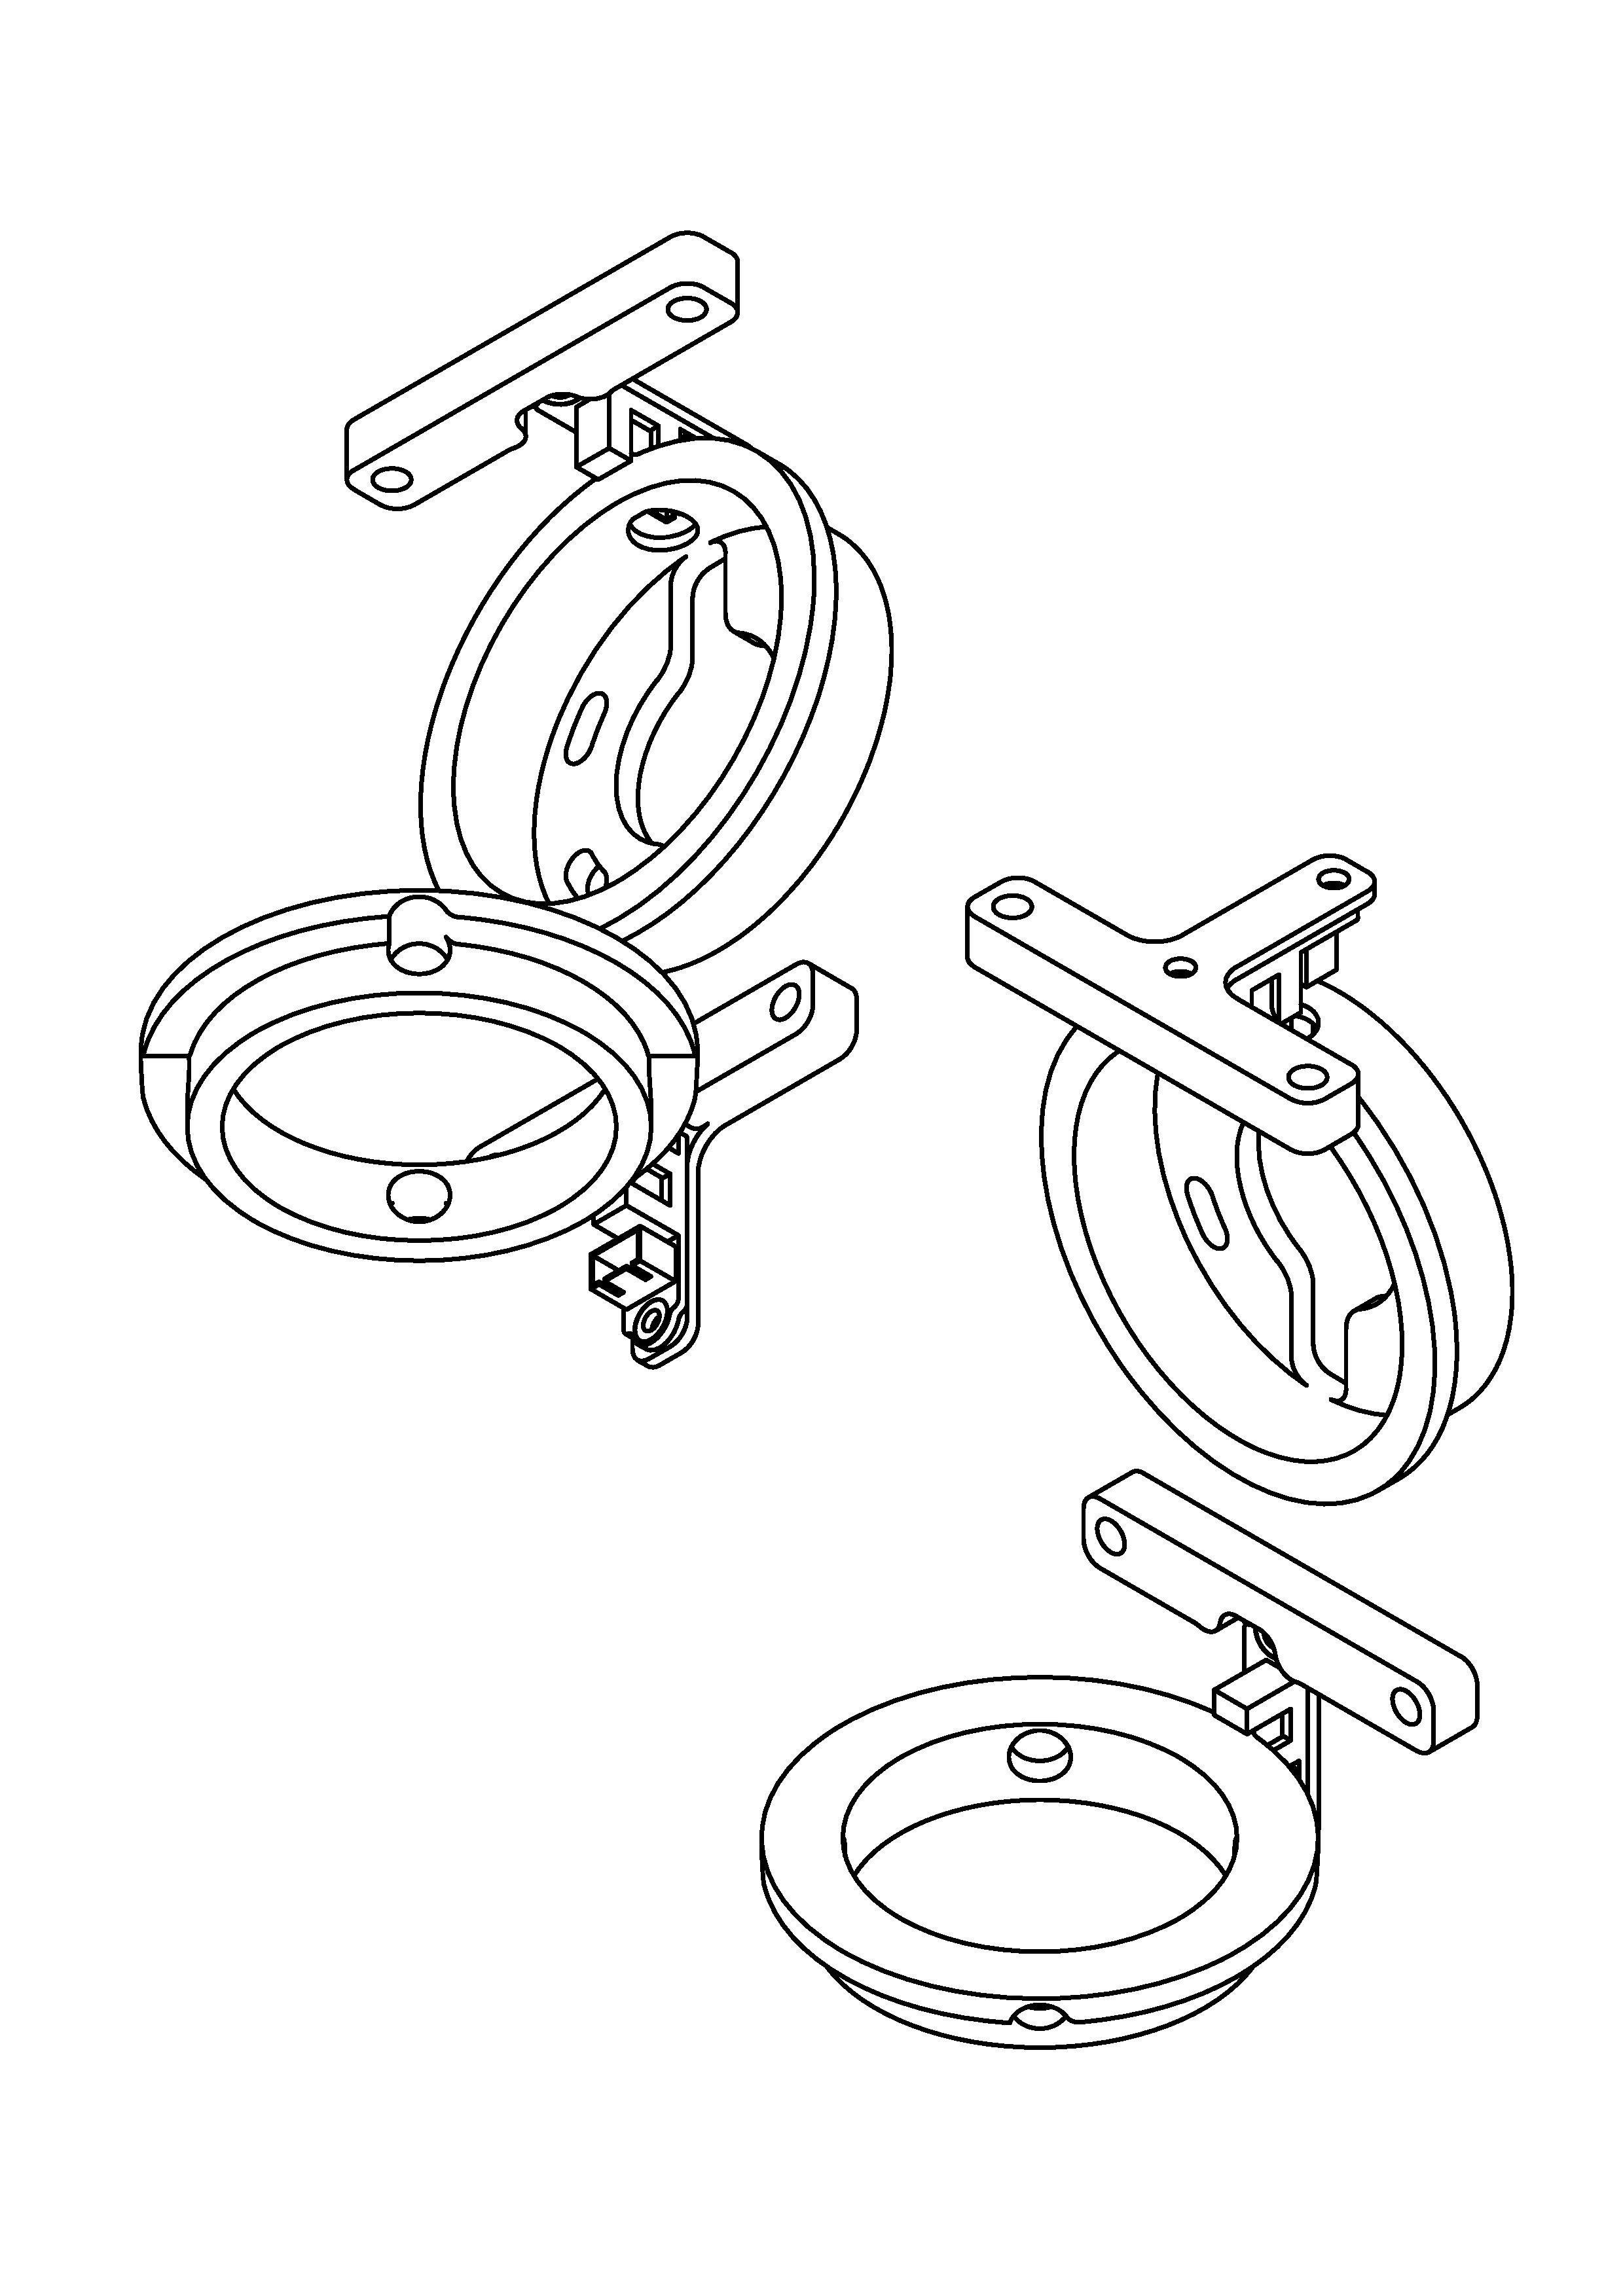
Then and only then we need part to mount the azimuth and elevation mast on the rotator

We need a first part to make a connection between a face and the shaft, its name is “key hub” we can buy it in aluminum or in stainless steel

Al : 12$ / pcs
Steel : 20$ / pcs

This are only for the elevation mast, so we need 2 of them.

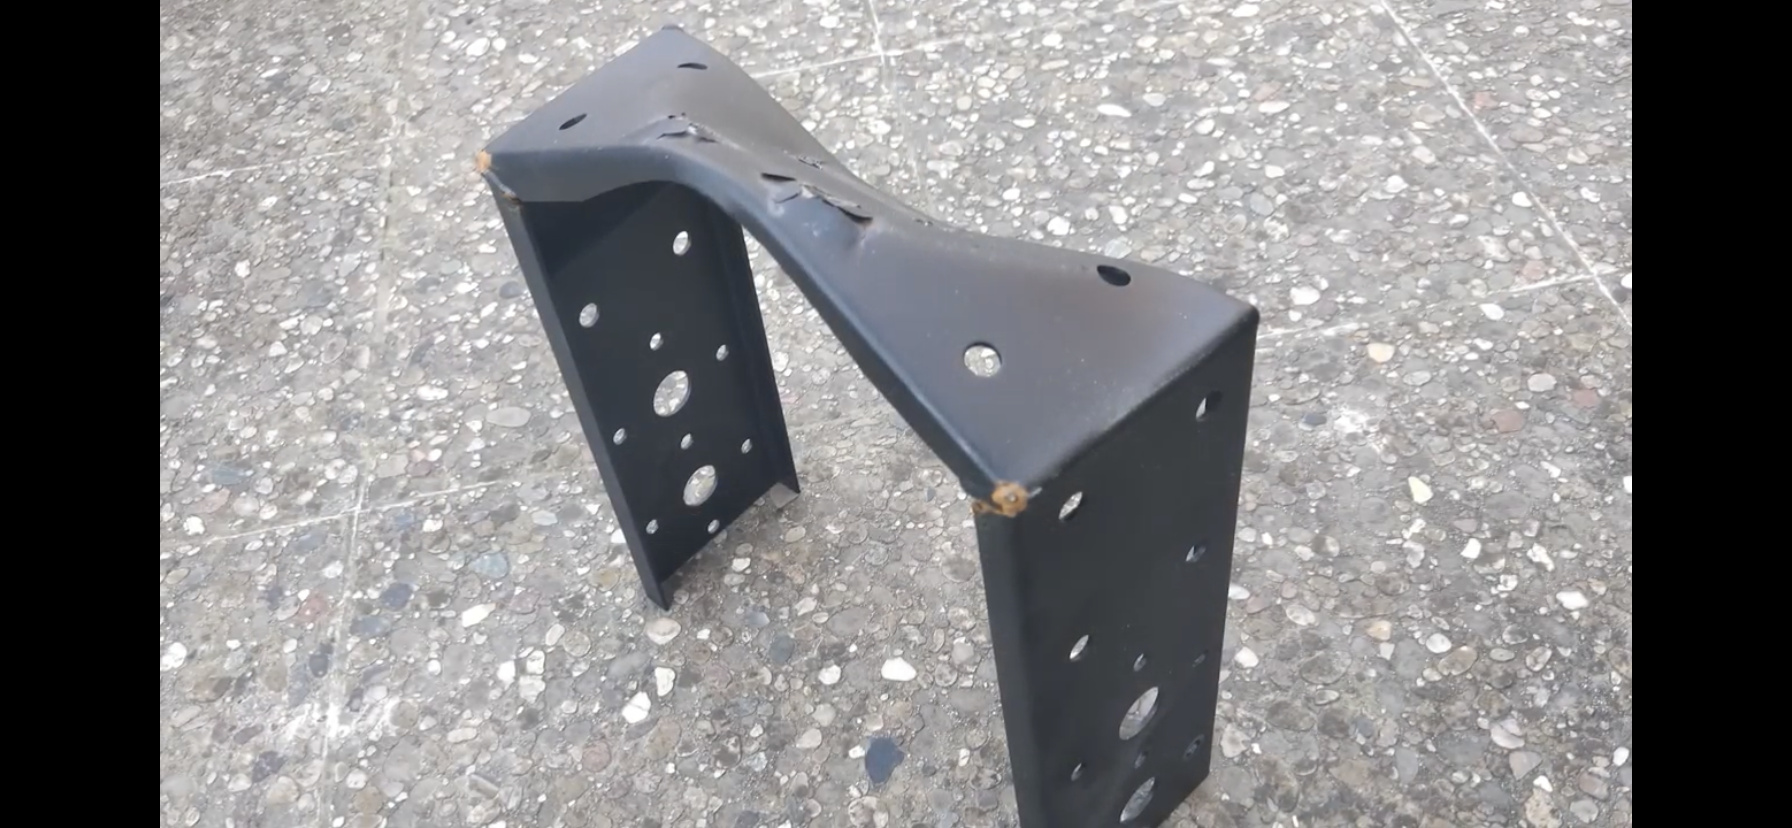
On this part I purpose to mount a designed U shaped 5mm thick aluminum bracket
Price : between 100$ and 30$ (depend on the quantity (1 to 10)

Then on the bracket we want to mount a mast, so we need 2 jaws, you can basically use any jaws with a 50mm hole to hole distance (2*1$ = 2$)

So we are ok for the elevation parts

Then for azimuth, we need a part to make the connection between the reducer and the vertical mast, this part is turned in aluminum, and will cost between 80 and 10$ (depends on quantity)

So that’s it we have the azimuth part and the elevation part, we still need something to connect azimuth and elevation part, we will use 2 laser, or water jet cute 5mm aluminum plate, one on the front, and one on the back of the rotator.
Price between 60$ and 10$ (depends on quantity)

Small Sum-up

To buy :

  • 2 * Nema 23
  • 2 * RV030 Reducer
  • 1 * Simple axis
  • 1 * Double axis
  • 2 * 14mm ket hub
  • 2 * Jaws for 35-40mm tube with 50 mm hole to hole distance

To manufacture :

  • 1 * U shaped bracket, 5 mm thick, aluminum (Laser cutting, and sheet bending)
  • 1 * Mast connector, 35mm to 14mm, aluminum (Turning)
  • Connection plate, aluminum, 5mm thick, (Laser cutting, Water Jet cutting)

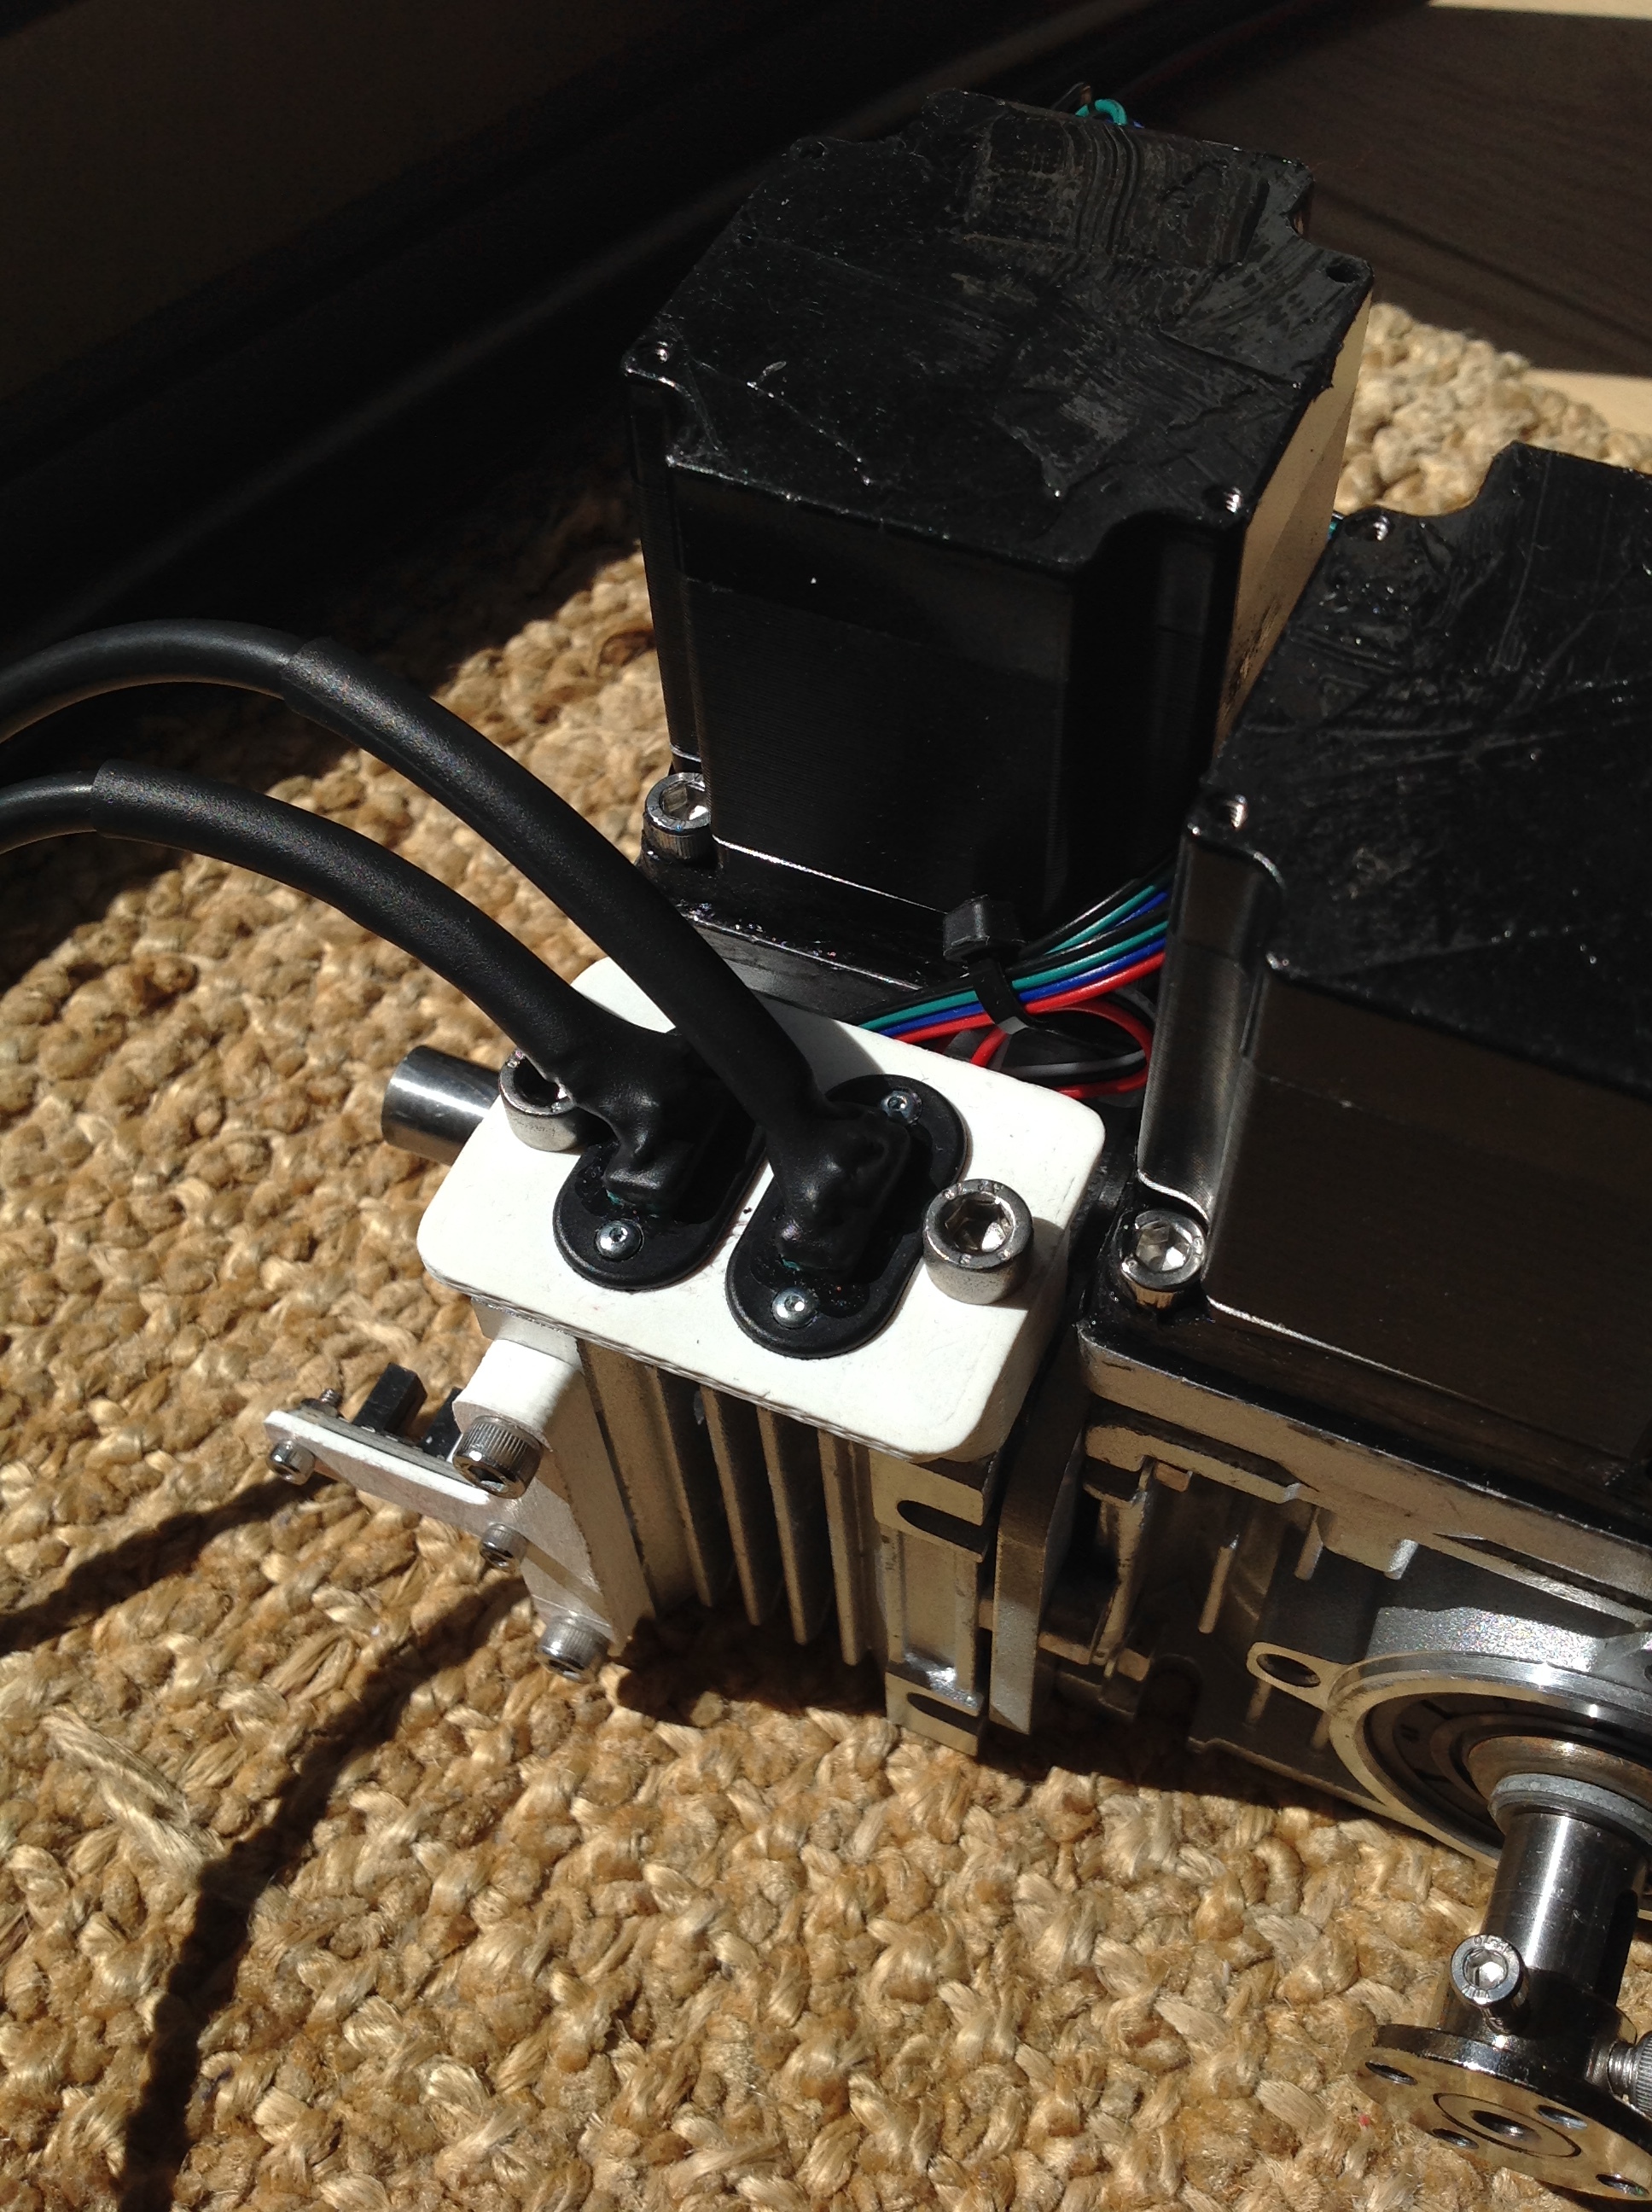
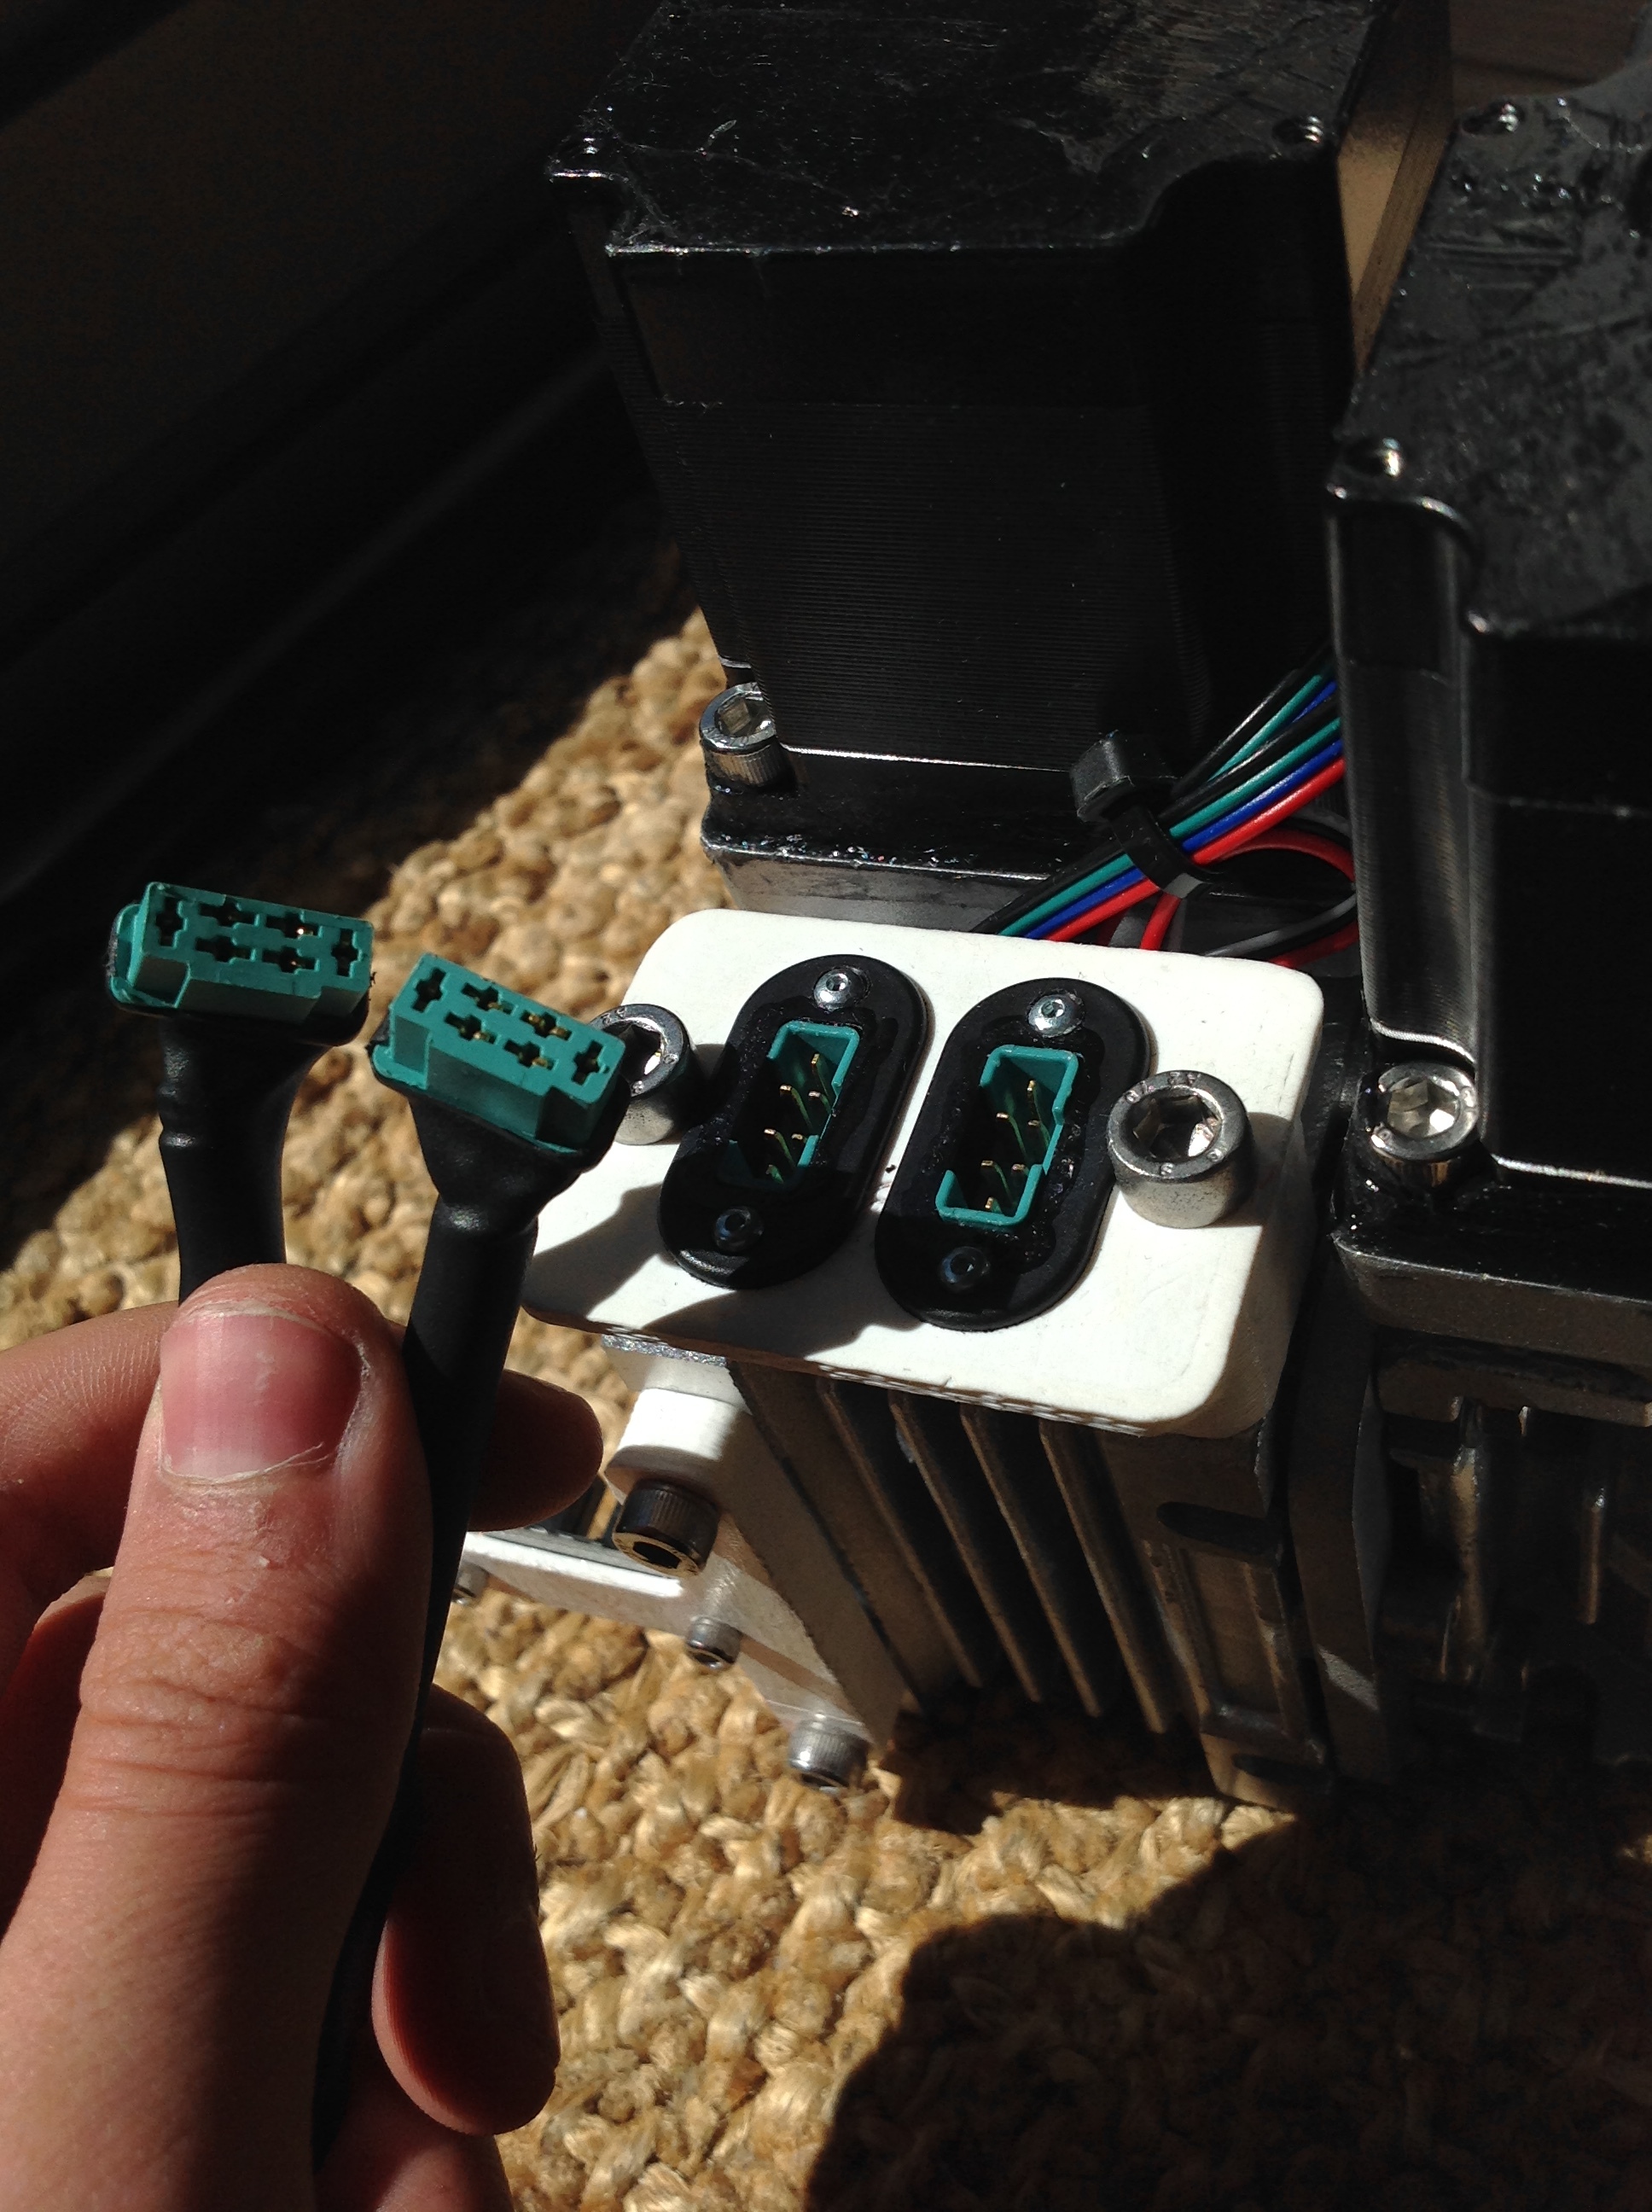
Then I purpose my design for endstop system, 3D files a freely accessible (on the repo; Yohan-s-Rotator-/Pin v1.step at master · YohanHadji/Yohan-s-Rotator- · GitHub), it will work with stock optical endstop

If never you really want to use encoder, it will be a pleasure to work on it with you.

Now the other options are, first instead of heavy duty key hub, we can use cheaper flange Bride rigide 2mm/3mm/3.17mm/4mm/5mm/6mm/6.35mm/7mm/8mm/10mm/11mm/12mm/14mm guide moteur de couplage, connecteur de moteur de coupleur d'arbre | AliExpress

But, the hole aren’t always precise, and the thread is a bit to small, so I don’t recommend it

Then instead of two plate to fix everything together we can use only one horizontal plate between the two reducer, BUT, the construction of the rotator is really hard, because screw are not reachable.

Speaking of screw, only M4 and M5 screw are needed, something like 20M5 and 10M4

Finally i’ve done a small google form, so that I can know what do you would like to know, please only answers if you are motivated to build your rotator (5 people at this time) :slight_smile:

Hope I still help some of you !

Yoyo

3 Likes

Aux âmes bien nées, la valeur n’attend point le nombre des années. Pierre Corneille

Encore bravo !

73’s Martin 9V1RM / F8UKP

2 Likes

Hi All, and thanks Martin !
However like said, I’m only a kid and I’ve done one more time a big error, I’ve thought that with a bit of sealing rubber I will have waterproof stepper motor, and unfortunately this apear to not be the case, one of the two stepper motor is totally rusted and unusable anymore.

That’s not that bad, this stepper was pretty cheap, but now I will need few weeks for new steppers to get delivered

The only one available is that one : https://www.omc-stepperonline.com/waterproof-stepper-motor/p-series-ip65-waterproof-nema-23-stepper-motor-4-0a-1-2nm-169-97oz-in.html?sort=p.price&order=ASC

An this is maybe there that brushed motor are cheaper.

If never, you have already bought non-waterproof stepper, I thinks that this is possible to use them, but you really need to take care of the sealing. I thought it was enough, it wasn’t. The stepper worked one weeks, and after only 2-3 days of rain they are good for the trophy case

Yohan

3 Likes

Hi All,

New motor are working good, unfortunately new motor are drawing more power, unfortunately Chinese driver are not are not big enough (essentially not as big as they say they are).

So unfortunately I had to balance the big antenna while waiting for new drivers, it’s a shame, and I hope it’s the last problem, with the right drivers, I now have the perfect power supply (40v 9.7A) to run the motors without microstep, so I can finally hope to do 360° in less than 15s and develop 80N.m

6 Likes

@Yohan_Hadji : you definitely want to improve the waterproofing of your RTL-SDR key as well. Get a cheap IP65 enclosure from Aliexpress before it’s too late (or steel a Tupperware from your mom while she isn’t looking !). If you leave it the way it’s, water will end up getting in …

Hi !
indeed at the very beginning I made that mistake…
But now the pcb of the rtl-sdr has been coated to be waterproof so that I don’t need any box, I prefer this solution to the box because then It’s way more complicated when I want to change the antenna of to connect my computer directly to the sdr. I would need the cut (one time more) the usb cable to make it go trough the waterproof connector and I don’t know how I will do to manage the RF connection

1 Like

@Yohan_Hadji

What is the name of those connectors and/or where can I find them?

These are Multiplex connector, https://www.lindinger.at/en/rc-electronics/cables-und-connectors/multiplex-connector-plugs-male-3-pcs.
But finally on my rotator I switched to other connectors which are much much better (not particulary this one from bangood, but this type, you will find them anywhere on the web : https://www.banggood.com/Aviation-Plug-Connector-Male-Female-Panel-Metal-Wire-Connector-16mm-Aviation-Connector-Plug-p-1333377.html?cur_warehouse=CN)

Just flew over the last monthes: is there any kind of building instructions available?

2 Likes

Hi @DL4PD and Hi all (@PH3V @KE0PLO @w2whc @pd0sbc)

I feel a little guilty about leaving you in the dark the last few weeks/months.
To tell the truth I was waiting for a 5th answers to the google form, which never arrived.
And the result of the form was only 3 people interested for the group order, and 1 interested to get the files.

And with only 3 people, the price for the machined part are really high, 30$ for the plates, 40$ for the mast mount, and 60$ for the bracket, which mean a total price of 130$, without the screw, without the shipping cost, and it’s seems to me that it’s a lot of money for 3 parts of aluminum.

So there are few solution, or the price is ok for you, and we can launch the group order, or if you find like me, that the price is to high we can search for cheaper solution, the bracket could maybe be done in a cheaper way than laser cutting and sheet bending but then it may be also more fragile.

If you have a CNC and a metal lathe I can give you the file, but if you don’t it’s kind of impossible to build it

So far, before I turned my station off for holidays, everything was working perfectly,
https://network.satnogs.org/observations/?station=762

1 Like

Maybe there’s another way to get the needed parts than build them on ourselfs. An overview or build instruction may lead others into interest. A parts list also (sorry if I missed something in this big thread :wink: )…

1 Like