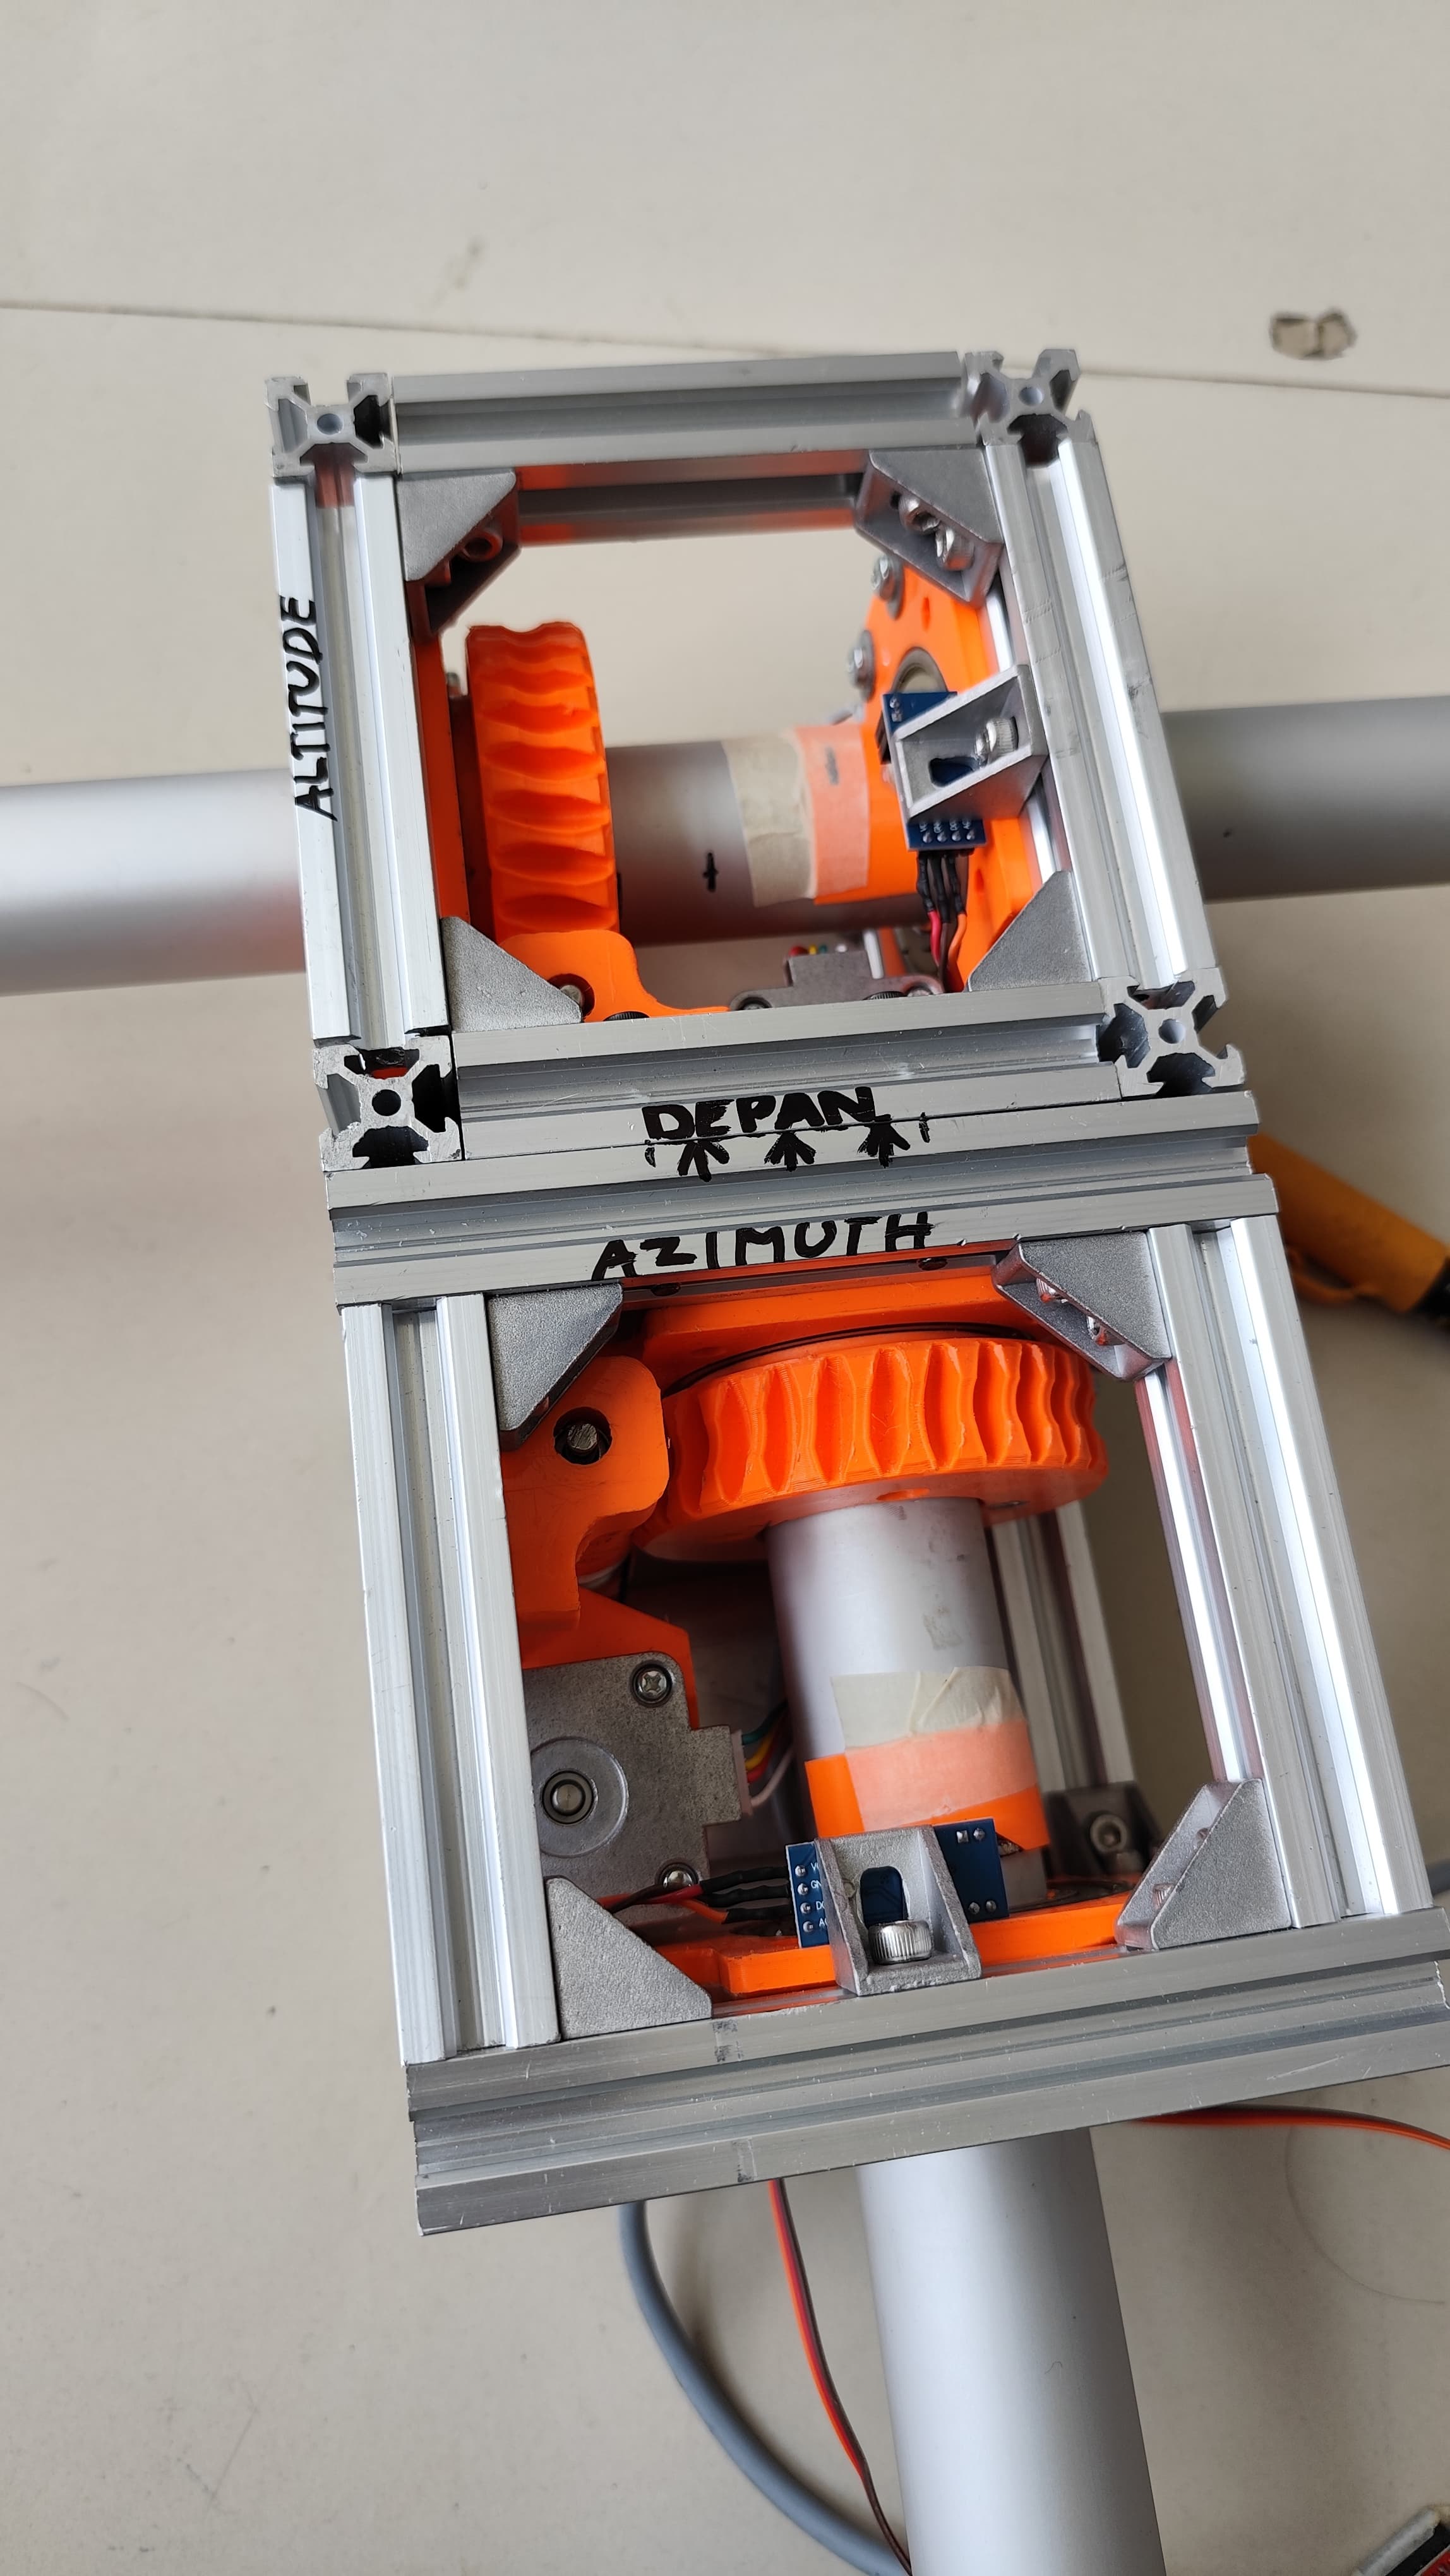
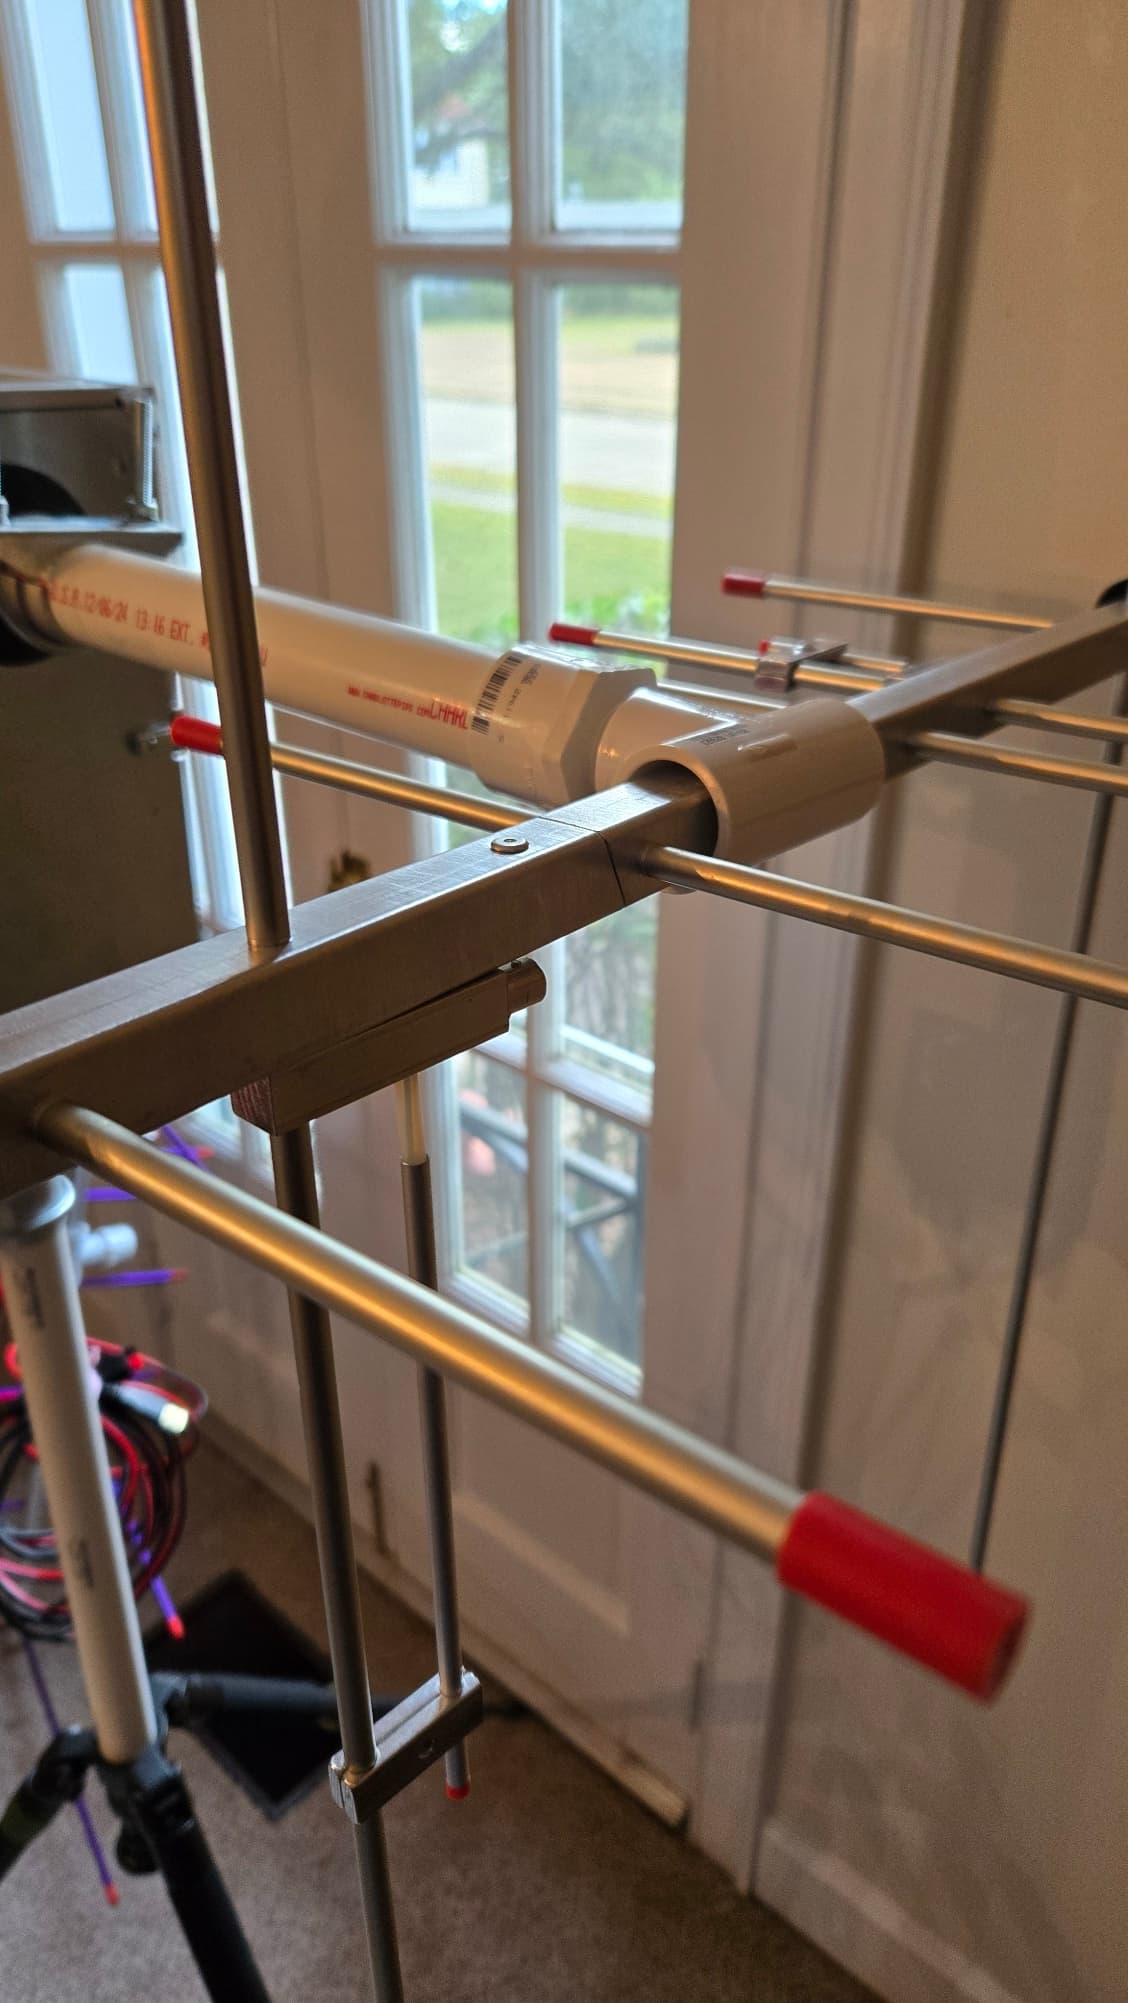
Hello, I’m starting this thread to share and document my build of SatNOGS Rotator v3. I should’ve done it earlier, but I’m almost done with my rotator part. It’s mostly built on the v3.1 guide but I slightly modified it to adapt what I can sourced locally. I used aluminium extrusion corner bracket instead of T slot L bracket like in the guide as it was so expensive here it could cost almost half of the budget just for the L bracket .
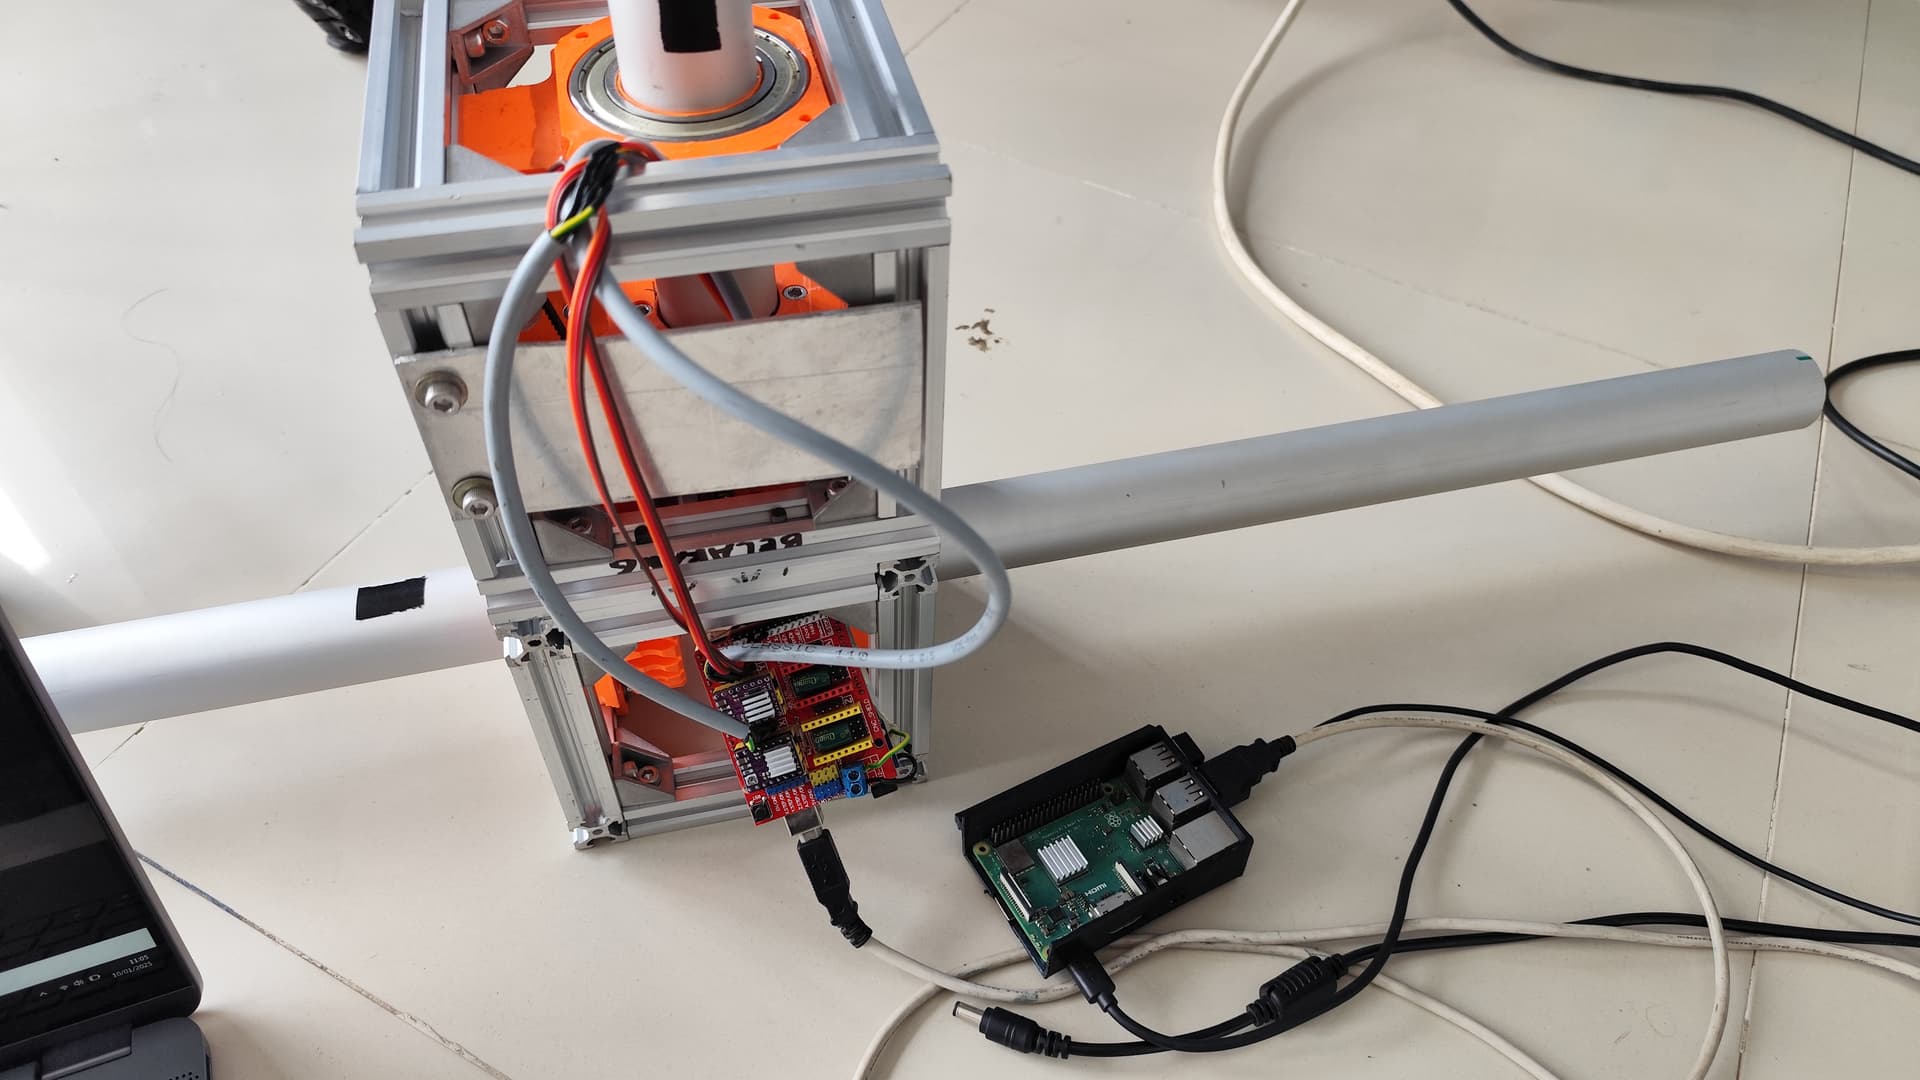
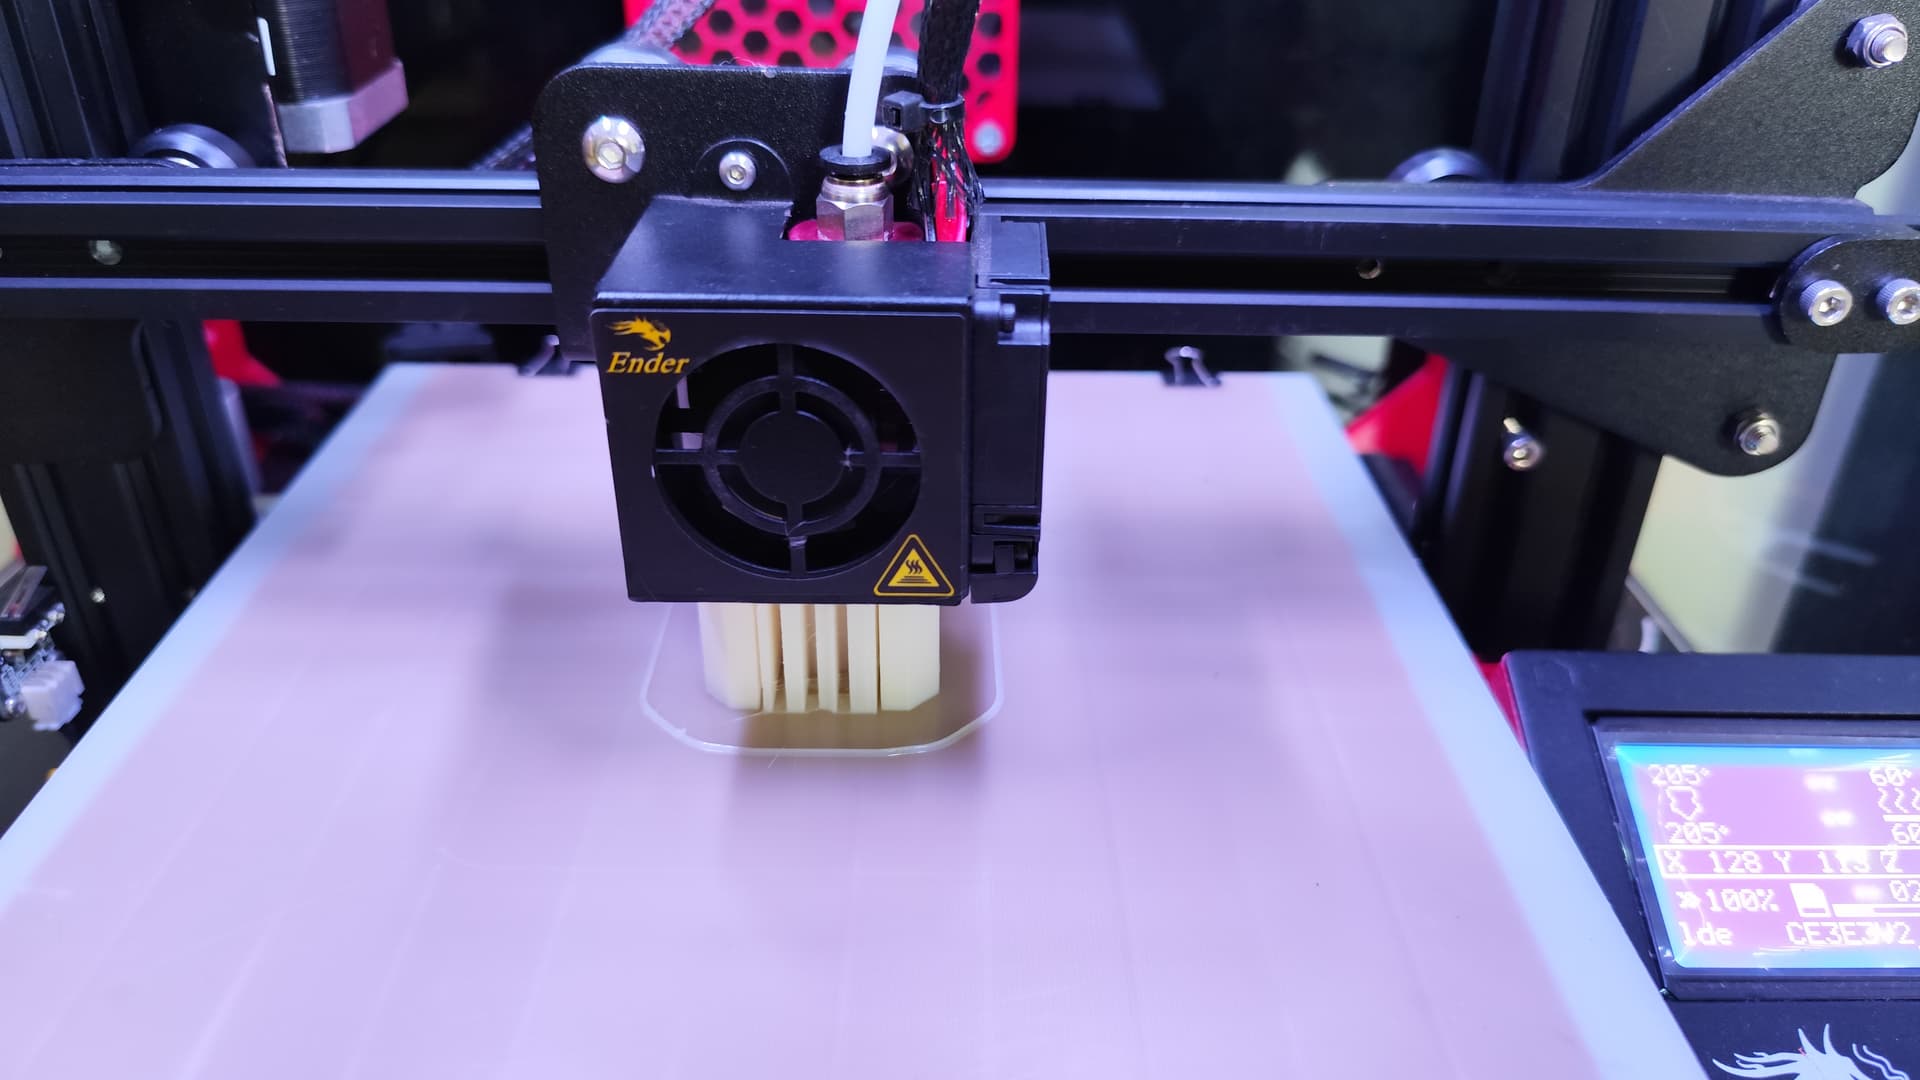
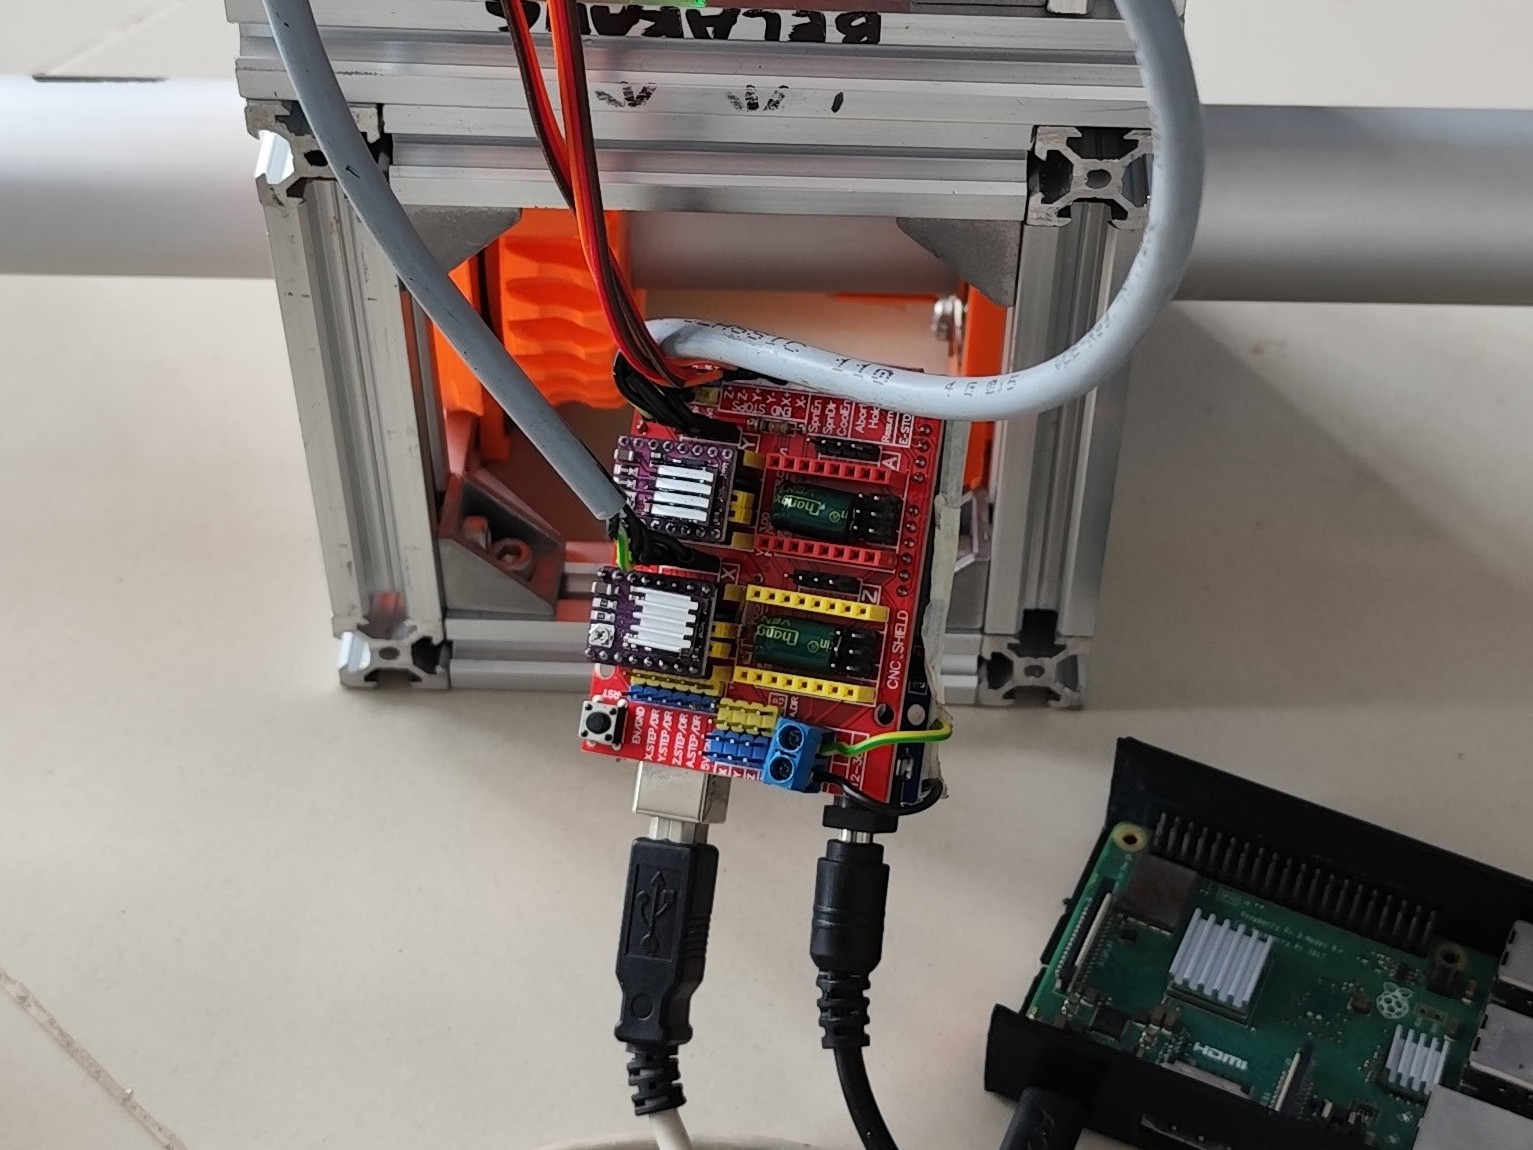
For the controller I used Arduino UNO and CNC shield V3 running DRV8826 at 12V (I might step up the voltage as it supports up to 36V, but 24V is more reasonable as I could lower the amp draw and reduce heat). The 3D printed parts were printed on Ender 3 with PETG and 100% infill (yes, 100% lol) and my setup was 240°C for hot end and 70°C for bed. In the future I’m going to integrate it with the SatNOGS network, but for the moment I’m going to control it manually (running Gpredict or SatDump). I’ll post more update in the future!
Hey, feel free to post here too if you want. I hope we can exchange ideas with each other, but don’t expect daily updates as I’m doing it on my free time
It’s ALIVE!
Turns out, there was a misprint on the CNC Shield, then my EL was backwards, so I just had to flip the stepper dongle, but it works! Thanks@quartapound for the killer fork! It homes np, use the .BAT to start it up and Gpredict works flawlessly!
Now I need to work with it for a bit, but I’d like to figure out a way to get it working organically with Ham Radio Deluxe (HRD) rotator control. That is what I’m using for CAT for my 705 and other SDR. It’d be nice to have it all under a single pane of glass.
Nice! You’re far ahead of me! I just finished testing out the connection to a computer and I’m happy it works great, I’ll take a video of it tomorrow. By the way are you planning to dual wield the Arrow antennas or it was just for testing purposes? Oh also did you use any lube or grease for the gears? I heard petroleum jelly (or Vaseline) works great for 3d printed parts.
I can’t wait to see it working! The gears are pretty nice and relatively smooth however for added protection I am using a silicon-based lube like what I use on my 3d printers. The grey tube of Super Lube on amazon works great! I 3d printed my parts with 7 perimeters and 100% infill PETG, these things are pretty indestructible, I literally took a hammer to the first main gear to see if I could break it… barely scratched it!
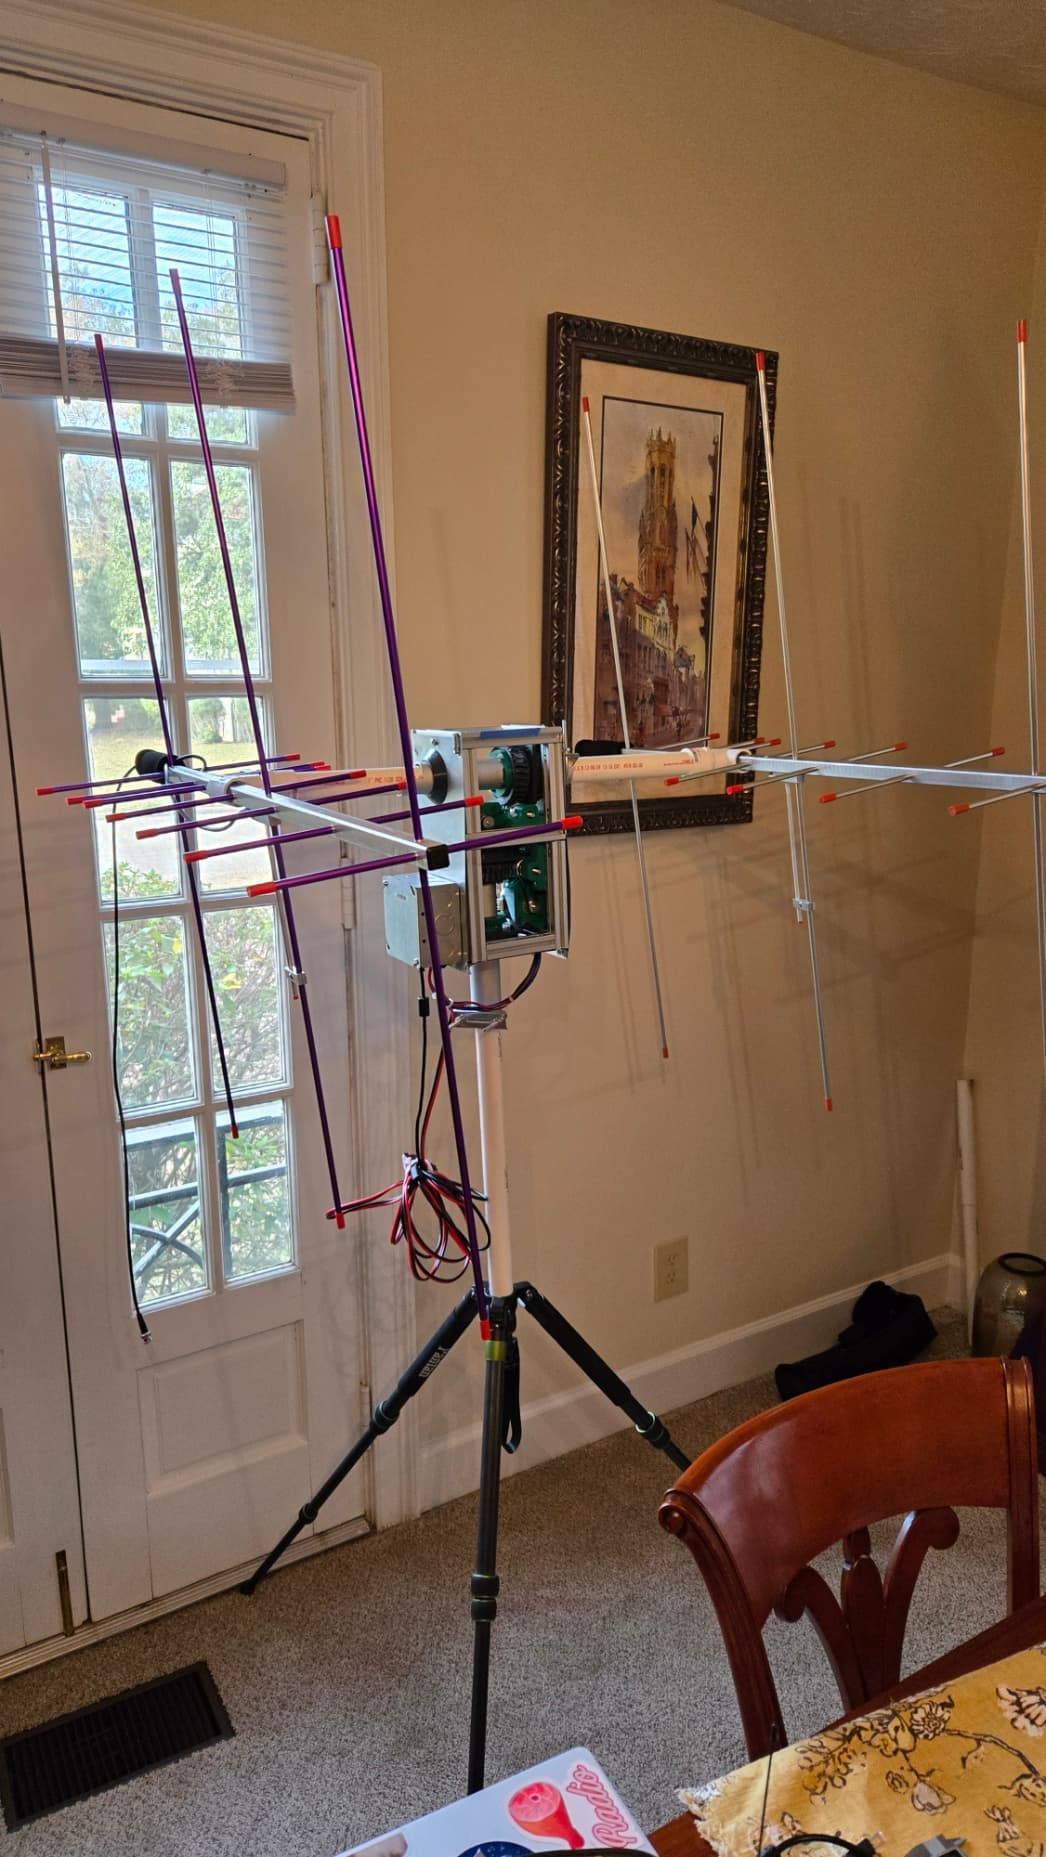
I DO plan to dual-wield since I do not have a full-duplex radio (yet)! I primarily wanted to get this setup for me as a amateur operator to push myself in to doing something outside my wheelhouse, but ultimately I want to get the rig setup so I can help a local school participate in ARISS, what better way to get the next generation interested in STEM by facilitating what I would imagine would be core memories!
I currently have an IC-705 that I plan to pair with either an HT or an SDR hooked directly up to my laptop to RX as well as record the QSOs. Hence the 2xYagis. Additionally, I wanted to do some experimentation with polarization also.
Once I see a few more builds here and I have a bit more experience, I plan to build another one, hopefully a bit more refined. When I can find some time, I plan to CAD a bit and try to 3d Print an exoskeleton to protect it.
My plan is I might use UHF Yagi on one side and VHF Yagi on the other side. UHF for receive only and I’ll hook up to my SDR and SatNOGS network. VHF for transmit and receive, I’ll add a coax switch/SDR switch so I can choose either receiving WX satellite APT images or as transmitter for satellite repeater.
Also, I might do experimentation on third axis like this one for polarization matching, cross Yagi should be much simpler, but this one should be much fun
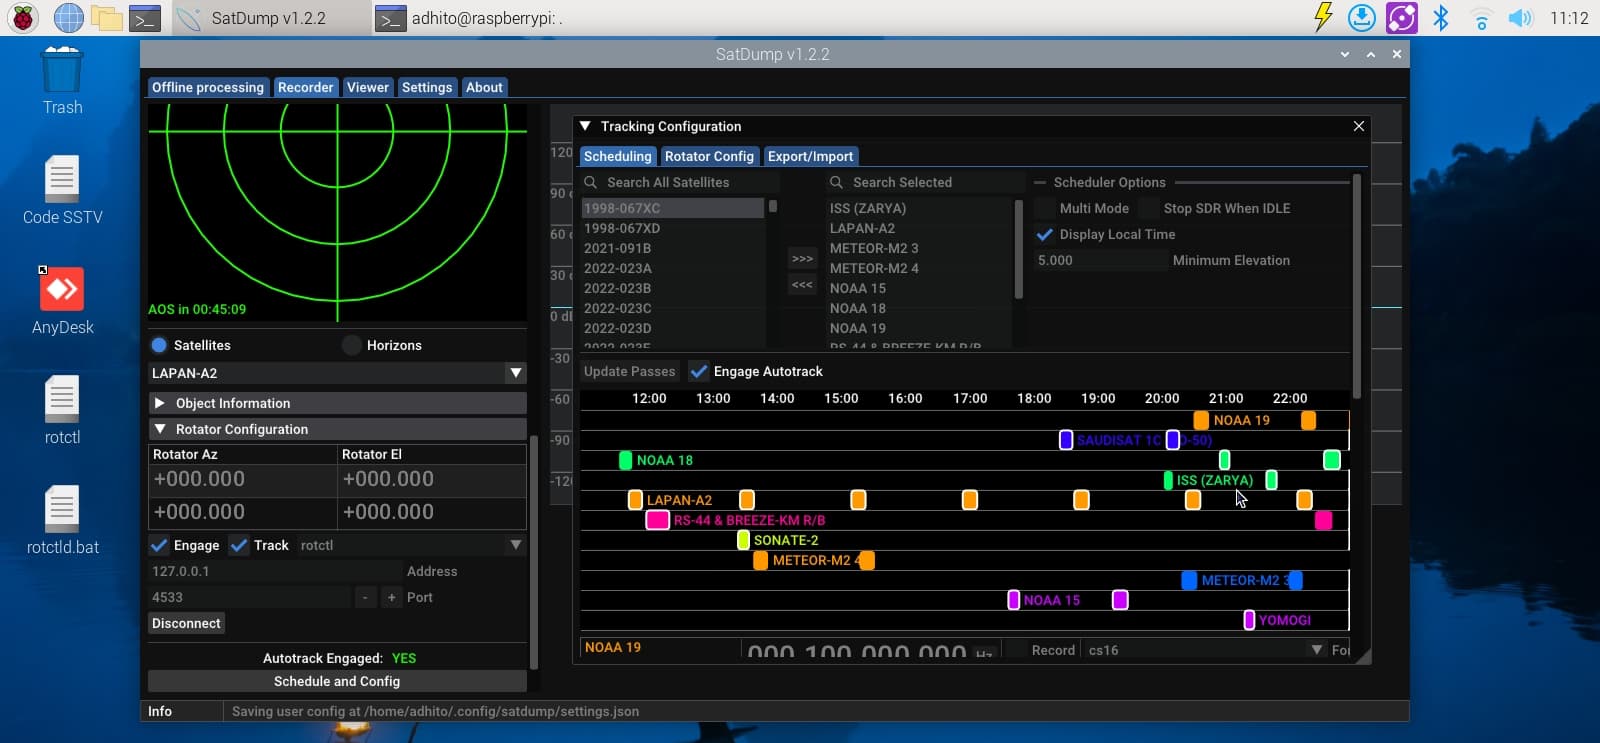
Finally connected it to Gpredict and works on the first try, lol. Well mostly because I was helped by my friend who build his own rotator in the past, so working well so far.
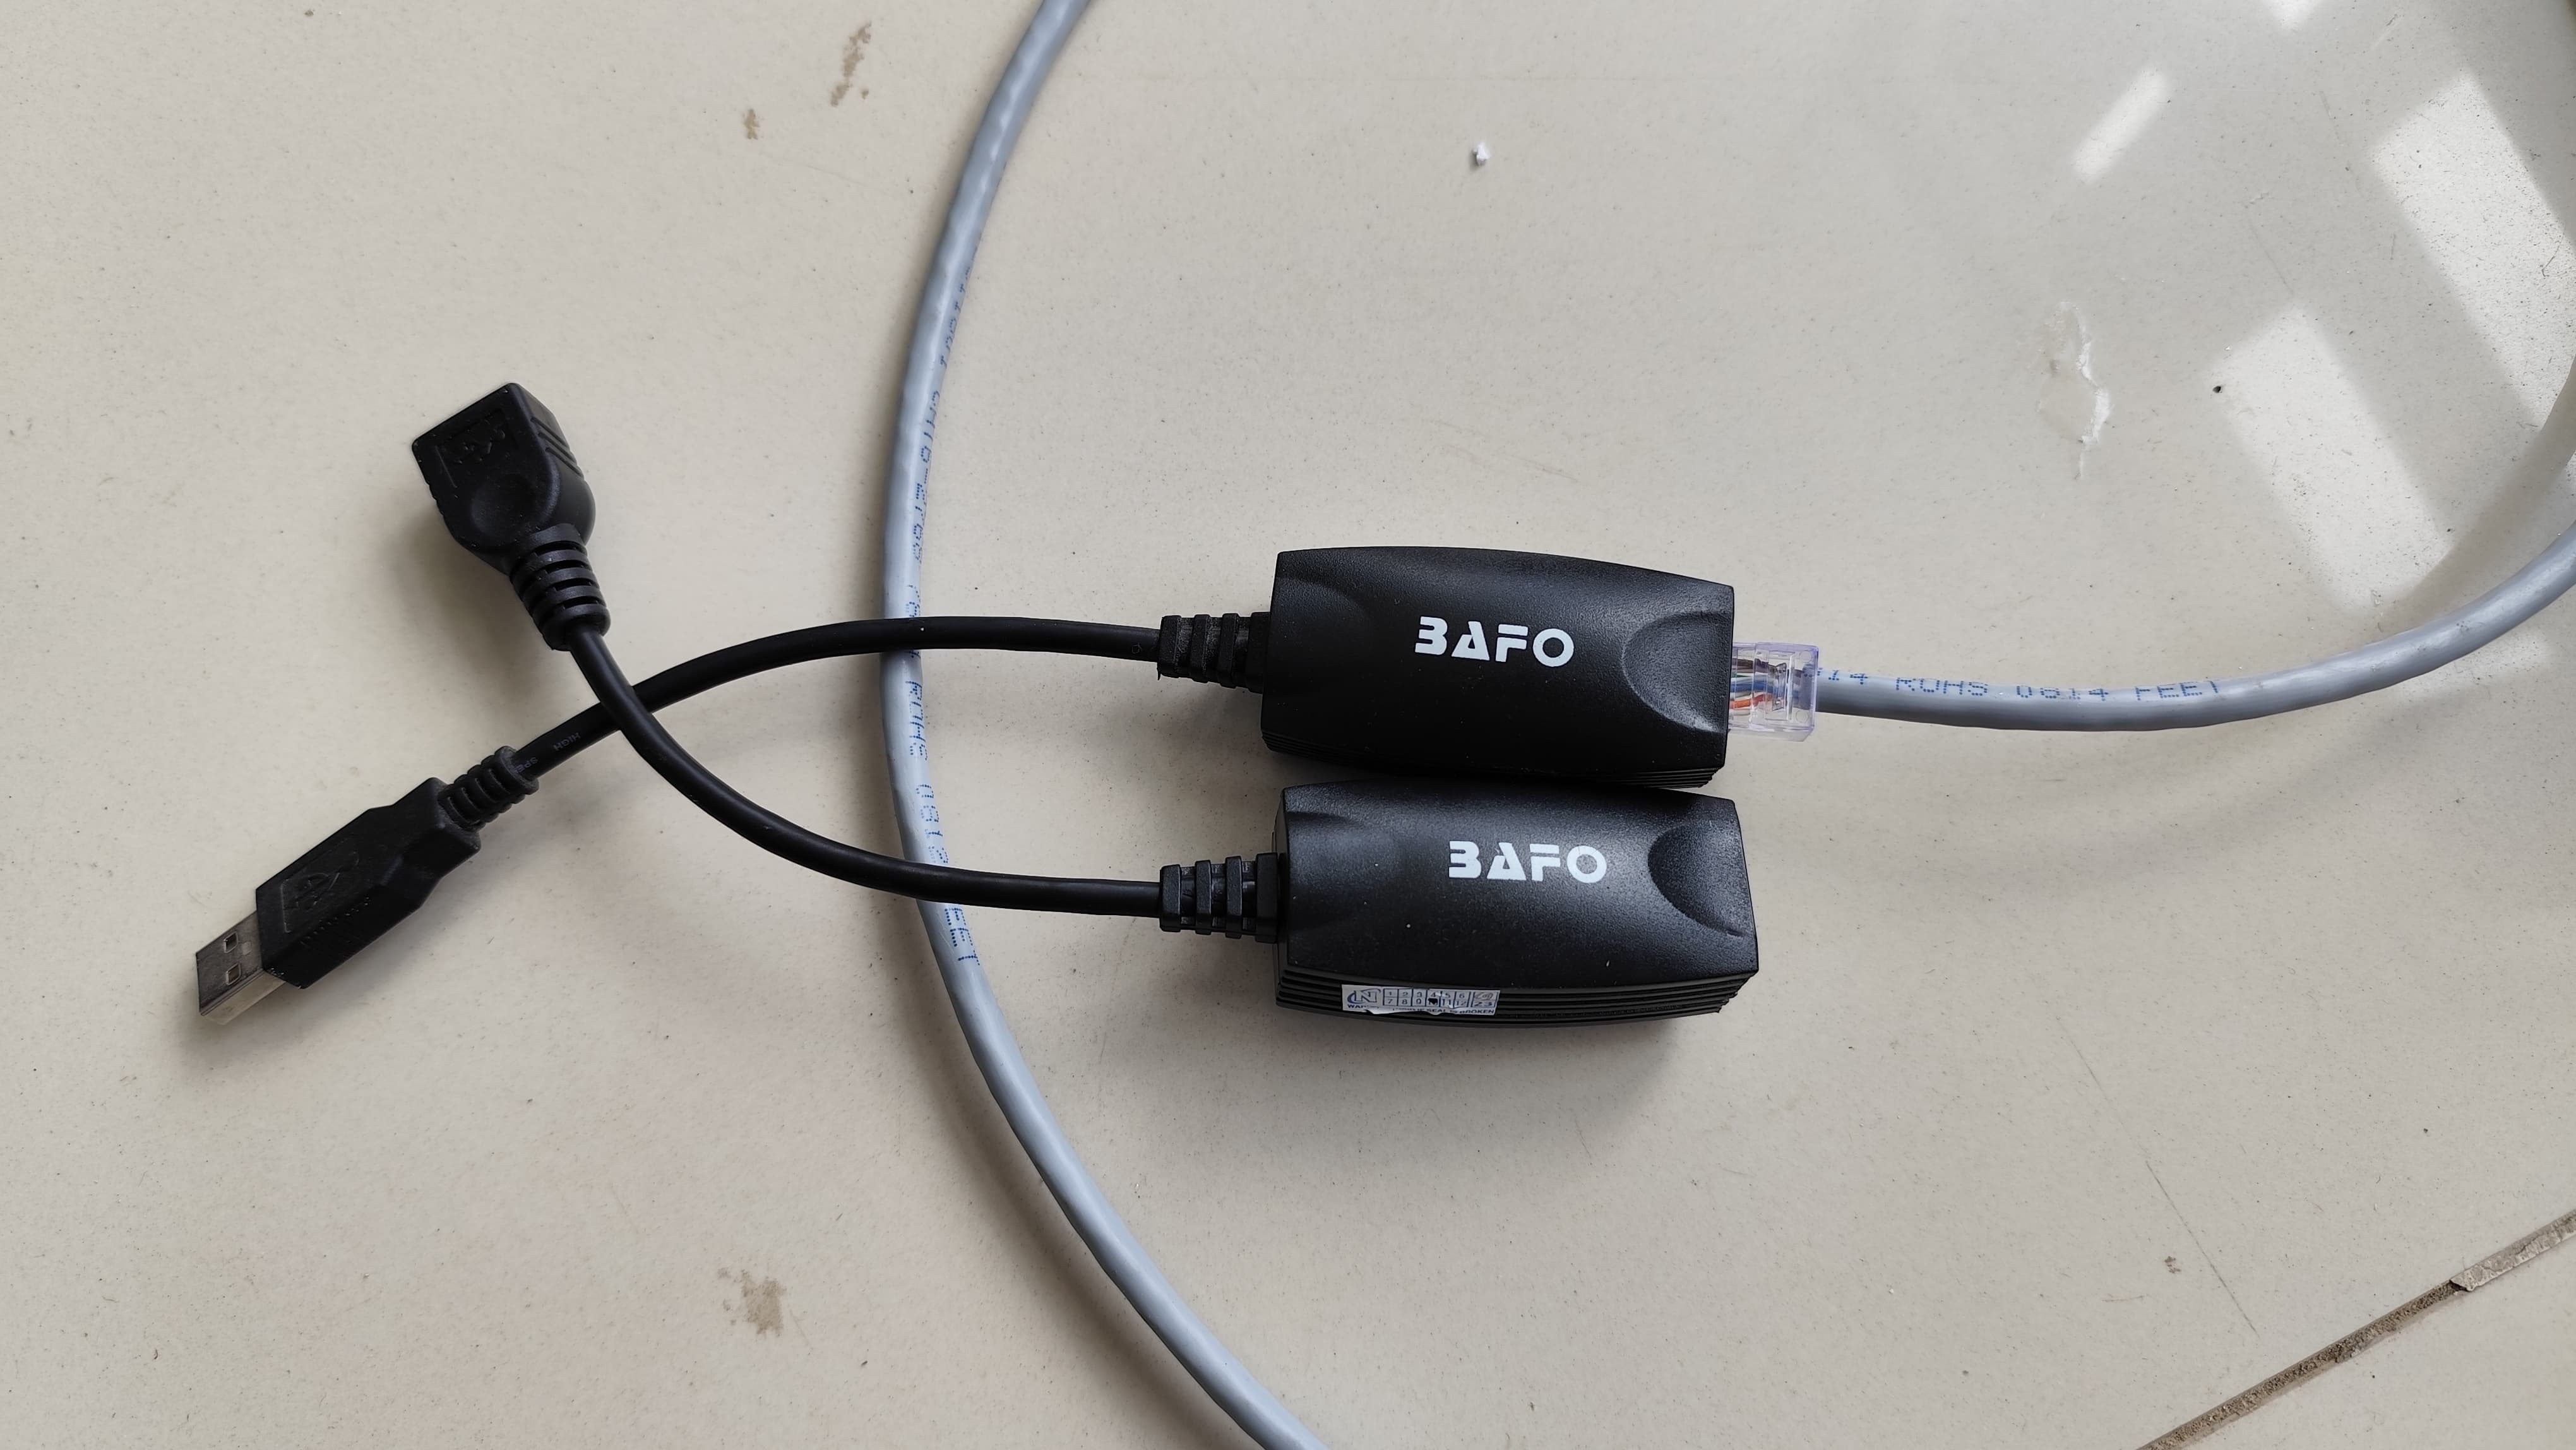
Also, I tried using this USB to ethernet and works well for at least 10m of Cat6 ethernet cable. How did you plan to control yours? I might just put a Raspberry Pi beside the Arduino on the rotator and SSH the Raspberry Pi.
As for how I’ll control mine… .since it’ll primarily be used for Ham QSOs, I’ll be close by with my laptop for a while until I get some of my workflow down. I want to do a few months of experimentation and really just learning since this is all pretty new to me!
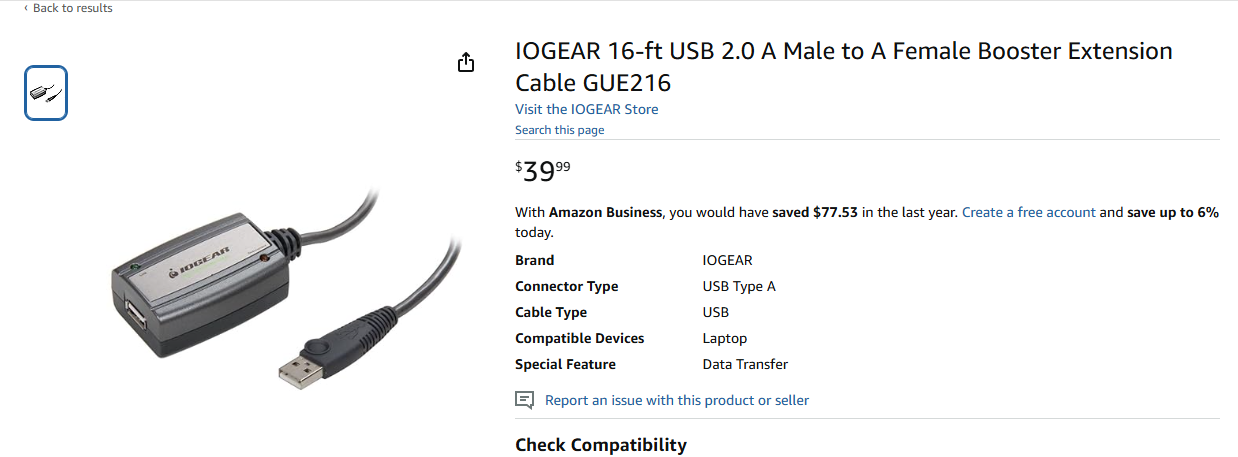
For now I’ll be using a USB extension/booster that I used for my astrophotography rig. I’ll probably keep close/babysitting until I get my workflow down. I’ll also be looking to what ya’ll are bringing to the table on your builds and try to figure out what I want to mod/adapt for my second build. The next build will definitely be a wx-resistant enclosure (prob 3D printed) and remoted in some way.
Also, I used a PVC T-Coupler to make a quick disconnect for my Yagis. This is temporary until I can CAD/3D print my own but, they work pretty well for a few $$ from the hardware store.
Finally the Raspberry - Arduino setup working well! A bit of headache troubleshooting it but actually I’m happy learning some Raspbian/Linux system.
I can remote control the rotator with my smartphone (it’s via laptop on the video) and only need a single Ethernet cable (beside the antenna coax) for power and communication. I’m planning to use PoE, hopefully it’s enough.
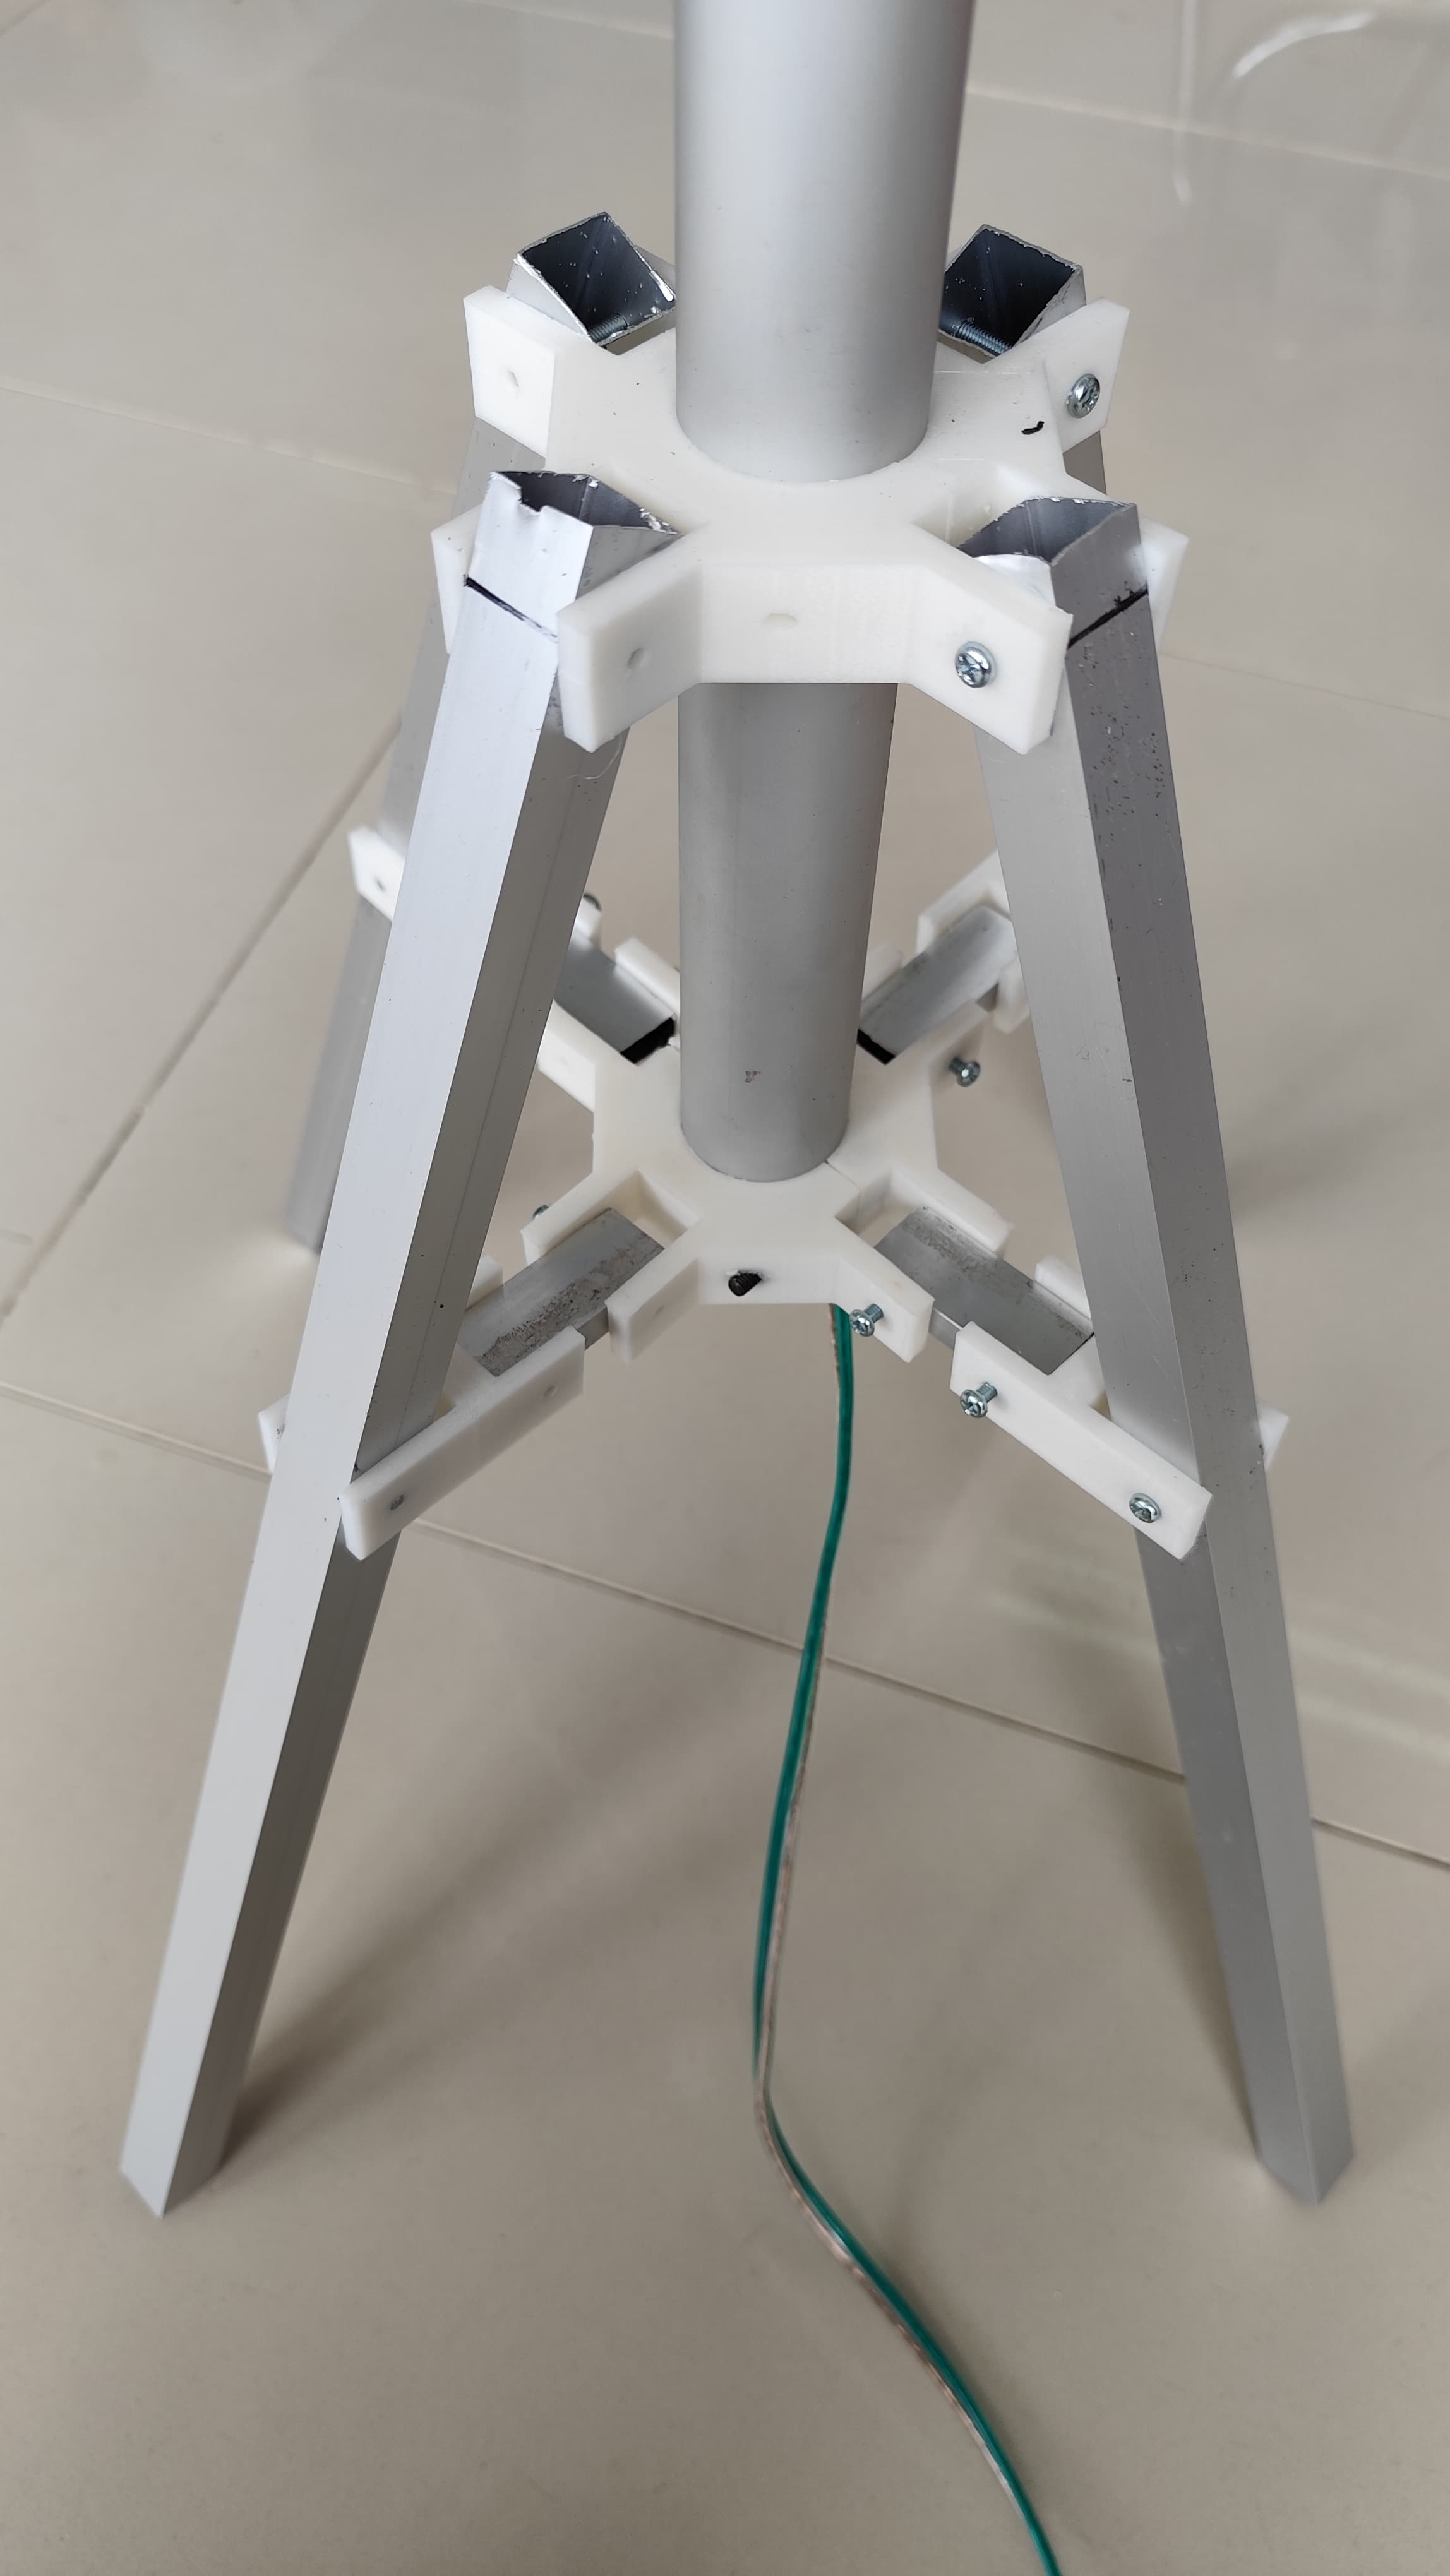
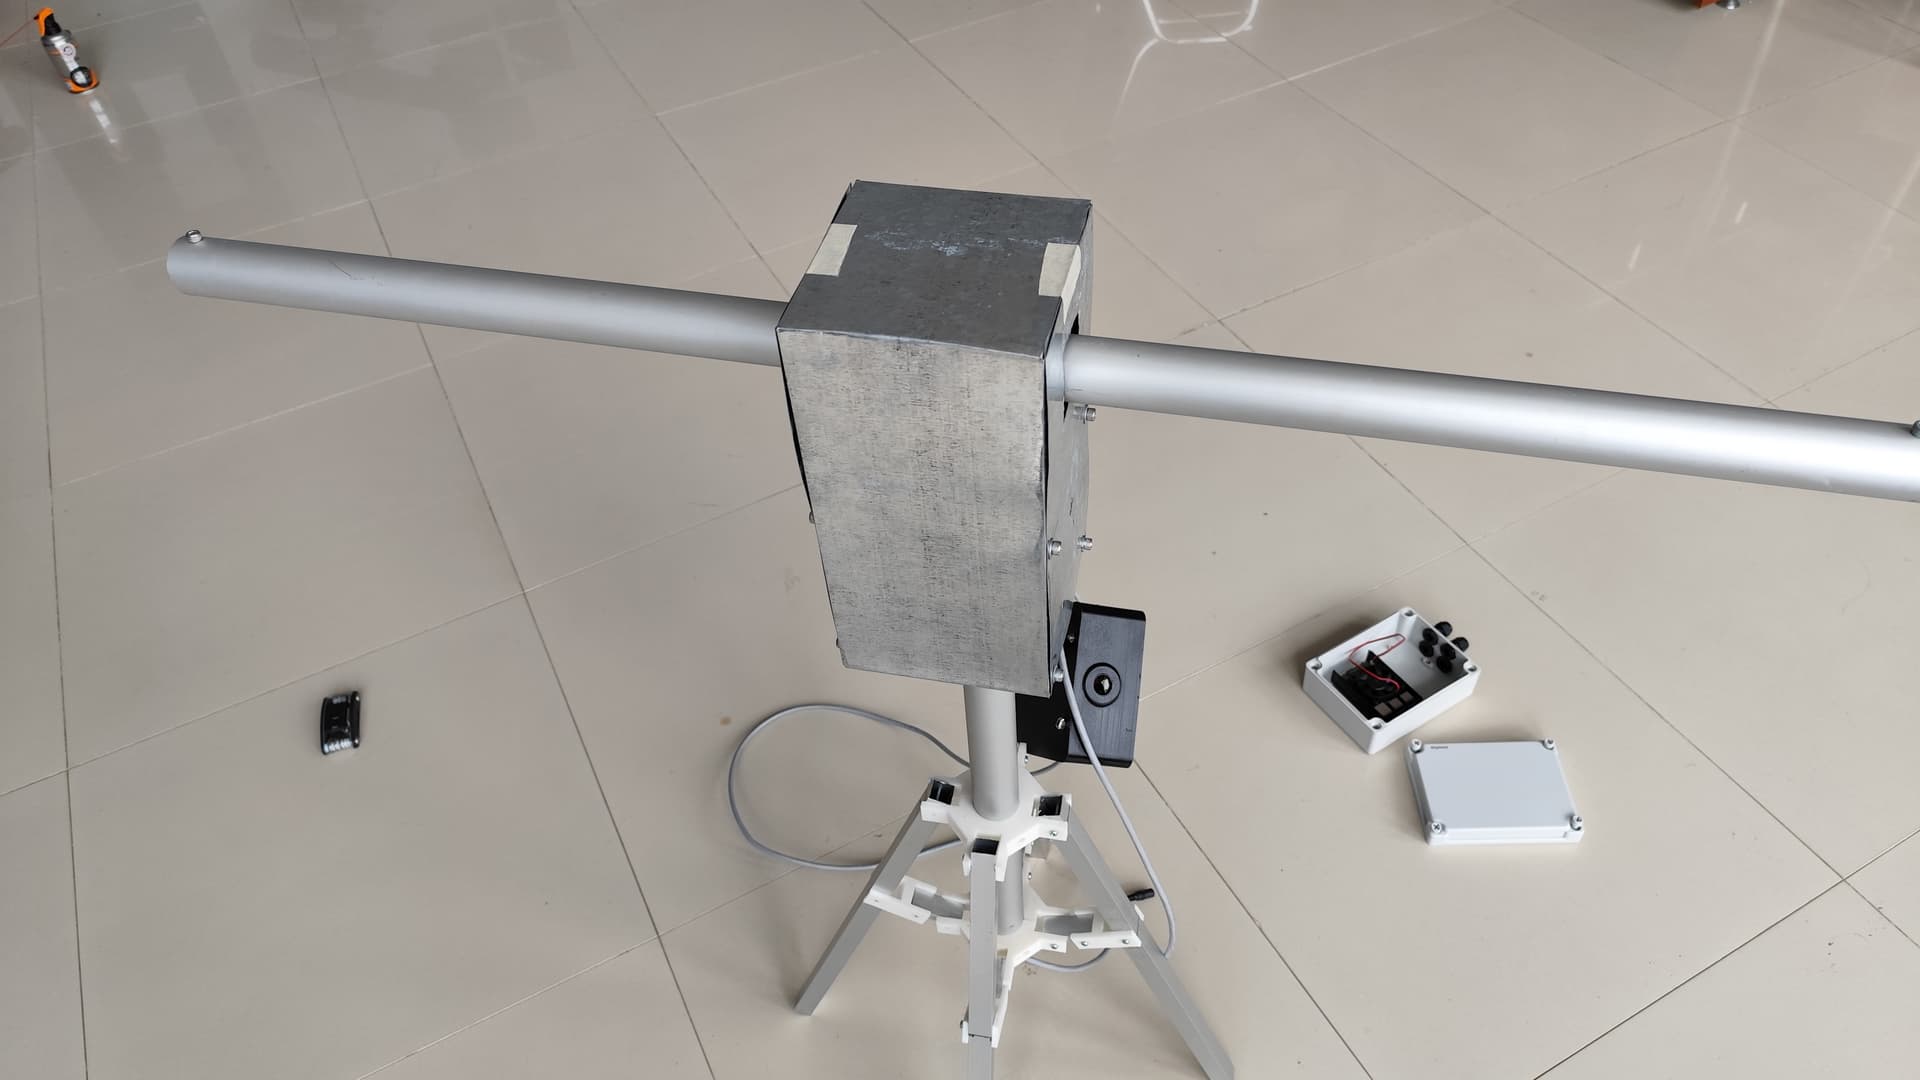
Also for a while I might just sat the rotator on the balcony for a while just for testing purposes, so I’m printing this bracket so it can stand up on it’s own without a tripod. But now time to tidy up this mess up haha…
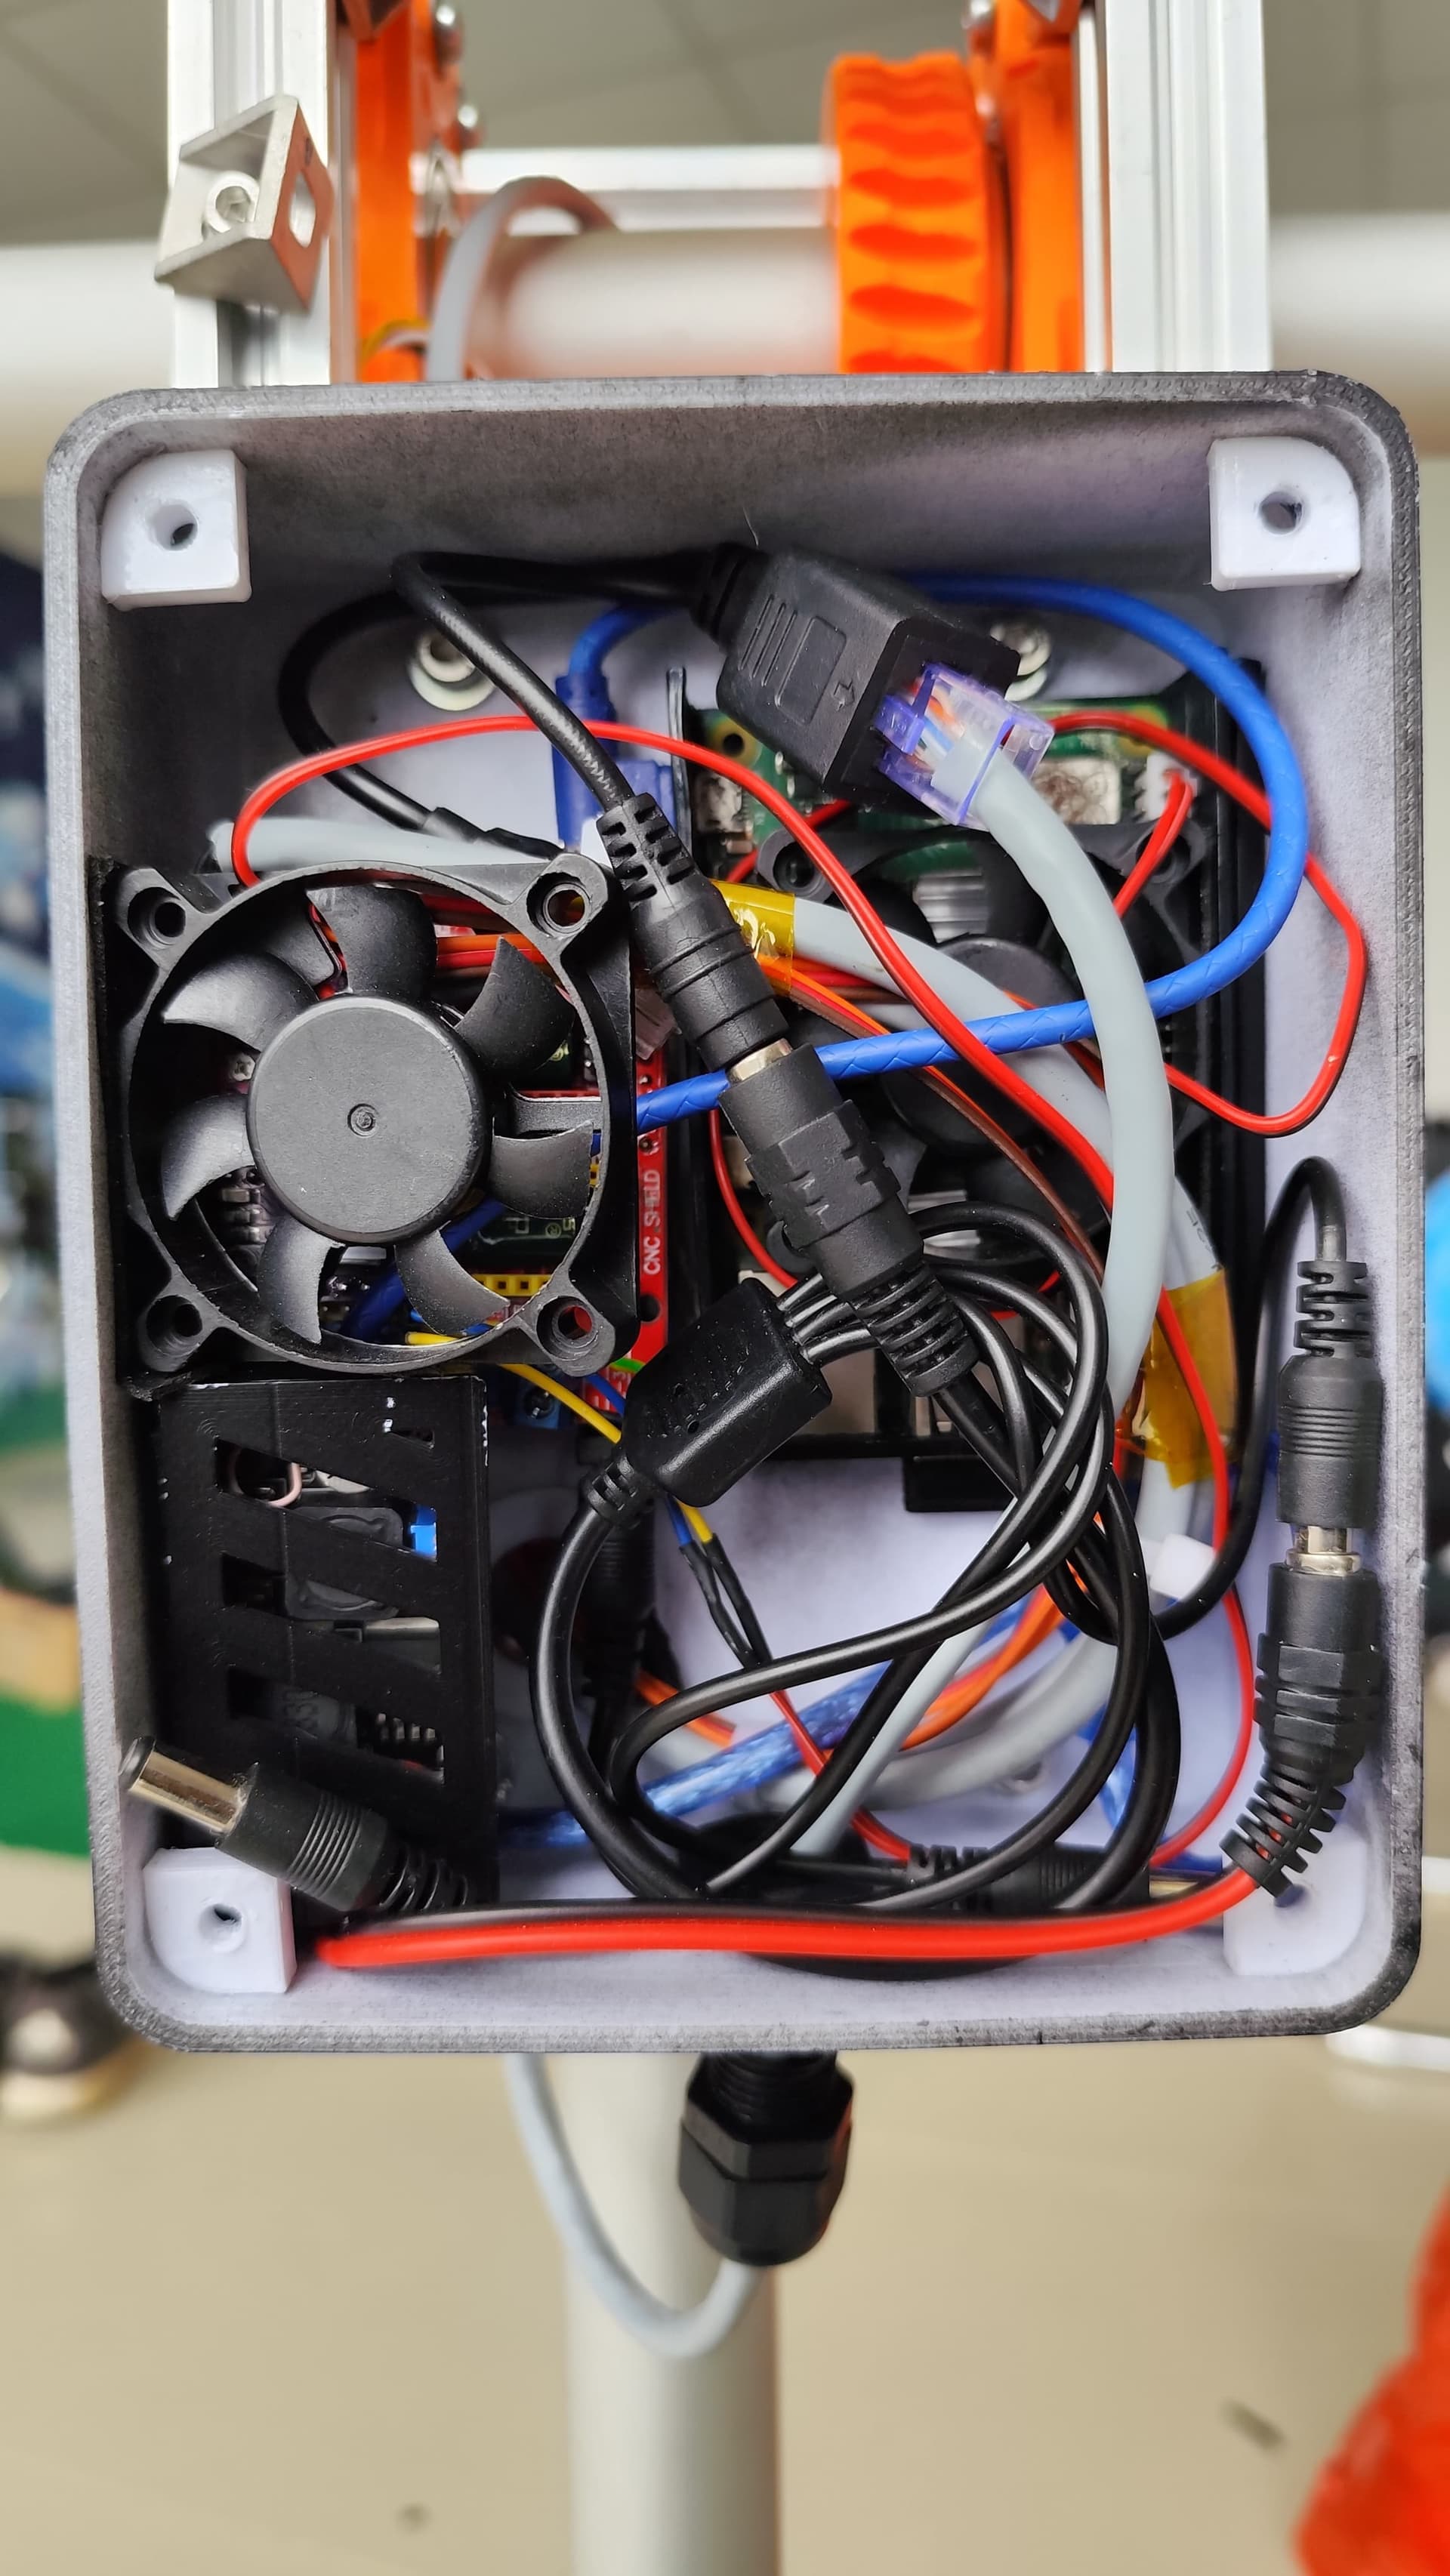
Done installing and testing out SatDump connection to the rotator. I run the power cable through the azimuth axis, so it will have lower chance getting tangled. Raspberry Pi is powered by battery bank temporarily as I still don’t have 12 to 5 regulator.
Also next should be building the Yagis. I borrowed my friend’s just for testing purpose. Don’t mind the missing elements
I uploaded the Quadropod for temporary testing on Thingiverse. I use 38mm instead of the 40mm on the SatNOGS Rotator V3 as it’s rather hard to find aluminium pipe with that dimension. If you want to use this, feel free to ask me if you want in another dimension.
I’m rocking a SW ESPRIT ED80, SW EQ-6R pro, ASI1600pro mono w/filter wheel, and an ASIAir w/ an EAF & OAG to automate it all. It’s been a bit since I’ve been able to shoot. I might have to sell it soon as I’m moving soon and the skies are not favorable where I’m going.
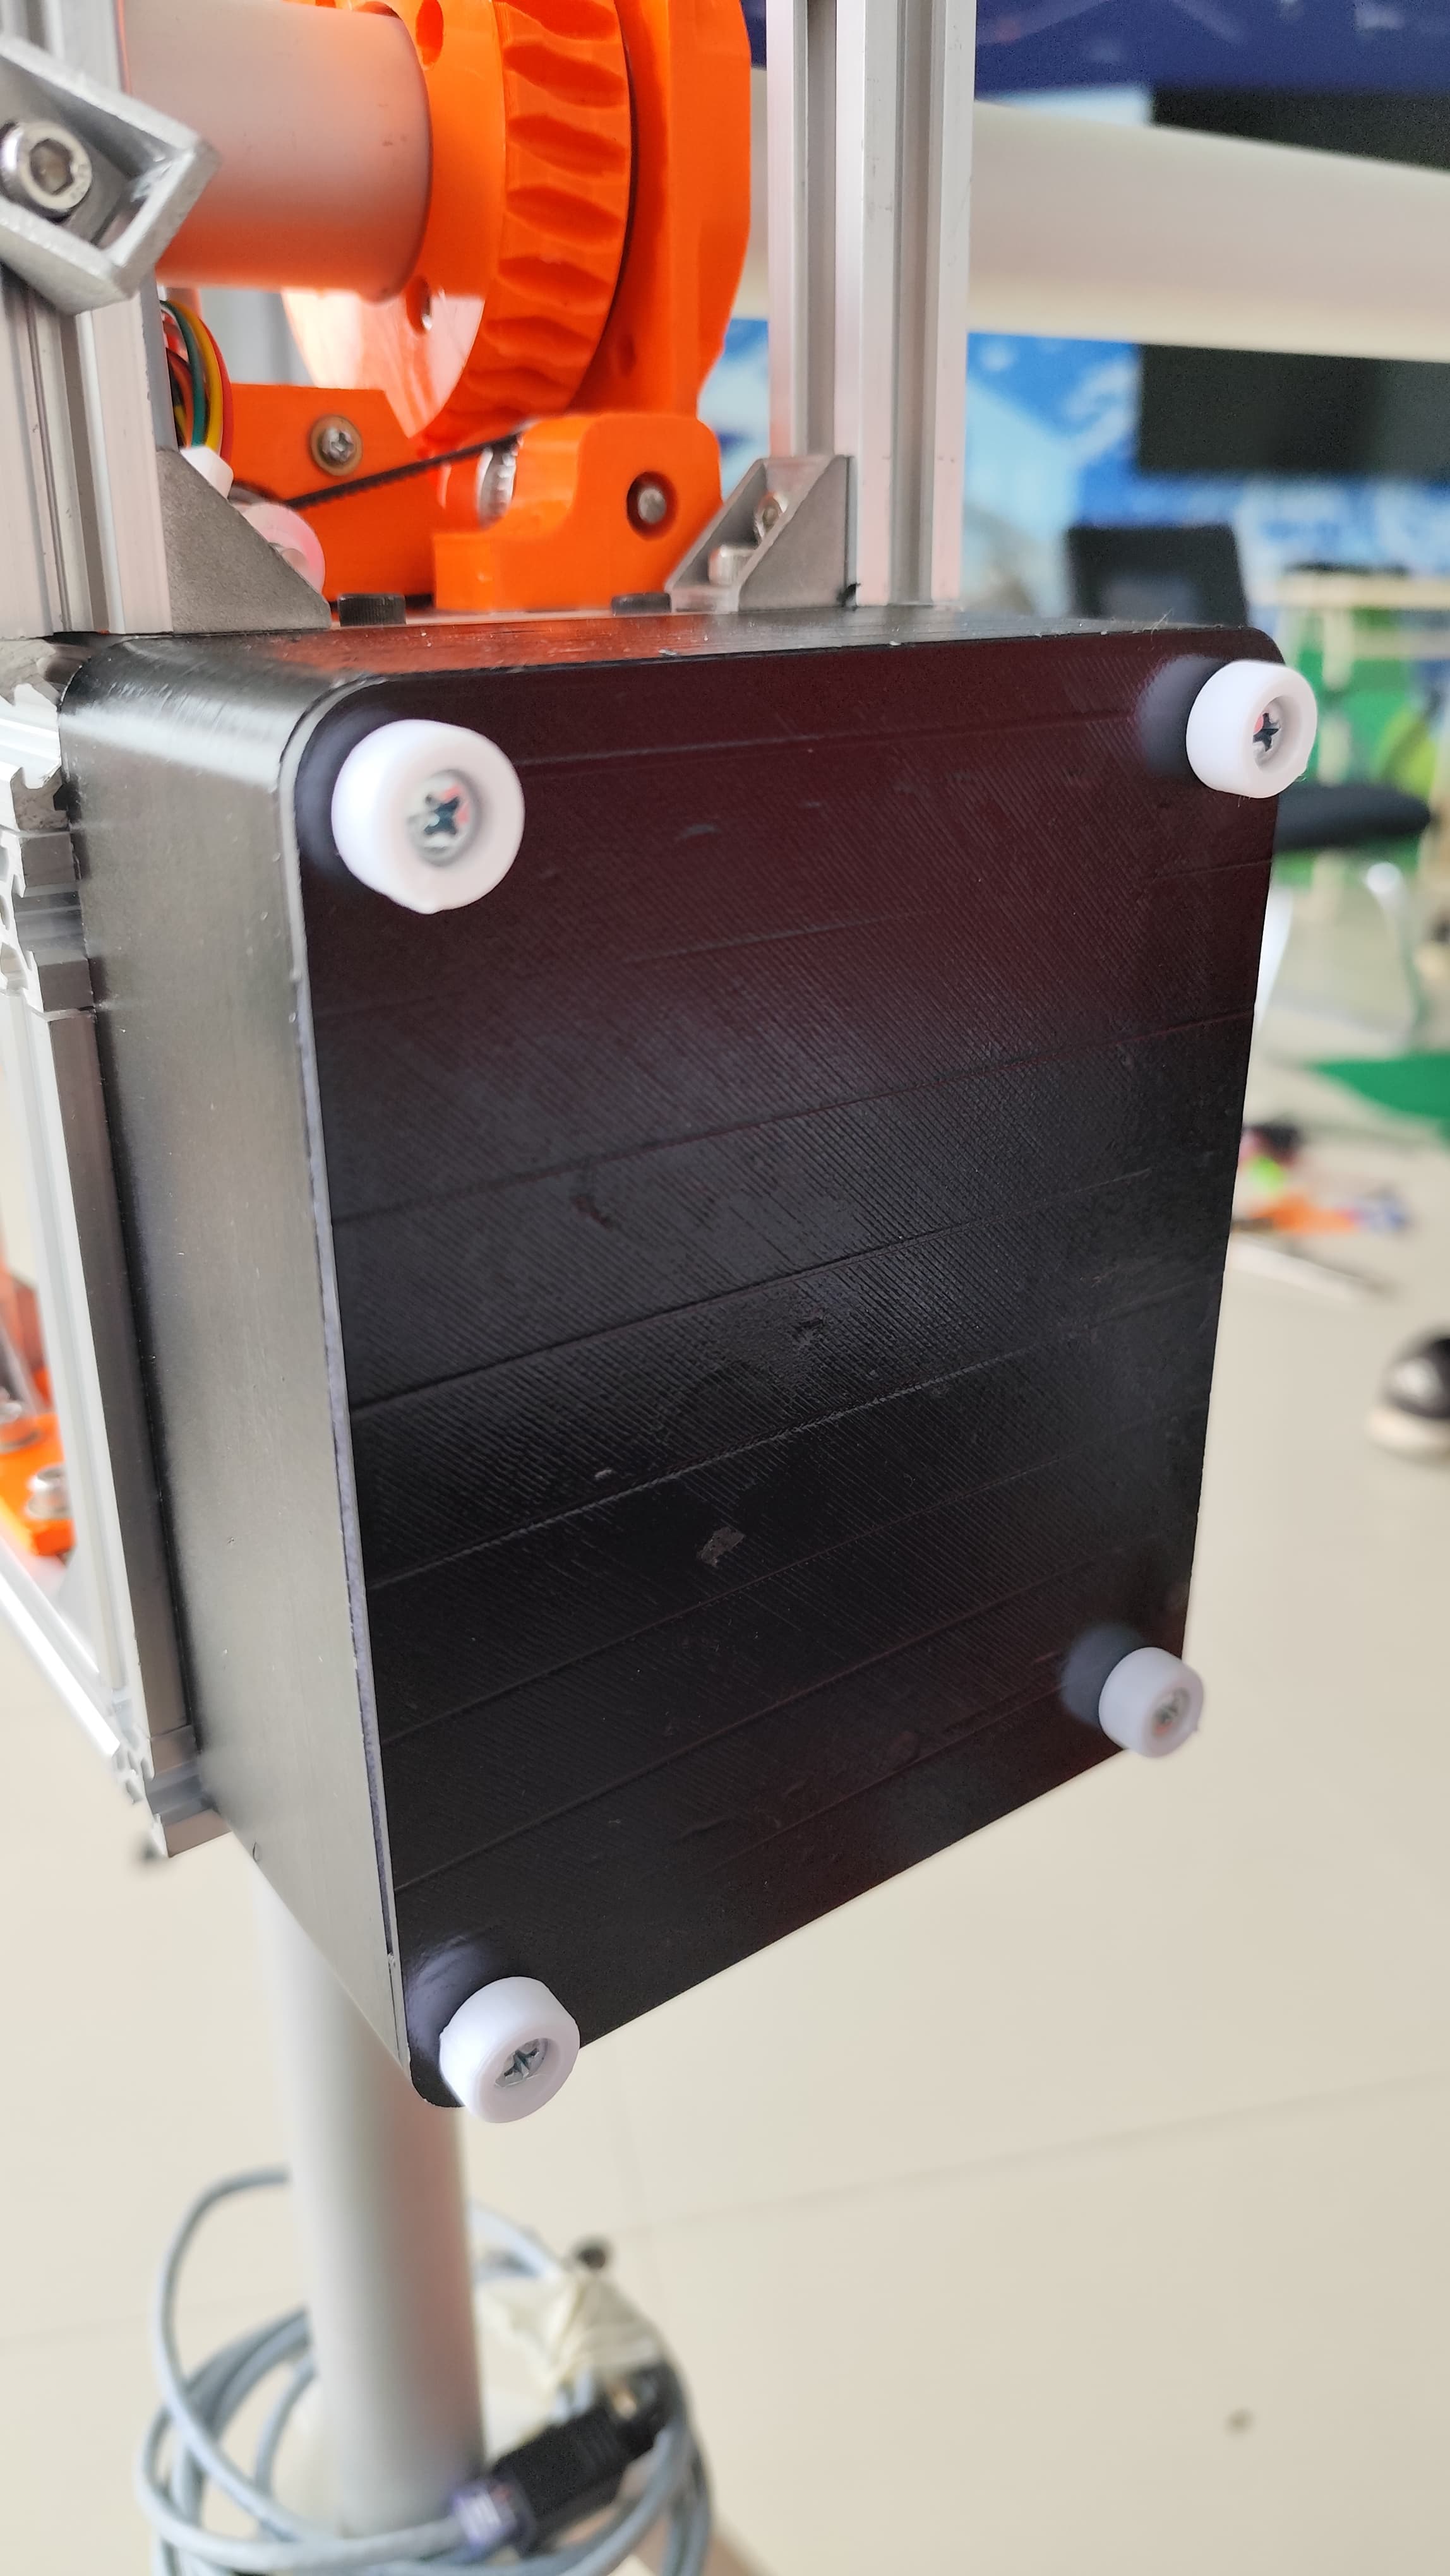
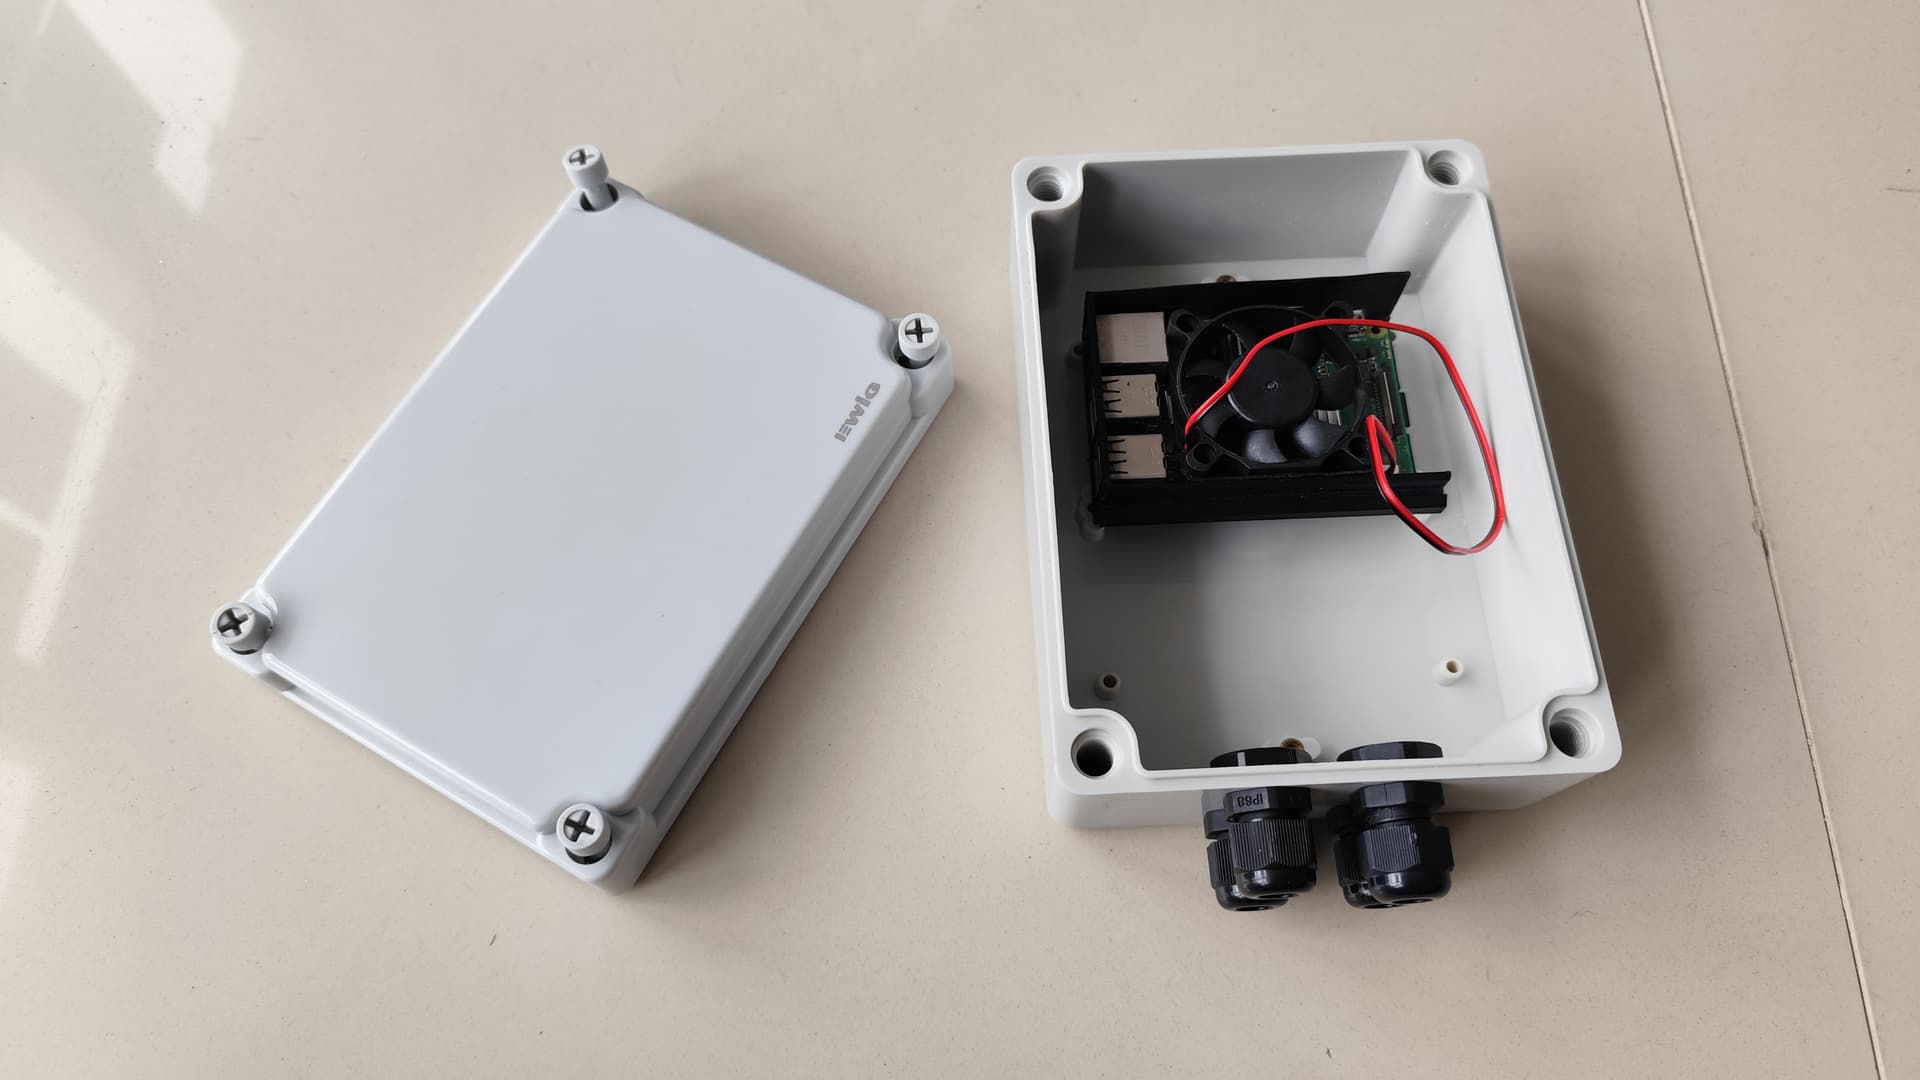
I put the Raspberry Pi and Arduino all in one box that I 3D printed it, a temporary solution until I encased the rotator in waterproof cover and moved the electronics to a waterproof box. The main issue is that the electronics and motor put out a sizeable amount of heat that will warm up everything, especially in an airtight box and I’m concerned more about the Raspberry Pi overheating.
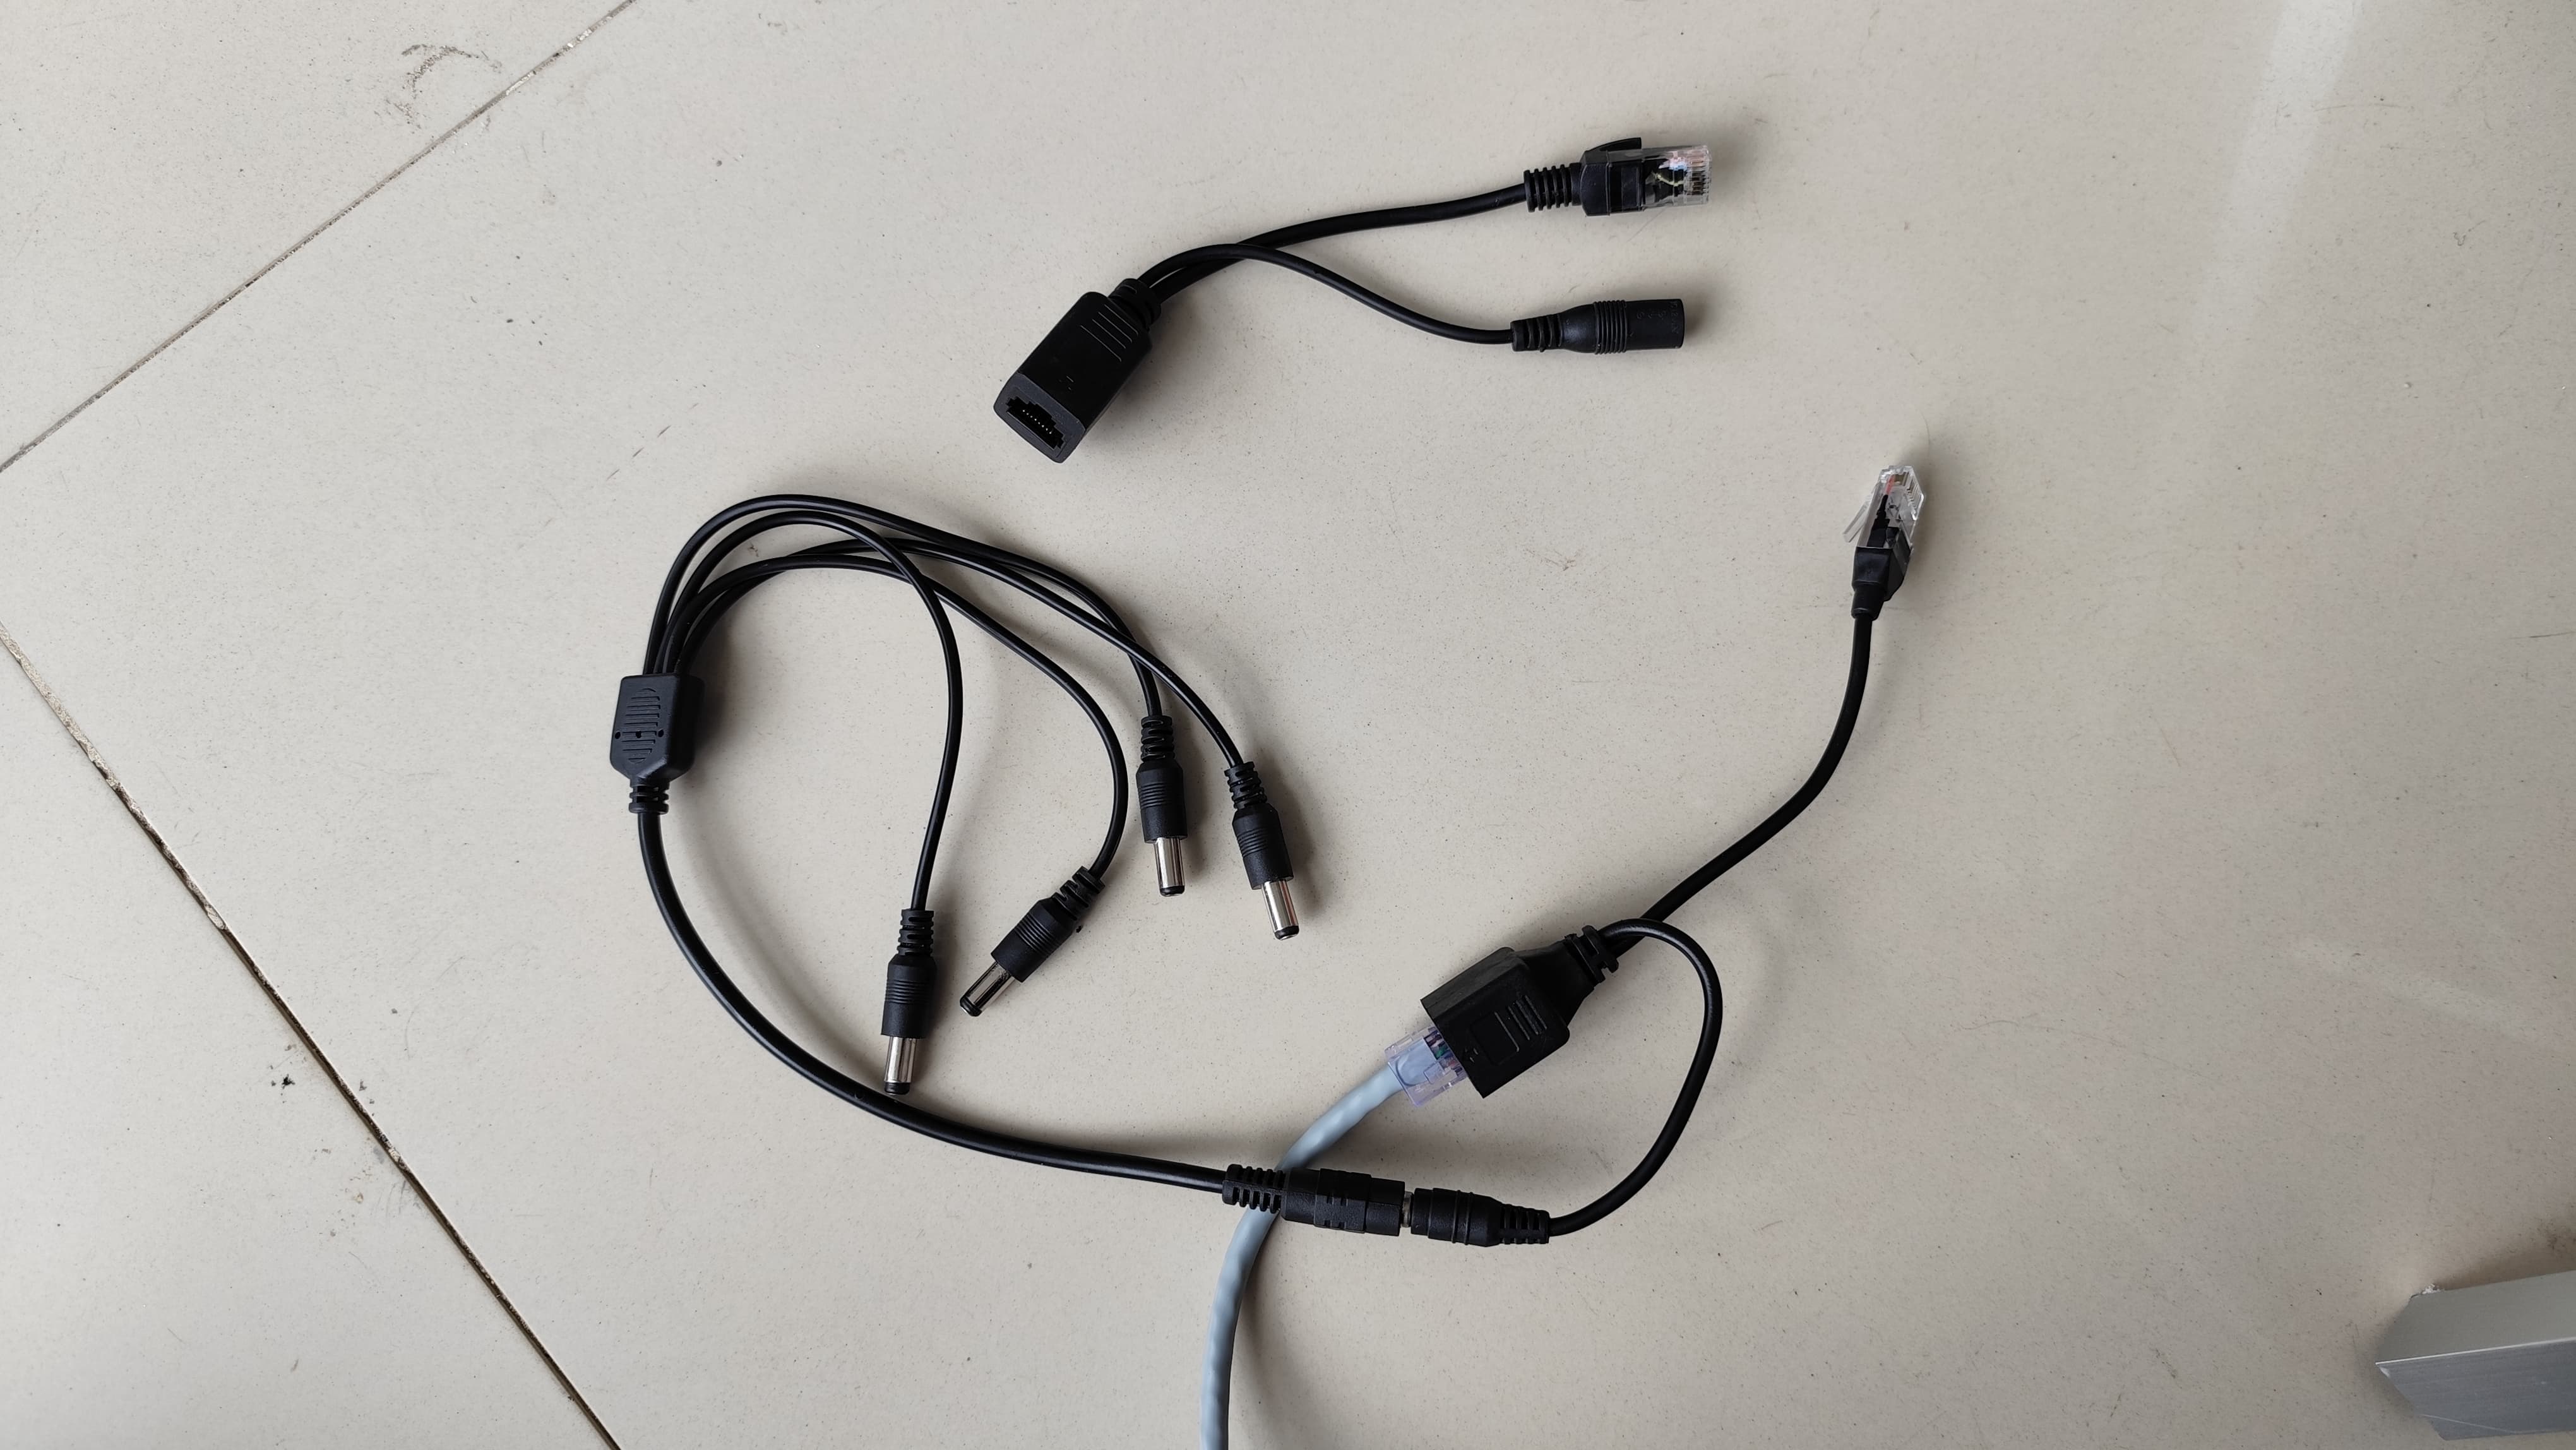
And for power and communication I used a pair of PoE splitter cable running through a single ethernet cable that split into ethernet for the Pi and the 12V output into the Arduino/motor and a step-down converter for the Pi. That way it should be much simpler :).
Someone maybe will ask why not using SatNOGS to automate the tracking itself, well tbh there’s a couple of reason with the first is that’s for flexibility and I’m planning to use it for hybrid between satellite QSO and telemetry reception. And second is clearly for wear and tear, and due its DIY nature, my rotator won’t be like a factory-built rotator such as G5500 and won’t run 24/7 continously, lol. I also currently building my own SatNOGS station using my second spare Pi, and that will use omnidirectional antenna (QFH/Turnstile), but I can still switch my antenna to the Yagi on the rotator and pipe the signal directly to the SDR on the SatNOGS station if it’s necessary
Well, I actually work in an observatory so although I play with a lot of astronomy instruments, none are mine unlike yours . But we are also currently developing DIY 3d printed telescope mounts based on OnStep (UTOPIA)
Also, while at it have you tried Skytrack Satellite Tracker? If you haven’t it’s a piece of software that can connect to any ASCOM compatible mounts, and you can track satellites optically or put your antenna :).
Hi, Tony. Any reason you want to use the v1.1? There’s the newer v2 or like mine, I use Arduino CNC Shield V3 as it’s much simpler, don’t require you to ordering custom PCB and soldering (except maybe some wires).
First time I believed the V 1.1 is the best way for me.
But now I tested the CNC shield. It works but I’m not happy with that because the stepper drivers makes too much heat. (I calibrated the stepper current).
Too much heat is not reliable. I seen some high current “industrial” stepper drivers.
I think I’ll buy them.
Nice, do you mind to share your setup? For this rotator (SatNogs V3.1), I use DRV8825 with Nema 17 motors. The current that I use is 0.6A for each so that’s 1.2A for both. I calculate the current by using ampmeter and tweak the current for each motor, I don’t use the voltage method that recommended by most tutorials as I’ve found out is not really accurate. You also need to check the maximum rating for the motor, running higher current would not only increase heat on the the driver, but also much more on the motor. And I use fans on top of the heatsink and tested it running all day with no problem.
Second option if you need more torque is to increase the voltage while keeping the same current. That’ll increase the torque a significantly while only increasing the heat generated by a little. I do this on another unrelated rotator that run on Nema 23 and DM542 driver that run on 36V. But be carefull as at this voltage you can easily fried your Arduino controller .
Sorry for missing for a month without any update, a bit busy but still actively working on the rotator in the background!
Small update, I’ve finally found a way to track the satellite without the rotator doing a meridian flip everytime it crosses the meridian, at least on GPredict (thanks a lot YB3MBN for helping me to troubleshoot the issue ).
Hardware wise I’ve made a cover from a metal sheets so I can finally deploy it outside. The corner should be covered with caulk and corner trim to tidy it up. I bought a waterproof box for the Pi and Arduino controller, also cable glands for external wiring.
Hopefully it shouldn’t be long before I can finally put this thing to a real work!