HI.
I Have build V3.1 rotator and for fix a bug of elevation i had to reflashing firmware of arduino pro mini ( a chinese version).
I had almost solved the elevation encoder problem but … I burned something.
It went like this
I programmed a new arduino pro mini with the updated firmware, I put it in place of the pro mini sparkfun and magically everything worked perfectly, the azimuth and the elevation worked correctly and both encoders worked very well.
Then, in the next ignition of the rotor, the LDO regulator exploded, I think it happened, because probably it was a Chinese clone.
So I tried to update the pro micro original but I could not because it probably no longer load the bootloader and with my FTDI 232 or arduino one I could not do it.
However, once put back on the pcb, the board does not seem to work anymore, probably damaged by the previous Chinese pro-Arduino when it is burned.
In fact, testing point 2 as from wiki pre flight no longer arrive 5v while the 12v of point 1 yes.
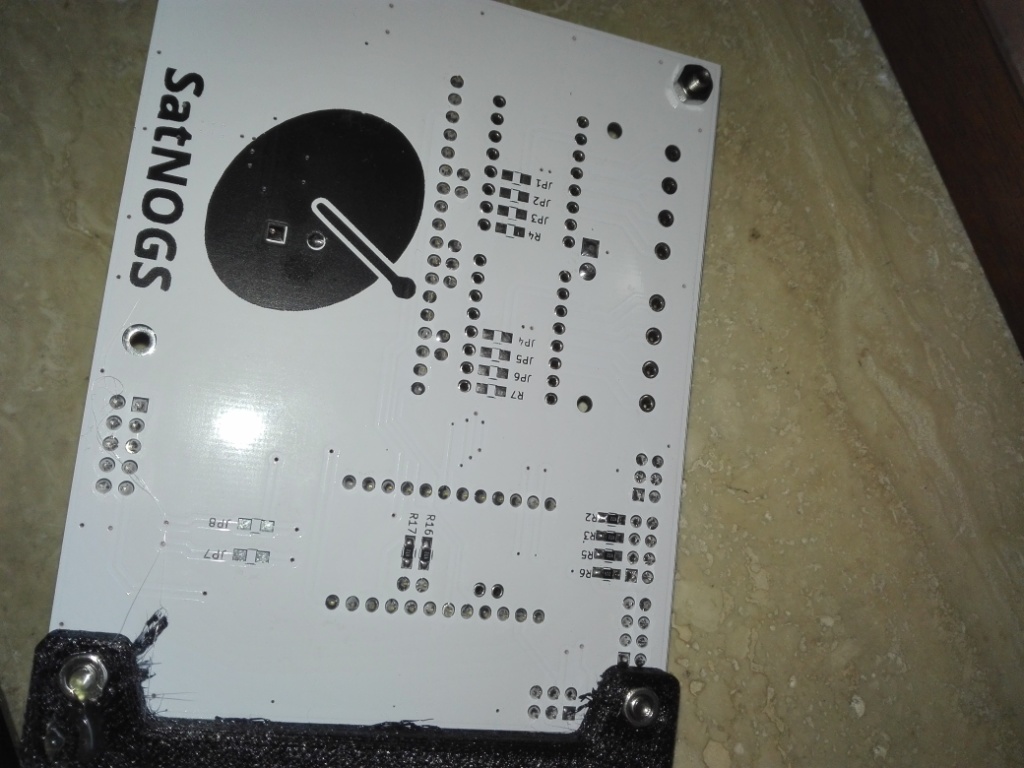
Now then proceeding to the tests I’m sure that SMD FUSE F1 is burned too (as in the picture)
So … I had solved by reprogramming the pro mini (maybe chinese) and then I damaged everything. I am really sorry and I am very sorry to have damaged this masterpiece.
At this point, since I do not have enough skills in electronics and I do not have the necessary equipment to desolder and replace the burned components.
According to YOU what could be burned in addition to FUSE F1 in SMD?
Not having many skills on SMD components, I have problems with fixing it
I think the only blown thing could probably be the fuse and your arduino.
Replacing this is relatively easy, as there are only two solder pads
If replacing the fuse, you might consider adding a fuse holder, so you can easily replace it.
To unsolder components like resistors, ceramic capacitors and such stuff you can follow this few easy steps:
heat your solder iron and select a ~1.5mm to 2mm tip
heat one pad of the mounted device
quickly change over to the other pad and slide the component off its placement
clean pads
apply a small amount of solder on one pad
place the new component by heating the pre-soldered pad using tweezers
solder the second pad
Done! \o/
What I would like to suggest:
Dismount all socketed devices, as the motor drivers, the arduino board etc.
Replace the fuse and check for shorts on the voltage pins. If there’s no short, power up and check voltages!
Hi, now pcb at point 1 do not send 12V, but I have to change the fuse F1 first.
About arduino pro mini I was able to reload the bootloader using Arduino UNO as an ISP and the operation was successful, so I managed to reprogram it with the new firmware without the bug on the elevation.
Now I just have to find out where the problem is on the PCB.
So you think I have not damaged the integrated lRS485 or the temperature sensor or lI2C multuplexer?
We hope not.
Then I order the fuses F1 and I will try to replace it.
Many thanks AZISI and DL4PD
Try to gain some soldering experience on “old electronics” with similar components on them meanwhile!
This is always a good opportunity to practice soldering