I tried printing the worm gear in PLA in one pieces with little success.
Did you try to print it in ABS in two pieces and glue it together with acetone afterwards?
Want to try that tomorrow, but maybe someone has tried that before … no reason to make a mistance twice
Hello!
The worm gear is the most difficult to print part. We printed in our lulzbot AO-100 at 200um with abs and a 0.5mm nozzle. We added 2 gears in the max distance we could and we slow down the travel speed in order to let each part to cool for longer time. An other solution maybe is to use the min layer time option in slic3r (or in whatever sw you use). Try those things and let us know.
Cheers!
I am not sure it is the cooling. For me the overhang is the more critical element, which is completely screewed up:
in print orientation:
up-side-down:
do you really think, letting the filament not cool down long enough is my issue?
After cutting the file in two and printing it seperately the quality is much better now:
let’s see how smooth the rotation will be …
The printing parameters were:
ABS, bed 90deg, nozzle 230deg
@DL2ZZ indeed looks that the overhang is your problem, this is at 100um? Do you want to try it at 200um? Just for test. For the split part now, if you manage to assemble it right and then cure it with acetone I think you can made it work, the only think is that I don’t know how durable will gonna be. @nallath One thing for PLA is that can’t be cured with acetone.
I am waiting your updates
I know PLA can’t be cured with ABS, but I don’t think you want to cure it in the first place. I think that glue (and / or coating) should be sufficient. But the problem with PLA is that if you keep your stepper powered, it can easily reach sufficient temperatures to hit the glass transition temperature of PLA, which is obviously undesiarable.
This is the wormweel printed on 120 microns with PLA and support. It was quite a bit of work to remove the support. The quality isn’t as bad as the image suggests, but its not really good either.
I think this part needs some re-engineering to be properly printable.
Well I assembled und glued two parts together with acetone. Just put some drops on one side, pushed both parts together, smeared it our by moving them and then when it starts curing aligned them. Looks like that:
Worked pretty well in my eyes. Acetone really solves the ABS and as long as the glued surfaces are touching everywhere the bond should be as strong as solid material. The weaker point is the ABS layers itself! Pushing in the motor shaft with too much force is resulting in de-bonding of the layers in my case.
I was also a bit concerned about the durability, but the M3 screw is holding the worm gear together at the motor side, and the bearing at the other side. Meaning that should help. As soon as I get the M3 and M5 screws + the stepper driver I will run it over the weekend in continuous motion to see how it holds.
Indeed 200um is worth a try. Do you suggest printing it in halves laying or standing as one piece?
Hi there,
I wanted to try printing parts so I started from most difficult one
This is one of my first prints all together on home made Kossel delta printer.
I printed this in 1.75 ABS
0.3 mm layer
Nozzle temp 250
Heated bead 90
Speed was 60 mm/m
50 % solid linear infill
Support pillars with 2 mm spacing
Cleaning support pillars took 2 min with flat screwdriver
I can provide more details and pictures if needed
picture is here_http://www.trenadvertising.com/wormgear.jpg
Nice! We never print the worm with support, I thought that it will be difficult to remove it. This looks very good. I ll definitely give it a try and I ll post the results.
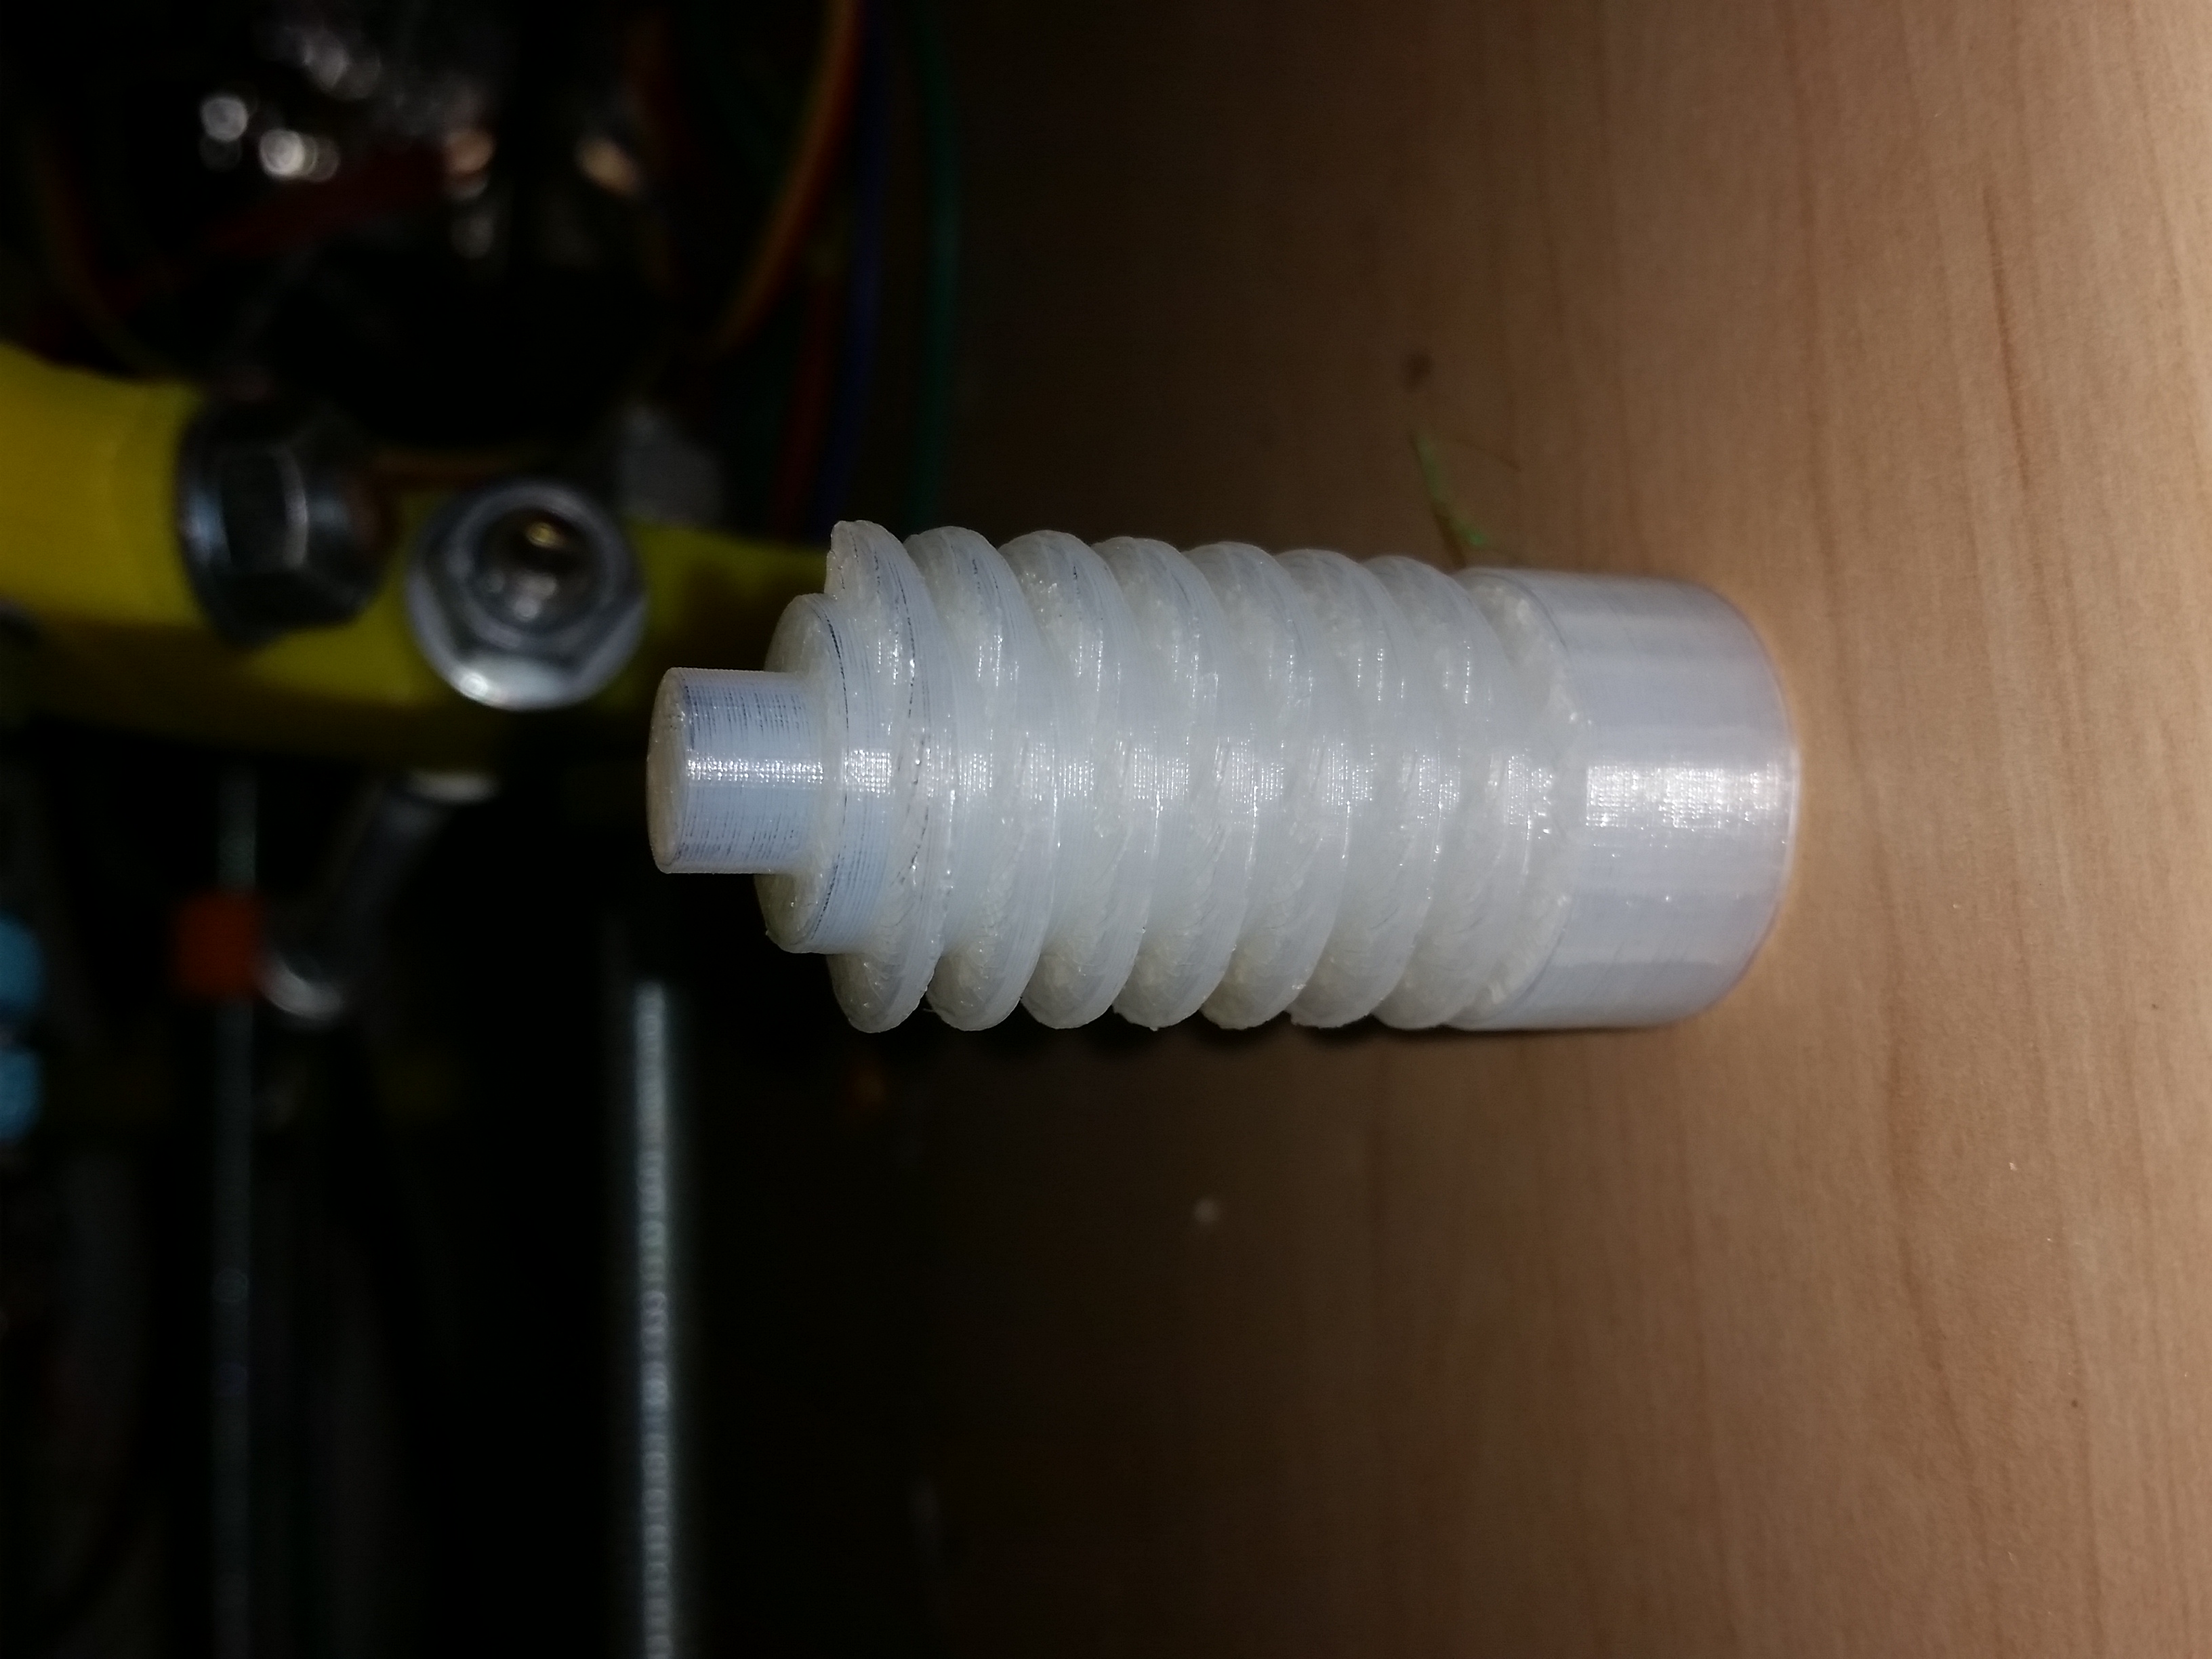
Hi, new user here. busy sourcing all the parts and decided to also start my printing with the worm gear. Printed in PLA at 0.2mm with lots of cooling and it came out great
After some tweaking with slic3r settings:
Slic3r -> 0.2mm layer high, PLA 1.75 0.5 nozzle, 190 temp, 40% infill, speed Perimeters 25mm/s, everything else is default. (no support), Cooling air ON stable 190C during printing. Printing time is huge -> 1h 40min.
Printer: Pirx3D 1.0
I’ve got simmilar results as @tomvdb. Next will be axis gear.
uff more 12 min and will be finish.


 (btw what printer is this?)